Velvety Caramel Puff Corn
- Time: Active 10 minutes, Passive 1 hour, Total 1 hour 10 minutes
- Flavor/Texture Hook: Velvety butter caramel with a crisp, airy snap
- Perfect for: Holiday gifting, movie nights, or stress free party hosting
- How to Make Sweet Caramel Puff Corn
- The Science of Crispy Coating
- Benchmarks for Sweet Snack Success
- Necessary Ingredients for This Recipe
- Crucial Tools for Batch Baking
- Step-by-Step Baking Method
- Troubleshooting Grainy or Sticky Batches
- Creative Flavors and Texture Swaps
- Storage Tips for Long Shelf Life
- Plating Designs for Every Occasion
- Myths and Common Baking Mistakes
- Recipe FAQs
- 📝 Recipe Card
How to Make Sweet Caramel Puff Corn
Ever bitten into a piece of caramel corn only to have a jagged hull lodge itself firmly in your gums? It ruins the moment. That is exactly why I started making this version using puffed corn snacks. There are no hulls, no kernels to break a tooth on, just pure, airy crunch.
The first time I served this at a family gathering, my aunt actually asked if I had bought it from a boutique candy shop. It is that good.
We are going after that specific texture that starts with a firm "shatter" and ends with the puff corn essentially dissolving on your tongue. Achieving this is not about luck, it is about controlling the moisture and the sugar structure.
Most people try to just pour caramel over popcorn and call it a day, but that leads to a sticky, chewy mess that goes stale in twenty minutes.
This recipe uses a low and slow oven method to dehydrate the caramel, turning it into a glass like shell. It is a simple mixing process, but the results feel sophisticated. We are going to walk through the science of the foam, the importance of the stir, and how to present this so it looks like a million bucks.
Trust me on this, once you try the hull less version, you will never go back to the standard stuff.
The Science of Crispy Coating
The magic happens when we introduce baking soda to the boiling sugar mixture, which triggers a rapid chemical reaction. This creates carbon dioxide bubbles, expanding the caramel into a light foam that coats every nook and cranny of the puff corn without weighing it down.
- Carbon Dioxide Expansion
- Baking soda reacts with the acid in brown sugar to create tiny gas pockets, making the caramel "fluffy" and easier to spread.
- Sucrose Inversion
- Corn syrup acts as an interfering agent, preventing the sugar from forming large crystals so the glaze stays smooth rather than grainy.
- Maillard Reaction
- The slow bake at 120°C allows proteins and sugars to brown gently, deepening the flavor without burning the butter.
- Evaporative Crispness
- Oven time draws out remaining water from the butter, ensuring the final product is brittle and shelf stable.
Benchmarks for Sweet Snack Success
| Feature | Stovetop Method | Oven Baked Method |
|---|---|---|
| Texture | Chewy and often sticky | Crisp, shattering shell |
| Shelf Life | Best within 4 hours | Stays fresh for 2 weeks |
| Effort | Fast but requires constant watching | Mostly passive baking time |
Necessary Ingredients for This Recipe
To get the best results, the quality of your fats and sugars matters immensely. I prefer using grass fed butter because it has a lower water content and a richer yellow hue, which translates to a more vibrant glaze.
- 8.5 oz Chester's Butter Flavored Puffcorn: These are the "hull less" stars of the show. Why this? They provide the airy, melt away structure without any hard kernels.
- 1 cup Kerrygold Unsalted Butter: A high fat, grass fed butter provides a velvety mouthfeel. Why this? Less water means a crisper caramel that sets faster.
- 1 cup C&H Light Brown Sugar: Provides the molasses backbone for the caramel flavor. Why this? The moisture in light brown sugar creates a chewy turned crisp texture.
- 0.5 cup Karo Light Corn Syrup: This is your insurance against a grainy, sandy texture. Why this? It prevents sugar crystallization during the boiling phase.
- 0.5 tsp Morton Sea Salt: Essential for balancing the intense sweetness. Why this? Fine grains dissolve perfectly into the hot glaze.
- 1 tsp Nielsen Massey Pure Vanilla Extract: Adds an aromatic floral note to the finish. Why this? high-quality extract won't evaporate as quickly in the heat.
- 0.5 tsp Arm & Hammer Baking Soda: The secret to the foamy, aerated coating. Why this? It provides the necessary lift to keep the caramel light.
Structural Component Analysis
| Ingredient | Science Role | Pro Secret |
|---|---|---|
| Light Corn Syrup | Crystallization Inhibitor | Heat it slightly before measuring to ensure it slides out of the cup easily. |
| Baking Soda | Leavening Agent | Sift it before adding to the pot to prevent tiny bitter clumps in the glaze. |
| Unsalted Butter | Fat Emulsion | Use unsalted to have total control over the sodium levels in the finish. |
Crucial Tools for Batch Baking
You do not need a professional kitchen, but a few specific items from your cupboard will make this much easier. A large roasting pan is non negotiable, you need the high sides to toss the corn without making a mess on your floor.
- Lodge Enameled Cast Iron Dutch Oven: Perfect for boiling the caramel because it holds heat steadily.
- Large Granite Ware Roasting Pan: The dark surface absorbs heat well, helping the corn crisp up from the bottom.
- OXO Silicone Spatula: Caramel is the enemy of wooden spoons, silicone allows for a clean scrape.
- Nordic Ware Cooling Rack: Essential for letting air circulate around the corn as it sets.
- Digital Kitchen Timer: Precision is key during the 2 minute boil.
step-by-step Baking Method
Right then, let's crack on. The goal here is a uniform, golden coating that looks like it was applied by a machine. Follow these cues for first try success.
Phase 1: The Foundation
Preheat your oven to 120°C (250°F). Place the 8.5 oz of Chester's Puffcorn into a very large roasting pan. I usually pick through the bag to make sure there are no tiny broken crumbs at the bottom, which can burn.
Phase 2: Boiling the Glaze
In your Lodge Dutch Oven, combine the 1 cup butter, 1 cup light brown sugar, 0.5 cup corn syrup, and 0.5 tsp sea salt. Melt over medium heat, stirring constantly with your silicone spatula until the mixture is uniform and starts to bubble.
Precision Checkpoint 1: Once the mixture reaches a full rolling boil, set your timer for exactly 2 minutes. Do not stir during these 2 minutes. This allows the sugars to bond properly.
Phase 3: The Aeration Secret
Remove the pot from the heat. Immediately stir in the 1 tsp vanilla extract and the 0.5 tsp baking soda.
Precision Checkpoint 2: The caramel will hiss and double in volume, turning a pale tan color. This is the aeration step. Quickly pour this foamy mixture over the puff corn in the roasting pan. Use two large spoons to toss the corn until it is mostly coated. It won't be perfect yet, and that is fine.
Phase 4: The Slow Bake
Slide the roasting pan into the oven. You are going to bake this for 1 hour total. However, the most important part is the "stir and toss."
Precision Checkpoint 3: Every 15 minutes, remove the pan and thoroughly stir the corn. This redistributes the caramel as it thins out in the heat, ensuring every single piece is eventually covered in a thin, even layer.
Phase 5: The Cooling Set
After 1 hour, the corn should look deeply golden and smell like a dream. Remove the pan from the oven. Immediately dump the caramel puff corn onto sheets of parchment paper or a silicone mat spread out on your counter.
Break up any large clumps while it is still warm, but be careful - that sugar is hot! Let it sit undisturbed for at least 15 minutes. As it cools, the glaze will harden into that signature shatter crisp shell.
Troubleshooting Grainy or Sticky Batches
If your first batch didn't turn out quite right, don't panic. Caramel is sensitive to humidity and temperature. Here is how to fix the most common issues.
Correcting Grainy Textures
If your caramel feels sandy on the tongue, the sugar crystals likely re formed because the mixture was stirred too much during the boil or there wasn't enough corn syrup.
| Problem | Cause | Fix | Pro Tip |
|---|---|---|---|
| Grainy Texture | Sugar recrystallization | Increase corn syrup by 1 tbsp | Don't stir once the boil starts |
| Sticky Surface | Under baked glaze | Bake for 10 mins longer | Check for a "snap" when cooled |
| Burnt Taste | Oven running hot | Lower temp to 110°C | Use an oven thermometer |
Chef's Note: If you live in a very humid climate, you might need to extend the baking time by 10 minutes to ensure all moisture is removed. Moisture is the enemy of the crunch!
Creative Flavors and Texture Swaps
Once you have mastered the base recipe, you can start playing with the profile. I often add a pinch of cayenne pepper for a "Mexican Chocolate" vibe if I'm drizzling with cocoa later.
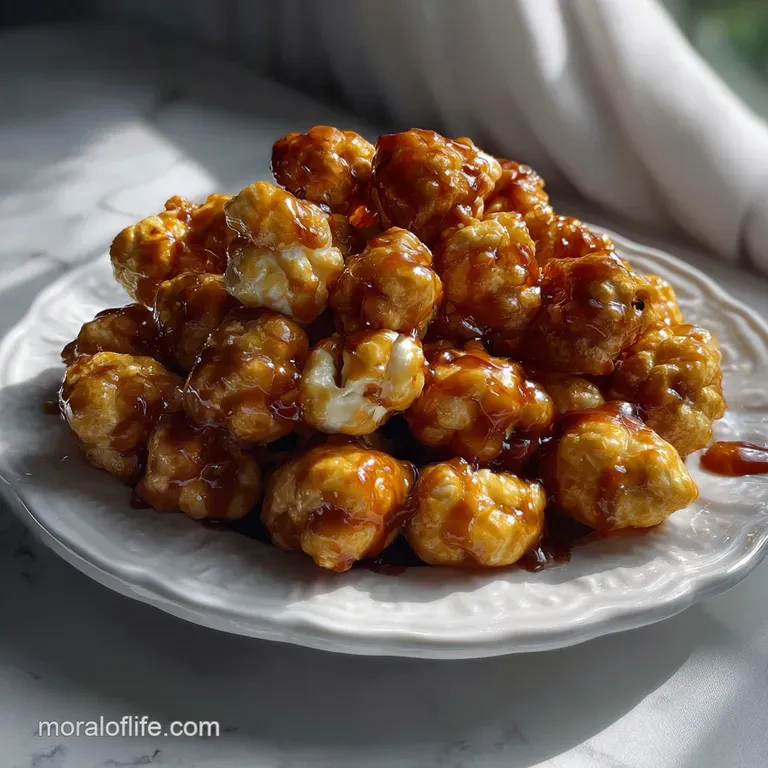
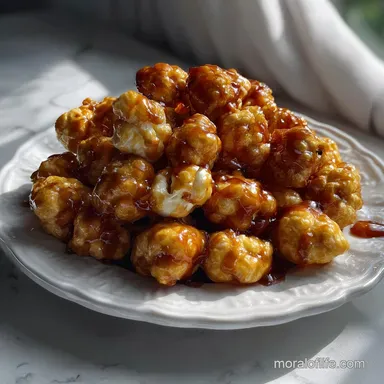
- For a Salted Dark Chocolate Twist: After the corn has cooled, drizzle 100g of melted 70% dark chocolate over the top and sprinkle with flaky Maldon salt.
- For a Spicy Autumn Kick: Add 1 tsp of pumpkin pie spice to the butter and sugar mixture before boiling.
- For a dairy-free Alternative: Use a high-quality vegan butter stick (like Miyoko's) and ensure it has a similar fat content to dairy butter. Note: The flavor will be slightly more nutty.
Decision Shortcut
- If you want a softer, chewier snack: Reduce the oven time to 30 minutes.
- If you want a darker, bolder flavor: Swap the light brown sugar for dark brown sugar.
- If you want extra crunch: Add 1 cup of roasted salted peanuts to the pan before pouring the caramel.
Storage Tips for Long Shelf Life
The biggest mistake people make is putting the caramel puff corn away while it is still slightly warm. Even a tiny bit of residual heat will create steam inside the container, turning your beautiful crisp snack into a soggy mess.
- Storage
- Once completely cool, store in an airtight container or a heavy duty Ziploc bag. It will stay perfectly crisp for up to 2 weeks at room temperature.
- Freezing
- Surprisingly, this freezes beautifully. Place in a freezer safe bag for up to 2 months. You can eat it straight from the freezer for a cold, extra crunchy treat!
- Zero Waste
- If you have crumbs or small broken pieces at the bottom of the bag, don't throw them away. Pulse them in a blender and use the "caramel dust" as a topping for vanilla bean ice cream or as a crust for a cheesecake.
Plating Designs for Every Occasion
Presentation is where you can really show off. This snack can go from "movie night" to "wedding favor" with just a few changes in how it is served.
| Level | Style | Tweak |
|---|---|---|
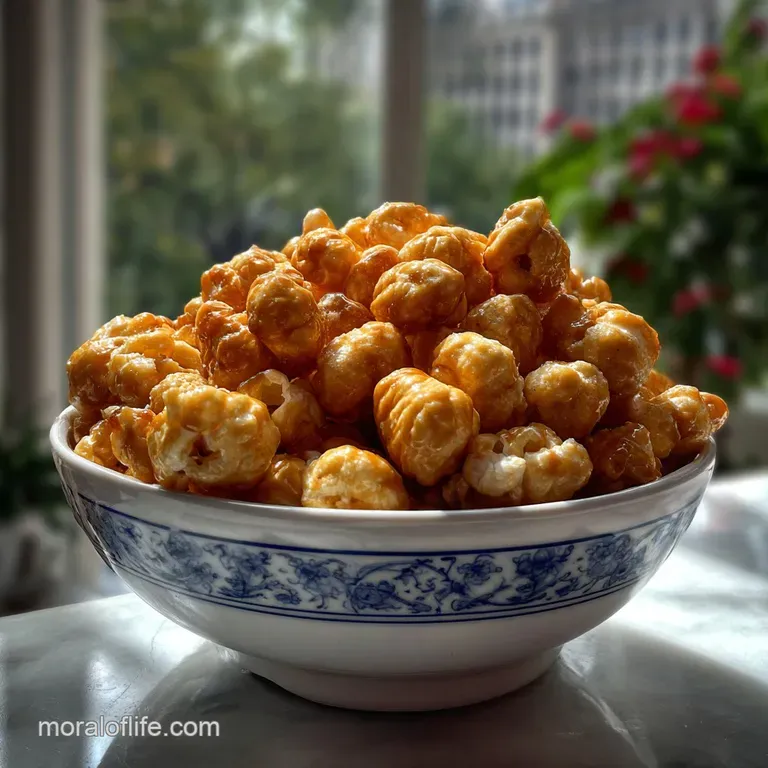
| Simple | Family Style | Serve in a large, pre chilled ceramic bowl to keep it crisp. |
| Polished | Individual Gifting | Place in clear cellophane bags tied with a rustic twine ribbon. |
| Restaurant | Gourmet Display | Stack in a glass cloche and lightly mist with a salt water spray for shine. |
Simple Bowl Presentation
I love using a wooden dough bowl for this. It looks rustic and inviting. The key is to pile it high, let the pieces tumble naturally. It shouldn't look too manicured.
Polished Gift Style
If you are giving this as a treat, use parchment paper liners inside a decorative tin. It prevents any oil from the butter from seeping through the packaging and keeps the corn looking pristine.
Fine Dining Display
For a real "wow" factor, serve a small handful of the caramel puff corn alongside a scoop of salted caramel gelato. Use tweezers to place the most perfectly coated pieces on top of the cream, and perhaps add a tiny shard of edible gold leaf if you're feeling fancy.
Myths and Common Baking Mistakes
There is a lot of misinformation out there about working with sugar. Let's clear some of that up so you can bake with confidence.
Myth: You must use a candy thermometer. Truth: For this specific recipe, the 2 minute timed boil is actually more reliable than a thermometer. Because the volume is relatively small, thermometers can often give false readings if they touch the bottom of the pot.
Myth: Searing the sugar "seals" the flavor. Truth: Sugar doesn't have "juices" to seal. The goal of the boil is to dissolve the crystals and begin the browning process. The real flavor development happens during the hour long bake in the oven.
Myth: You can't make this on a rainy day. Truth: While humidity does affect sugar, the low temperature oven bake acts as a commercial grade dehumidifier. As long as you move the cooled corn into an airtight container immediately, it will survive a thunderstorm just fine.
Honestly, don't even bother with low-fat butter or margarine here. The water content is too high, and your puff corn will turn into a shriveled, soggy disappointment. Stick to the real stuff, follow the 15 minute stir rule, and you will have the best caramel puff corn anyone has ever tasted. Ready to get started?
Let's get that butter melting!

Recipe FAQs
Can I substitute standard popcorn kernels for the puff corn?
No, you should stick to puff corn. Standard kernels leave hulls and hard, unpopped pieces that create a sharp, uneven texture that can be difficult to chew.
What is the purpose of adding baking soda to the boiling mixture?
It acts as the primary leavening agent. When added off heat, the baking soda reacts with the acidic components, creating carbon dioxide gas that aerates the caramel, ensuring a light, non-dense coating.
How long can I expect this caramel puff corn to stay crispy?
It stays fresh for two weeks if stored correctly. The low and slow oven bake removes the necessary moisture, creating a brittle shell that is significantly more shelf stable than quick stovetop versions.
What happens if I stir the sugar mixture during the 2-minute boil?
You risk causing sugar crystallization, resulting in graininess. Do not stir once the mixture reaches a full, rolling boil; the corn syrup is present to help interfere with crystal formation.
Is it crucial to stir the corn halfway through the baking process?
Yes, stirring every 15 minutes is crucial for texture. This redistribution prevents the caramel from settling too thickly on the bottom pieces and ensures every piece receives an even, thin glaze.
Can I prepare the caramel base ahead of time?
Yes, you can make the glaze base up to two days early. Keep the cooled, liquid glaze refrigerated until you are ready to use it, but be sure to gently reheat it before adding the baking soda.
What causes the final product to feel sticky instead of crisp?
The most likely cause is residual moisture remaining in the glaze. To fix this, return the batch to the oven for an additional 10 minutes at 120°C to force out the extra water content.
Caramel Puff Corn Treat
Ingredients:
Instructions:
Nutrition Facts:
| Calories | 291 kcal |
|---|---|
| Protein | 0.9 g |
| Fat | 17.4 g |
| Carbs | 37.5 g |
| Fiber | 0.4 g |
| Sugar | 23.6 g |
| Sodium | 142 mg |
