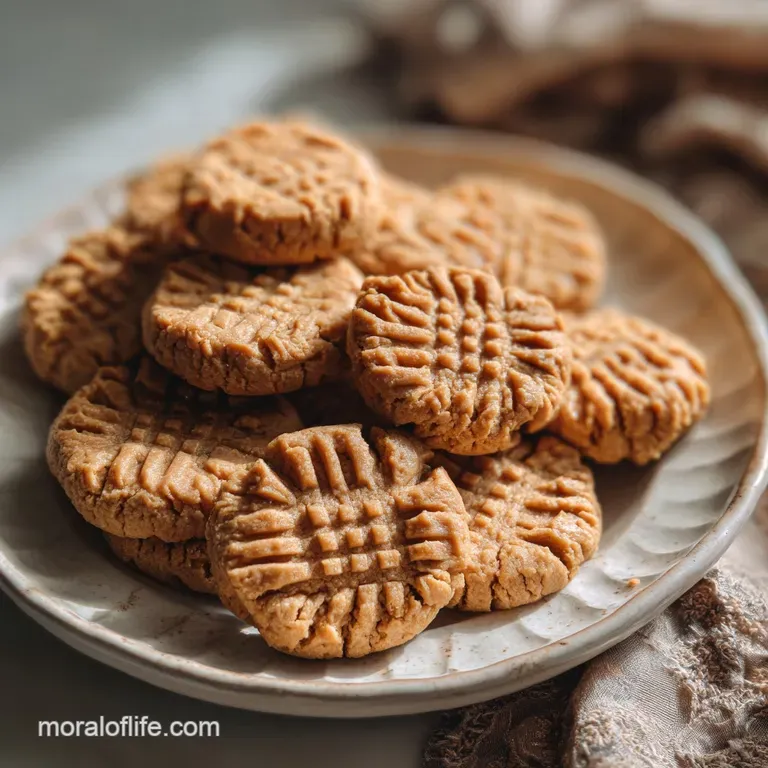
Chewy Peanut Butter Cookies
- Time: Active 10 minutes, Passive 10 minutes, Total 20 minutes
- Flavor/Texture Hook: Nutty, salty sweet with a velvety crumb
- Perfect for: Bake sales, lunchbox surprises, or beginner bakers
- Making the Best Chewy Peanut Butter Cookies
- Essential Recipe Specifications
- Selecting Your Key Ingredients
- Recommended Kitchen Equipment
- Detailed Mixing Instructions
- Troubleshooting Your Cookie Dough
- Adjusting the Batch Size
- Simple Dietary Modifications
- Storage and Reheating Tips
- Plating and Garnish Ideas
- Recipe FAQs
- 📝 Recipe Card
Making the Best Chewy Peanut Butter Cookies
The smell of toasted peanuts and melting butter hitting a hot oven is probably my favorite scent in the world. I remember the first time I tried to make these; I used a recipe from an old magazine and they came out like hockey pucks hard, dry, and honestly a bit sad.
I realized later that I’d overbaked them, waiting for the tops to look "done" while the bottoms were already turning into charcoal. It was a total mess, but it taught me the most important lesson in cookie history: the carryover bake is real.
Now, when I pull a tray of these chewy peanut butter cookies out of the oven, they look almost underdone. They have that slight wobble in the middle and a pale, golden edge. But as they sit on the hot pan, they firm up into something magical.
That first bite gives you a tiny crunch from the granulated sugar, followed immediately by a soft, almost fudge like interior. It’s the kind of cookie that makes you want to pour a huge glass of cold milk and just forget about the rest of your to do list for a while.
We've all been there, staring at a flat, greasy puddle on a baking sheet, wondering where it all went wrong. Trust me, I’ve made every mistake so you don’t have to. We’re going to focus on simple mixing and clear baking cues to make sure your first try is a massive success.
No fancy equipment is needed here just a bowl, a fork, and a little bit of patience while they cool. Let’s get into why this specific ratio works so well for that bendy texture we all crave.
Essential Recipe Specifications
The Physics of the Bend: Using dark brown sugar provides molasses, which is hygroscopic, meaning it pulls moisture from the air to keep the cookie soft. The addition of baking soda reacts with that acidic molasses to create a gentle rise that settles into a dense, chewy crumb.
- Moisture Retention: Dark brown sugar contains more molasses than light brown, creating a deeper color and a much softer texture after cooling.
- Fat Emulsification: Room temperature butter and eggs bond more effectively, trapping tiny air pockets that prevent the cookie from becoming a dense brick.
- Protein Structure: The 1.5 cups (190g) of all purpose flour provides just enough gluten to hold the peanut butter's heavy fats without making the dough tough.
- Leavening Balance: Baking soda helps the cookies spread just enough to create those classic crinkly edges while keeping the center thick.
| Thickness | Internal Temp | Rest Time | Visual Cue |
|---|---|---|---|
| 1/2 inch | 175°F - 185°F | 10 minutes | Edges set, center looks soft |
| 3/4 inch | 180°F - 190°F | 12 minutes | Light golden bottom, matte top |
| 1 inch | 185°F - 195°F | 15 minutes | Deep golden rim, puffy center |
Getting the timing right is the difference between a dry biscuit and a soft treat. If you’re looking for another snack that hits those nutty notes without the oven, you might want to try this High Protein Snack recipe for those busy afternoons. It uses similar flavors but requires zero baking time.
Selecting Your Key Ingredients
| Ingredient | Science Role | Pro Secret |
|---|---|---|
| Creamy Peanut Butter | Primary fat and flavor | Use conventional brands (like Jif) for a more stable, emulsified dough. |
| Dark Brown Sugar | Humectant (moisture) | Pack it tight in the cup to ensure the correct moisture to flour ratio. |
| Unsalted Butter | Tenderness and sizzle | Soften it until a finger leaves a dent, but it shouldn't be shiny or greasy. |
| Baking Soda | Browning and spread | Check the expiration date; old soda leads to flat, pale, soapy tasting cookies. |
Mixing different types of fats and sugars is what gives us that specific profile we're looking for. While some recipes call for shortening, I find that pure butter provides a much better flavor and a superior "melt in-your mouth" quality.
For the Creamy Base
The star of the show is the 3/4 cup (190g) of creamy peanut butter. I strongly suggest avoiding the "natural" stir style peanut butter for this specific recipe. The oil separation in natural brands can make the dough unpredictable, often leading to a greasy finish or a crumbly mess.
A standard creamy version provides the velvety consistency we need for that perfect dough ball.
For the Structural Bind
One large egg at room temperature acts as the glue. If you use a cold egg, it will seize the softened butter, creating little lumps in your dough. To warm an egg quickly, just pop it in a bowl of warm water for 5 minutes. This small step ensures a silky emulsion that incorporates the flour evenly.
- 1/2 cup (115g) Unsalted Butter: Softened. Why this? Provides flavor and controls spread better than salted versions. Substitute: Salted butter (omit the extra 1/2 tsp salt).
- 3/4 cup (190g) Creamy Peanut Butter: The heart of the cookie. Why this? Essential for the classic nutty flavor and fat content. Substitute: Almond butter (will be slightly grittier).
- 1/2 cup (100g) Granulated Sugar: For the edges. Why this? Creates the slight crispness and helps with browning. Substitute: Raw cane sugar (adds more crunch).
- 1/2 cup (100g) Dark Brown Sugar: For the chew. Why this? Molasses keeps the center soft and adds caramel notes. Substitute: Light brown sugar (milder flavor, less chewy).
- 1 Large Egg: Room temperature. Why this? Binds the ingredients and provides structure. Substitute: 1/4 cup applesauce (will be much softer/cakey).
- 1 tsp Pure Vanilla Extract: Flavor booster. Why this? Rounds out the saltiness of the peanut butter. Substitute: Almond extract (use only 1/4 tsp).
- 1.5 cups (190g) All Purpose Flour: Spooned and leveled. Why this? The perfect protein content for a soft crumb. Substitute: 1 to-1 gluten-free flour blend.
- 3/4 tsp Baking Soda: Leavening. Why this? Reacts with acid for lift and browning. Substitute: 2 tsp baking powder (cookies will be puffier/drier).
- 1/2 tsp Salt: Flavor balancer. Why this? Cuts through the sugar to highlight the peanuts. Substitute: Sea salt (use slightly more for texture).
- 1/2 cup Semi sweet chocolate chips: Optional. Why this? Because peanut butter and chocolate are soulmates. Substitute: Peanut butter chips.
Recommended Kitchen Equipment
You don't need a professional kitchen to make these, but a few specific tools make the process much smoother. I usually reach for my stand mixer, such as a KitchenAid, because it creams the butter and sugars much faster than I can by hand. However, a simple hand mixer works just as well.
Using a cookie scoop is my biggest "pro" tip for home cooks. It ensures every single cookie is the exact same size, which means they all finish baking at the exact same time. There’s nothing worse than having half a tray burnt while the other half is raw.
If you don't have one, a rounded tablespoon works in a pinch. Also, parchment paper is your best friend here it prevents sticking and makes cleanup a breeze.
Detailed Mixing Instructions

- Preheat your oven to 350°F (175°C). Note: A fully preheated oven is vital for the initial spread.
- Cream the 1/2 cup softened butter, 1/2 cup granulated sugar, and 1/2 cup dark brown sugar until pale and fluffy.
- Beat in the 3/4 cup peanut butter, egg, and 1 tsp vanilla until velvety and smooth.
- Whisk the 1.5 cups flour, 3/4 tsp baking soda, and 1/2 tsp salt in a separate small bowl.
- Fold the dry ingredients into the wet mixture until no flour streaks remain.
- Stir in the 1/2 cup chocolate chips if you are using them.
- Scoop rounded tablespoons of dough and roll them into 1 inch balls.
- Press a fork into the top of each ball in a "criss cross" pattern until slightly flattened.
- Bake for 10 minutes until the edges are just barely golden.
- Cool on the baking sheet for at least 10 minutes until firm enough to move.
Chef's Tip: Freeze your butter for 10 minutes before grating it into the bowl if your kitchen is very warm. This prevents the fats from melting too quickly during the cream phase, which keeps the cookies from spreading into thin pancakes.
For another classic treat that relies on a similar "set and cool" method, check out this Chocolate Chip Cookies recipe. It’s a great way to practice your timing cues and see how different sugars affect the final texture.
Troubleshooting Your Cookie Dough
Why Your Cookies Are Crumbly
If your cookies are falling apart or feel dry like sand, it usually comes down to the flour. Most people scoop the flour directly with the measuring cup, which packs it down. This can result in up to 25% more flour than the recipe needs.
Always use the "spoon and level" method or a kitchen scale for the most reliable results.
Why Your Cookies Spread
When cookies turn into one giant sheet on the pan, it's often because the butter was too soft (almost melted) or the dough was too warm. If you find your dough feels oily or very soft, pop it in the fridge for 20 minutes before rolling it into balls.
This chills the fats so they melt slower in the oven, keeping that thick, chewy center intact.
| Problem | Root Cause | Solution |
|---|---|---|
| Greasy texture | Butter was too warm/melted | Chill dough for 30 mins before baking. |
| No "criss cross" marks | Dough was too dry | Add 1 tsp of milk to the dough to hydrate. |
| Burnt bottoms | Dark baking sheet | Use parchment paper or move rack to middle. |
Common Mistakes Checklist
- ✓ Ensure your egg is at room temperature to prevent the butter from curdling.
- ✓ Don't overmix once the flour is added; stop as soon as you see no white streaks.
- ✓ Use a fork dipped in sugar to press the patterns it prevents the fork from sticking.
- ✓ Let the cookies rest on the hot pan; they are too fragile to move immediately.
- ✓ Check your baking soda for freshness by dropping a pinch in vinegar (it should fizz!).
Adjusting the Batch Size
If you are baking for a smaller household, you can easily cut this recipe in half. Since it calls for one egg, simply beat the egg in a small cup and use exactly 2 tablespoons of the liquid. This keeps the moisture ratio correct.
For half batches, use a smaller pan to ensure the oven's air circulation remains consistent.
When doubling the recipe for a party, be careful with the spices and leavening. Use only 1.25 tsp of baking soda for a double batch to avoid a metallic aftertaste. You should also bake in batches rather than crowding two trays into the oven at once, as this can lead to uneven heat distribution and soggy centers.
| If you want... | Then do... |
|---|---|
| Extra Soft Centers | Underbake by 1 minute and use dark brown sugar only. |
| Crispy Edges | Add 2 extra tablespoons of granulated sugar and bake 2 mins longer. |
| Thicker Cookies | Chill the rolled dough balls for 1 hour before pressing with a fork. |
Simple Dietary Modifications
For those looking for a gluten-free version, a high-quality 1 to-1 flour blend works wonders here because the peanut butter provides so much structure on its own. The texture will be slightly more delicate, so I recommend adding an extra 5 minutes to the "rest time" on the baking sheet after they come out of the oven.
If you are looking for a dairy-free option, you can swap the butter for a vegan butter stick. Avoid using oil, as it will make the cookies too heavy and greasy. If you want a protein packed alternative that doesn't involve traditional baking, our Protein Balls recipe is a fantastic way to satisfy that peanut butter craving with much less sugar.
| Method | Time | Texture | Best For |
|---|---|---|---|
| Oven Bake | 10 minutes | Soft center, crisp edge | Classic cookie experience |
| Air Fryer | 7 minutes | Extra crispy exterior | Small batches/quick snacks |
| Stovetop (Skillet) | 12 minutes | Gooey, brownie like | Sharing with a spoon |
Storage and Reheating Tips
These cookies stay chewy for about 4 to 5 days if kept in an airtight container at room temperature. A little trick I learned is to put a single slice of white bread in the container with them. The cookies will actually pull moisture from the bread, keeping them soft for much longer than usual.
You can also freeze the baked cookies for up to 3 months just wrap them tightly in plastic wrap first.
If you have leftover crumbs or broken pieces, don't throw them away! I love crushing them up and using them as a topping for vanilla ice cream or folding them into a chocolate pudding. It’s the perfect way to ensure zero waste while getting that nutty crunch in a different format.
To reheat, just pop a cookie in the microwave for 8 seconds to get that "just out-of the-oven" warmth.
Plating and Garnish Ideas
Presentation is where you can really make these look like they came from a high end bakery. To achieve a great color balance, I use a three step garnish strategy once the cookies are baked. This adds visual interest and hits those salty sweet notes perfectly.
First, I sprinkle a tiny pinch of flaky sea salt (the white accent) over the tops the second they come out of the oven. The heat helps the salt stick without melting. Second, once they are cool, I do a quick zigzag drizzle of melted semi sweet chocolate (the dark accent).
Finally, before the chocolate sets, I drop a few crushed toasted peanuts (the golden accent) right on top of the drizzle. It looks professional and adds three distinct textures to every bite.
Myths About Peanut Butter Cookies
One common myth is that you must use a fork to make the criss cross pattern for the cookie to bake correctly. In reality, the pattern is mostly traditional. While it does help flatten the dense dough slightly for even baking, you could technically just press them flat with the bottom of a glass.
Another myth is that the "oil" on top of natural peanut butter is better for moisture. Actually, that separated oil usually leads to a greasy bottom and a crumbly top stick to the emulsified stuff for the best chew.

Recipe FAQs
What makes a peanut butter cookie chewy?
Dark brown sugar and higher fat content. The molasses in dark brown sugar acts as a humectant, attracting and retaining moisture, which keeps the cookies soft. Using creamy peanut butter and ensuring the butter doesn't fully melt also contributes to a richer, chewier texture.
What is the secret for chewy cookies?
Control moisture and underbake slightly. The key is to use ingredients like dark brown sugar that hold moisture and to pull the cookies from the oven when the edges are set but the center still looks slightly underdone. They will continue to bake on the hot pan.
What makes a cookie chewy instead of crunchy?
Higher ratio of brown sugar to granulated sugar and less flour. Brown sugar's molasses content is crucial for chewiness, while granulated sugar promotes crispness. Using less flour also prevents the development of too much gluten, which can lead to a tougher, crunchier cookie.
How do I keep my cookies soft and chewy?
Store them properly and underbake. Keep baked cookies in an airtight container with a slice of bread to maintain moisture, or use a tip like this for our Banana Bread: The Moist & Easy Recipe. Always aim to slightly underbake them, as they will firm up as they cool on the baking sheet.
Why are my peanut butter cookies spreading too much?
Likely too warm or too soft ingredients. Ensure your butter is softened but not melted, and if your dough feels very soft or oily, chill it for about 20-30 minutes before baking. This helps the fats solidify, slowing their melt in the oven and preventing excessive spread.
Can I use natural peanut butter in chewy cookies?
No, it's not recommended for optimal chewiness. Natural peanut butter often separates, and the excess oil can lead to greasy cookies and a crumbly texture. Conventional creamy peanut butter creates a more stable emulsion, crucial for that desired chewy consistency.
What's the role of baking soda in chewy cookies?
It aids in spread and browning. Baking soda reacts with the acidic components in ingredients like brown sugar, creating a gentle lift and causing the cookies to spread. This spread helps create thinner, chewier cookies rather than thick, cakey ones.
Chewy Peanut Butter Cookies
Ingredients:
Instructions:
Nutrition Facts:
| Calories | 145 kcal |
|---|---|
| Protein | 2.8 g |
| Fat | 8.1 g |
| Carbs | 16.1 g |
| Fiber | 0.6 g |
| Sugar | 9.2 g |
| Sodium | 98 mg |
