Crispy & High Protein

- Time: Active 5 minutes, Passive 20 minutes, Total 25 minutes
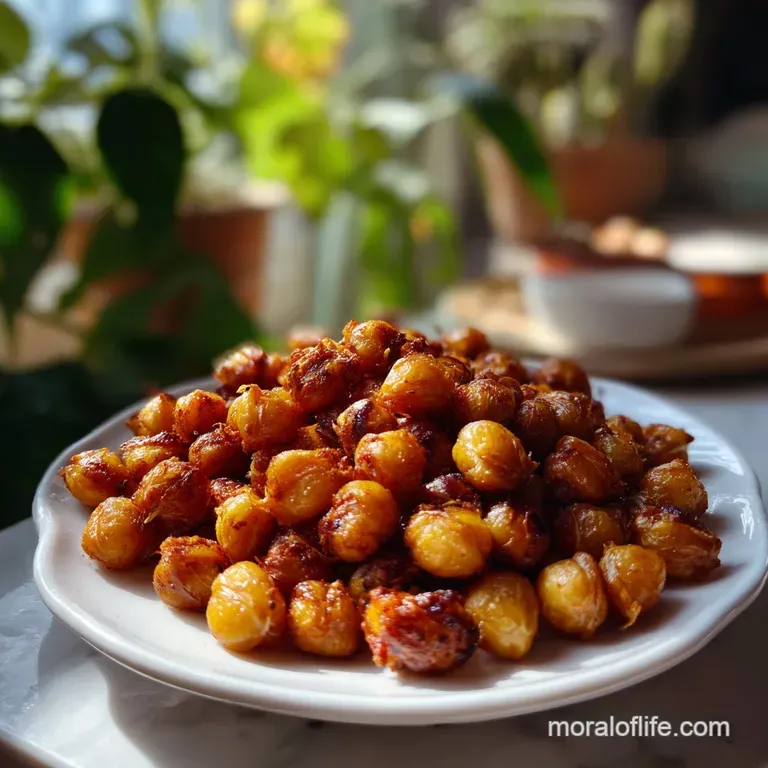
- Flavor/Texture Hook: Shatter crisp exterior with a nutty, smoky core
- Perfect for: High protein meal prep and efficient weekday snacking
- Making a Healthy Snack with Roasted Chickpeas
- Understanding the Essential Recipe Metrics
- Evaluating Our Essential Ingredient Components
- Streamlining Your Preparation Tools
- Executing the Perfect Roast
- Correcting Common Texture Failures
- Smart Flavor Variations
- Extending Freshness and Quality
- Selecting Complementary Dishes
- Debunking Roasting Misconceptions
- Recipe FAQs
- 📝 Recipe Card
Listen for that sharp, glassy "tink" when you drop a chickpea onto a metal tray. That sound is the holy grail of snacking, and honestly, it is the only way I will eat legumes these days. I used to think that getting a decent crunch required hours of low temperature drying, but who has time for that?
We need efficiency, especially when we are trying to stay fueled during a chaotic work week.
This recipe solves the soggy center problem that plagues most home cooked versions. I remember a batch I made three years ago that felt more like a pencil eraser than a snack, simply because I rushed the drying phase. Since then, I have streamlined the process to hit that precise balance of speed and texture.
We are going for a snack that feels light but provides 7.4 grams of protein per serving to keep you moving.
If you are tired of snacks that leave you feeling sluggish, this is your new standard. We are using minimal tools, just one pan and a bowl, to get maximum results. It is about working smarter, not harder, in the kitchen.
Let’s look at why this specific method produces such a reliable result every single time you preheat the oven.
Making a Healthy Snack with Roasted Chickpeas
The secret to a consistent crunch lies in the physics of the oven and the behavior of the chickpea skin. When we roast at 400°F, we are forcing water out of the legume faster than it can be reabsorbed. This creates a porous, airy structure that shatters when you bite it.
It is a quick win for anyone who needs a portable, high fiber option that does not require refrigeration.
- Evaporative Cooling: Surface moisture must vanish before the Maillard reaction begins, so drying the chickpeas is non negotiable for a crisp finish.
- Starch Gelatinization: The internal starches swell and then set, creating the structural integrity needed for a long lasting crunch.
- Lipid Heat Transfer: Using Chosen Foods Avocado Oil provides a high smoke point, allowing the heat to penetrate the skin efficiently without burning the fats.
- Vapor Pressure: High heat creates internal steam that puffs the skin slightly away from the flesh, improving the overall texture.
If you are already into meal prep like I am, you probably have an Overnight Oats recipe ready for your mornings, and these chickpeas fill that same "set it and forget it" slot for your afternoons. The efficiency of roasting a can of chickpeas while you clean up the kitchen is a total productivity hack.
Understanding the Essential Recipe Metrics
I keep these metrics on a sticky note inside my pantry because they are the foundation of a successful batch. Precision matters when you are dealing with small items like legumes, as a few extra minutes can be the difference between a smoky treat and a burnt husk.
We are targeting a specific moisture loss percentage that makes these shelf stable for a few days.
| Metric | Value | Purpose |
|---|---|---|
| Roasting Temperature | 400°F | Optimal for rapid moisture exit |
| Chickpea Volume | 15 oz (1 can) | Fits perfectly on a standard half sheet |
| Oil Ratio | 1 tbsp per 15 oz | Coats every surface without pooling |
| Cooling Time | 10 minutes | Allows starches to set and harden |
Staying fueled means having these ready to go. I usually double the batch if I know I have a long commute ahead. Just remember that crowding the pan is the enemy of the crunch, so use two pans if you scale up.
Evaluating Our Essential Ingredient Components
Every ingredient in this snack has a functional role. We aren't just adding things for "flavor," we are building a structural coating that stands up to the heat. For instance, using Goya Chickpeas provides a consistent size, which is vital for even roasting.
If the sizes vary too much, the small ones burn while the big ones stay soft.
| Ingredient | Science Role | Pro Secret |
|---|---|---|
| Goya Chickpeas | High fiber/protein base | Dry them between two lint free towels for 2 minutes. |
| Chosen Foods Avocado Oil | Heat conductor | Use a spray bottle for even coverage with less fat. |
| Smoked Paprika | Surface friction | Adds a wood fired aroma without actual smoke. |
| Sea Salt | Hygroscopic agent | Add half before roasting and half after for depth. |
For the High Protein Base
The 15 oz can of chickpeas is the workhorse here. I prefer canned over dried for this specific snack because the pressure cooking process in the can ensures the starch is already hydrated. This means we only have to worry about the drying and crisping phases.
If you use home cooked chickpeas, make sure they are tender but not falling apart, otherwise, they will turn into a mushy pile on your baking sheet.
For the Signature Spice Blend
Our blend of 1/2 tsp smoked paprika, 1/2 tsp garlic powder, and 1/4 tsp ground cumin creates a savory profile that mimics high end snack mixes. The garlic powder is essential because it toasts at a different rate than the cumin, adding layers of complexity.
I always use a fresh jar of McCormick Cumin because old spices tend to taste like dust once they hit high heat.
Streamlining Your Preparation Tools
You don't need a cabinet full of gadgets to make a Healthy Snack with Roasted Chickpeas. In fact, fewer tools mean less cleanup, which is a core tenet of efficient cooking. I rely on a Nordic Ware Natural Aluminum Half Sheet because it conducts heat evenly and won't warp at 400°F.
If your pan is thin, the chickpeas in the corners will burn before the ones in the middle are even warm.
- Nordic Ware Baking Sheet: Its rimmed edges keep the chickpeas from rolling into the abyss of your oven.
- Stainless Steel Mixing Bowl: I use a large KitchenAid bowl to toss the legumes with oil. It gives you enough room to be aggressive with the coating.
- Lint Free Kitchen Towels: Skip the paper towels if you can. A dedicated tea towel absorbs more surface moisture and doesn't leave little white flecks on your food.
- Silicone Spatula: This is best for scraping every bit of spice and oil out of the bowl and onto the pan.
Chef's Note: If you find your chickpeas are sticking, skip the parchment paper. Roasting directly on the metal pan encourages a better sear on the skin. Just give the pan a quick scrub afterward with a bit of Bar Keepers Friend to keep it looking new.
Executing the Perfect Roast
This process is about timing. If you are distracted, set a timer on your phone. We are looking for that specific window where the water is gone but the protein hasn't started to char. For a different high protein meal, you might try an Air Fryer Chicken Tenders recipe, but for a shelf stable snack, the oven is king.
- Prep the chickpeas. Drain the 15 oz can of chickpeas into a mesh strainer. Note: Rinsing removes excess starch and sodium.
- Dry thoroughly. Roll the chickpeas between two towels until the skins feel matte. Note: Surface water prevents the oil from sticking.
- Preheat the oven. Set your oven to 400°F and ensure the rack is in the center.
- Coat with oil. Toss chickpeas with 1 tbsp avocado oil in a large bowl. Note: Ensure every chickpea is glossy.
- Apply the spices. Add 1/2 tsp smoked paprika, 1/2 tsp garlic powder, 1/4 tsp cumin, and 1/4 tsp sea salt.
- Spread on pan. Pour the mixture onto your Nordic Ware sheet in a single layer.
- Roast for 20 minutes. Shake the pan halfway through to rotate the legumes. Note: Look for a darkened, golden brown hue.
- Test for crunch. Remove one chickpea, let it cool for 30 seconds, and bite. Note: It should shatter, not squish.
- Cool on the pan. Leave them on the hot sheet for 10 minutes out of the oven.
- Store properly. Move to an airtight container only once they are completely cold.
Correcting Common Texture Failures
If your batch isn't perfect, it is usually a moisture issue. I have failed at this enough times to know exactly what went wrong just by looking at the pan. Most people blame the recipe, but usually, it is the environment.
If it's a humid day, you might need an extra 5 minutes in the oven to compensate for the moisture in the air.
Mastering Moisture Evaporation
The biggest hurdle to a Healthy Snack with Roasted Chickpeas is the "snap back" where they get chewy after an hour. This happens because the internal moisture migrates back to the surface.
To prevent this, you can turn off the oven and crack the door, letting the chickpeas sit in the receding heat for another 10 minutes. This pulls that final bit of steam out of the center.
Achieving Uniform Heat Distribution
If you have "hot spots" in your oven, one side of the pan will be charcoal while the other is soft. I always rotate my pan 180 degrees at the 10 minute mark. This ensures every chickpea gets equal exposure to the heating elements.
Using a heavy duty pan also helps buffer those temperature swings that occur when the oven cycle kicks on and off.
| Problem | Cause | Fix | Pro Tip |
|---|---|---|---|
| Chewy centers | Inadequate drying | Roast 5 mins longer | Use a cooling rack for airflow. |
| Burnt spices | Added too early | Add spices halfway through | Mix spices with a drop of oil first. |
| Skins falling off | Aggressive drying | Pat gently, don't scrub | Some skin loss is fine for crunch. |
Smart Flavor Variations
Once you have the base technique down, you can start experimenting. I usually stick to the smoky profile because it satisfies that "BBQ chip" craving without the refined carbs. However, if you are serving these with a Vegan Chili recipe, you might want to lean into more earthy tones.
- Lime and Chili: Swap the paprika for Tajin seasoning and add a squeeze of fresh lime after roasting.
- Maple Cinnamon: Replace the savory spices with 1 tsp cinnamon and a drizzle of maple syrup for a sweet version.
- Garlic Herb: Use dried rosemary and thyme instead of cumin for a more Mediterranean vibe.
- Everything Bagel: Use a pre made everything seasoning blend but watch the salt content in your canned chickpeas.
| Original Ingredient | Substitute | Why It Works |
|---|---|---|
| Avocado Oil (1 tbsp) | Ghee (melted, 1 tbsp) | Adds a buttery, toasted flavor. Note: Lower smoke point than oil. |
| Chickpeas (15 oz) | Edamame (frozen, thawed) | Higher protein content. Note: Stays slightly softer than chickpeas. |
| Smoked Paprika | Chipotle Powder | Increases heat level significantly. Note: Use sparingly, it's potent. |
Extending Freshness and Quality
Storage is where most snacks go to die. If you put warm chickpeas into a plastic bag, they will steam themselves and turn into a soggy mess within minutes. I have learned to be patient. I let them sit on the counter until they are stone cold. This preserves the structure we worked so hard to build in the oven.
- Fridge: Do not put them in the fridge. The humidity will ruin the texture immediately.
- Freezer: You can freeze roasted chickpeas for up to 2 months. To eat, just pop them back in a 400°F oven for 5 minutes to refresh the crunch.
- Counter: Store in a glass jar with a loose lid or a paper bag for 3-4 days. The paper bag actually helps by absorbing any residual moisture.
For zero waste, save the liquid from the can, also known as aquafaba. You can whip it into a vegan mayo or use it as an egg replacer in baking. I hate throwing away anything that has culinary value, and aquafaba is basically liquid gold for plant based cooking.
Selecting Complementary Dishes
These chickpeas are a versatile "fueled" snack, but they also work as a functional garnish. I love tossing them on top of a salad instead of croutons for that extra protein hit. They add a much needed textural contrast to softer dishes, making the meal feel more substantial and satisfying.
- Grain Bowls: Sprinkle over quinoa and roasted veggies for a crunch factor.
- Soups: Use as a garnish for tomato soup or butternut squash puree.
- Taco Night: Add to your taco bar as a crispy topping for plant based tacos.
- Hummus: It sounds redundant, but putting roasted chickpeas on top of creamy hummus is a texture win.
Scaling the Recipe
If you are cooking for a crowd or doing heavy meal prep, you can easily triple this recipe. Just remember the "Single Layer Rule." If the chickpeas are stacked on top of each other, they will steam instead of roast. Use multiple baking sheets and swap their positions in the oven halfway through the cook time.
If you're cutting the recipe in half, use a smaller toaster oven pan to prevent the oil from spreading too thin and burning on the empty parts of the tray. This snack is all about surface area, so keep those legumes spread out and give them the space they need to breathe.
Debunking Roasting Misconceptions
There is a lot of bad advice online about roasting legumes. One major myth is that you need to peel every single chickpea to get them crispy. Honestly, life is too short for that. The skins actually provide a lot of the structural "shatter" we are looking for.
While a few might pop off during the drying process, there is no need to manually remove them.
Another common error is the belief that soaking dried chickpeas is better than using canned for roasting. In my experience, the uniform hydration of canned chickpeas actually leads to a more consistent crunch.
Dried chickpeas that haven't been soaked or cooked perfectly can often result in a "rock hard" texture that is unpleasant to eat. Stick to the convenience of the can and focus your energy on the roasting technique instead.

Recipe FAQs
Can I substitute dried chickpeas for canned ones in this recipe?
No, stick to canned. Canned chickpeas are already cooked and uniformly hydrated, which simplifies the drying process necessary for crispness. If using dried, you must perfectly pre-soak and cook them until tender, but not mushy, or you risk a rock hard result.
How do I ensure the spices stick and don't burn during roasting?
Toss the spices with the oil before adding them to the chickpeas. This creates a seasoned coating that adheres better than dry powder, which tends to burn on the hot surface. For a completely different flavor profile achieved through dry rub precision, see the technique used in our Taco Meat Recipe: Mahogany Finish.
What is the best way to store roasted chickpeas to maintain crunch?
Store them at room temperature in a container that allows airflow. A sealed plastic container will trap moisture and ruin the texture quickly. Use a glass jar with the lid slightly ajar or a simple paper bag for up to four days.
Why do my chickpeas sometimes end up chewy instead of crispy?
They were not dried sufficiently before roasting. Surface moisture must evaporate completely before the chickpea can achieve a proper snap. If you notice chewiness after cooling, return them to a 400°F oven for five extra minutes.
Can I make these sweet instead of savory?
Yes, they adapt well to sweet flavors. Replace the savory spices with cinnamon and a light drizzle of maple syrup applied after roasting to prevent the sugar from burning. If you enjoy sweet, slow cooked snacks, you should check out our Banana Bread: The Moist & Easy Recipe for another satisfying treat.
Do I need to use parchment paper on the baking sheet?
No, skip the parchment paper if you want maximum crunch. Roasting directly on a metal pan allows the chickpea skin to sear directly against the hot surface, promoting better crust formation. Parchment paper insulates the bottom and encourages steaming.
What temperature should I roast them at for the fastest results?
Roast at 400°F (200°C). This high temperature forces the internal water vapor to escape rapidly, creating the desired porous, light texture. This principle of high heat moisture control is also key when making a tender baked fruit dessert like our Baked Apples Recipe: Tender Spiced Dessert.
Healthy Roasted Chickpea Snack

Ingredients:
Instructions:
Nutrition Facts:
| Calories | 181 kcal |
|---|---|
| Protein | 7.4 g |
| Fat | 6.8 g |
| Carbs | 22.9 g |
| Fiber | 6.3 g |
| Sugar | 3.8 g |
| Sodium | 367 mg |
