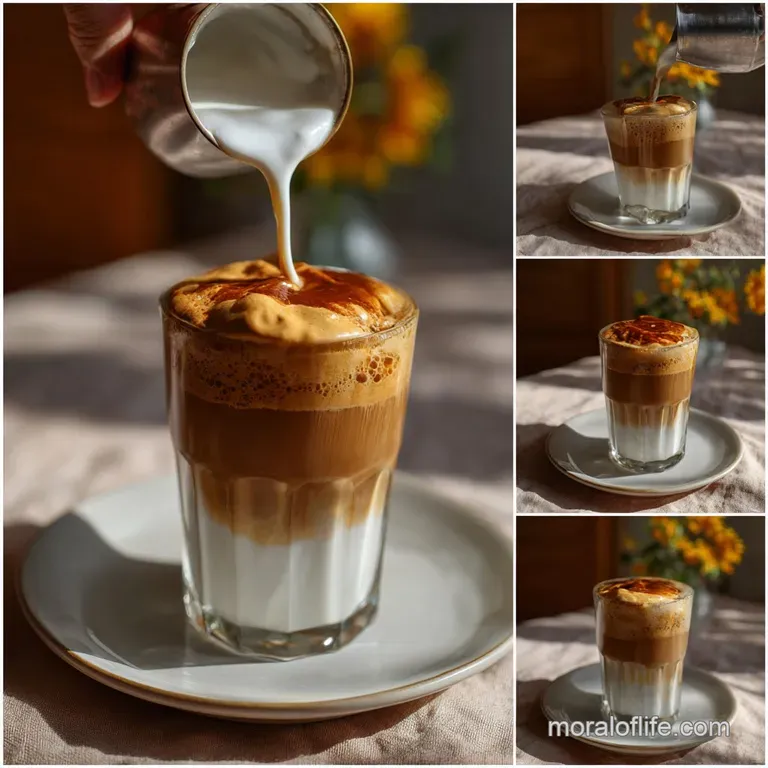
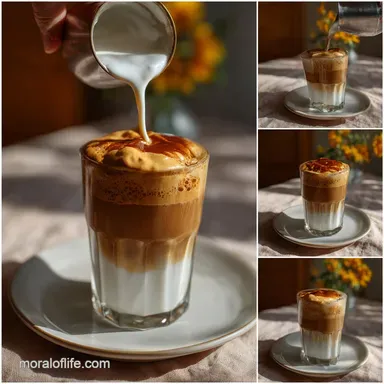
How to Make Dalgona Coffee at Home

- Time: Active 5 minutes, Passive 0 minutes, Total 5 minutes
- Flavor/Texture Hook: Velvety thick foam with a bold coffee punch
- Perfect for: Lazy weekend brunches or a mid-afternoon pick-me-up
- The Best How to Make Dalgona Coffee
- Key Techniques Explained
- Understanding the Ingredient Chemistry
- Vital Stats and Timing
- Essential Pantry Staples
- Best Tools for Success
- Step by Step Whipping Guide
- Solving Common Whipping Issues
- Simple Flavor Adaptations
- Freshness and Reuse Tips
- Elegant Serving Styles
- Scaling Your Coffee Batches
- True Whipped Coffee Secrets
- Common Questions
- 📝 Recipe Card
Remember that feeling when a drink suddenly takes over the internet and you think, "There's no way that actually tastes good"? That was me when I first saw people vigorously whisking coffee in their kitchens. I thought it looked like a lot of work for a simple latte, but one sip changed everything.
The texture is unlike any other coffee drink I’ve ever made at home. It’s thick, almost like a marshmallow fluff, but with the intense, bitter sweet kick of a double espresso.
Honestly, the first time I tried it, I used a hand whisk and my arm nearly fell off. I quickly learned that a little bit of technology, or just the right technique, makes this a five minute treat rather than a workout. We’re going to talk about how to get those stiff peaks every single time.
It’s about more than just mixing coffee; it’s about creating a stable emulsion that doesn’t dissolve the moment it touches the milk.
If you’ve been looking for a way to use that jar of Nescafe sitting in the back of your cupboard, this is it. We’re going to walk through the science of the foam, the exact steps to ensure it doesn't flop, and how to present it so it looks like it belongs on a professional menu.
It’s simpler than it looks, and trust me, once you see those dark brown granules turn into a golden mousse, you’ll be hooked.
The Best How to Make Dalgona Coffee
Creating the perfect foam isn't magic, even if it looks like it. It’s all about the ratio of ingredients and the physical force you apply. When we mix the hot water with the instant coffee and sugar, we aren't just dissolving them. We are creating a structured network of air bubbles trapped within a thick syrup.
This is exactly what gives the drink its signature "shatter" when you first dip your spoon into the thick, velvety layers.
- Surfactant Stability: Instant coffee contains tiny amounts of oils and proteins that act as surfactants, which stabilize the air bubbles as you whisk.
- Viscosity Control: The granulated sugar isn't just for sweetness; it creates a thick syrup that coats the air bubbles, preventing them from popping.
- Thermal Activation: Using boiling water at exactly 212°F helps dissolve the coffee solids instantly, ensuring a smooth slurry before the aeration begins.
Key Techniques Explained
To ensure success on your first try, you need to understand the texture of the foam. It should move from a dark, liquid state to a pale tan, thick mousse. If you stop too early, the foam will sink into the milk. If you whisk too long, it can become overly dry and difficult to mix.
You are looking for "stiff peaks," meaning when you lift your whisk, the foam stands straight up without drooping.
To Ensure Stiff Peaks
The secret is the sugar. While you can technically make this with less sugar, the foam won't be as stable. The sugar increases the viscosity of the liquid, which basically acts like a glue for the air bubbles.
If you use a hand mixer, start on a low speed to combine everything, then crank it up to high to incorporate as much air as possible in under two minutes.
For Maximum Volume
Always use a bowl that is slightly larger than you think you need. The foam expands significantly as air is whipped in. If the bowl is too small, you won't be able to move the whisk effectively to trap air.
I prefer using a stainless steel bowl because it stays cool and doesn't hold onto any residual oils that might deflate the foam.
Understanding the Ingredient Chemistry
Before we grab the whisk, let's look at why these specific items work together. Not all coffee works for this, and the type of sugar actually matters for the structural integrity of your drink.
| Component | Science Role | Pro Secret |
|---|---|---|
| Nescafe Instant Coffee | Provides surfactants | Use spray dried granules for the best aeration |
| Granulated Sugar | Stabilizes bubble walls | Avoid powdered sugar; the cornstarch ruins the gloss |
| Boiling Water | Dissolves solids | Must be 212°F to properly activate the coffee proteins |
| Almond Milk | Fat-to-water base | Use unsweetened for a cleaner coffee flavor profile |
Vital Stats and Timing
When you Make Dalgona Coffee, precision in your timing is what separates a liquid mess from a professional grade mousse. You don't need a thermometer for the milk, but the water for the coffee must be bubbling.
- Active Prep:5 minutes
- Yield: 1 serving
- Whip Time:2 minutes (Electric) or 8 minutes (Manual)
- Water Temp:212°F (100°C)
Essential Pantry Staples
You probably have everything you need in your kitchen right now. This recipe relies on the interaction between the dried coffee and the sugar to create its unique structure.
- 2 tbsp (12g) Instant Coffee: I recommend Nescafe Taster's Choice for a reliable whip. Why this? It has the specific protein structure needed to hold air bubbles long term.
- 1.5 tbsp (18g) Granulated Sugar: Use Domino Granulated Sugar. Why this? The crystal size provides the perfect friction for aeration during the initial whisking.
- 2 tbsp (30ml) Boiling Water: Freshly filtered water is best.
- 1 cup (240ml) Unsweetened Almond Milk: I like Silk Unsweetened Almond Milk. Why this? The neutral flavor allows the bold coffee foam to be the star.
- 3 4 Large Ice Cubes: To keep the drink refreshing and prevent the foam from melting.
Substitution Table
| Original Ingredient | Substitute | Why It Works |
|---|---|---|
| Granulated Sugar | Coconut Sugar | Adds a caramel note; Note: Foam will be slightly darker and denser. |
| Almond Milk | Oat Milk | Creates a creamier base; Note: Increases the total calorie count. |
| Instant Coffee | Instant Espresso | Provides a much stronger, more bitter flavor profile. |
Best Tools for Success
You don't need a lot of gear, but the right whisk makes a massive difference. I’ve tried this with a fork don't do that to yourself.
- Electric Hand Mixer: A KitchenAid 5 Speed Hand Mixer is my go-to. It saves your arm and gets the job done in 120 seconds.
- Small Glass Bowl: Use a Pyrex Prep Bowl so you can see the color change as the coffee aerates.
- Tall Glass: A Libbey Highball Glass shows off the beautiful layers.
step-by-step Whipping Guide
Follow these steps exactly for a perfect result. The transition from liquid to foam happens quickly once it starts, so keep a close eye on the color change.
- Boil water. Use a kettle to bring your water to a full 212°F boil. Note: Lukewarm water will result in a grainy foam that collapses.
- Combine solids. Place 2 tbsp (12g) Instant Coffee and 1.5 tbsp (18g) Granulated Sugar into your small bowl.
- Add liquid. Pour in 2 tbsp (30ml) of the boiling water.
- Initial stir. Use a spoon to mix until the granules are completely dissolved. The mixture should look like dark ink.
- Begin whisking. Start your electric mixer on low. Once the mixture is bubbly, turn it to high.
- Monitor color. Watch as the dark brown turns to a golden, peanut butter color. This usually happens around the 1 minute mark.
- Check peaks. Continue whisking until the foam is thick enough to hold its shape. It should look like stiff peak meringue.
- Prepare base. Drop 3 4 Large Ice Cubes into your glass and pour in 1 cup (240ml) Unsweetened Almond Milk.
- Layer foam. Carefully spoon the coffee mousse over the milk. Once you master this, it's very similar to the How to Make recipe for other whipped drinks.
- Final touch. Give it a tiny swirl with a straw before sipping, but don't over mix!
Solving Common Whipping Issues
Sometimes things go wrong, especially if the humidity is high or the coffee is old. If your foam isn't stiffening, it's almost always a ratio or temperature issue.
Why the foam is liquid
If your mixture stays dark and runny after three minutes of whisking, your water might not have been hot enough, or you might have accidentally added too much water. The 1:1:1 ratio (by volume) is critical for the science to work.
The taste is too bitter
Dalgona is naturally very strong. If it's too much for you, try folding a little extra sugar into the foam at the very end. The almond milk also helps cut the bitterness, so make sure you're getting a bit of milk in every sip.
Quick Fix Table
| Problem | Cause | Fix | Pro Tip |
|---|---|---|---|
| Foam collapses | Not enough sugar | Add 1/2 tsp sugar | Use a chilled bowl next time |
| Grainy texture | Coffee didn't dissolve | Use hotter water | Stir for 30 seconds before whisking |
| Won't peak | Bowl was greasy | Clean bowl with lemon | Never use a plastic bowl |
Simple Flavor Adaptations
Once you’ve nailed the basic method to Make Dalgona Coffee, you can start getting creative with the flavors. It’s a very versatile base.
- The Mocha Twist: Add 1/2 tsp of cocoa powder to the coffee and sugar before whisking. It makes the foam taste like a chocolate covered coffee bean.
- Vanilla Bean: Scrape a small amount of vanilla bean into the milk before topping with the foam for a floral aroma.
- Keto Friendly: Substitute the granulated sugar with an erythritol based sweetener. Note: The foam will be less stable and should be served immediately.
Freshness and Reuse Tips
This drink is best served immediately because the foam will eventually begin to "weep" liquid back into the milk. However, if you have extra foam, you don't have to throw it away.
- Fridge Storage: You can store the whipped foam in an airtight container in the fridge for up to 24 hours. It will lose some volume, but you can give it a quick 30 second whisk to bring it back to life.
- Freezing: Surprisingly, you can freeze the foam! Dollop it onto a parchment lined tray and freeze. These "coffee clouds" are great dropped into hot cocoa.
- Zero Waste: If you have leftover foam that has turned back into liquid, use it as a concentrated coffee base for baking brownies or flavoring frosting.
Elegant Serving Styles
How you present this drink changes the whole experience. Since this is an Instagram famous beverage, the "wow factor" is part of the fun.
| Level | Plating Tweak | Vibe |
|---|---|---|
| Simple | Stirred gently with a straw | Casual Morning |
| Polished | Dusted with cocoa powder | Brunch Guest |
| Restaurant | Served in a coupe with a cinnamon stick | Dessert Course |
Chef's Note: For a truly professional look, use a piping bag to swirl the coffee foam onto the milk. It gives it a clean, soft serve ice cream appearance that looks stunning in photos.
Scaling Your Coffee Batches
If you are making this for a crowd, don't try to whisk five servings in one tiny bowl. You need space for the air to move.
- For 2 4 servings: You can double or quadruple the ingredients exactly. Use a large stand mixer with the whisk attachment. It will take about the same amount of time as a single serving.
- For large groups: Reduce the sugar slightly (by about 10%) as the volume of foam becomes very dense. Work in batches of four to ensure the foam doesn't sit too long and deflate before serving.
True Whipped Coffee Secrets
There are a lot of rumors about what you can and can't do with this drink. Let's clear up the confusion.
Myth: You can use ground coffee beans. Truth: This is impossible. Ground beans do not have the soluble solids or the specific processing needed to create a stable foam. You must use instant coffee.
Myth: You need a special "Dalgona" brand of coffee. Truth: Any instant coffee works, though spray dried versions (like the classic granules) tend to whip up faster than freeze dried chunks.
Myth: It only works with dairy milk. Truth: The foam is completely independent of the milk. You can put it on almond, oat, soy, or even water (though that would be very bitter!).
Decision Shortcut: If you want the thickest foam, use 2 full tablespoons of sugar. If you want a faster whip, use a hand held milk frother (the wand type). If you want a hot drink, skip the ice and use steamed milk.
Creating this Homemade Dalgona Coffee is a small joy that makes a regular Tuesday feel like a special occasion. The way the bitter foam slowly melts into the creamy almond milk creates a gradient of flavor that evolves with every sip. It’s efficient, beautiful, and honestly, just fun to make.
Give it a try, and don't be afraid to whisk it until it’s impossibly thick that’s where the magic happens.

Common Questions
Can I use regular ground coffee instead of instant?
Myth: You can use ground coffee beans. Reality: This is impossible. Ground beans lack the soluble solids necessary for stable foam structure.
Is using boiling water mandatory for Dalgona coffee?
Yes, boiling water is essential. The 212°F water instantly dissolves solids to initiate protein activation. Use freshly boiled water for immediate success.
Should I use granulated sugar or powdered sugar?
Granulated sugar. Powdered sugar contains cornstarch which impedes proper aeration and compromises the final gloss. Granulated sugar creates the necessary viscosity for bubble stability.
Why did my Dalgona foam turn runny and won't stiffen?
Insufficient heat caused the poor emulsion. Water that was not boiling prevents the necessary proteins in the instant coffee from activating correctly.
- Ensure water reaches a full boil (212°F).
- Confirm the 1:1:1 ingredient ratio.
- Whisk continuously past the dark brown stage.
Is an electric mixer necessary, or can I use a hand whisk?
Electric mixer. While a hand whisk is possible, it requires significantly more physical effort and time to reach stiff peaks. An electric mixer integrates air much faster, reducing active time to under two minutes.
Is this recipe better with dairy milk or a non-dairy alternative?
Unsweetened almond milk. Non-dairy options like almond provide a neutral flavor, allowing the strong coffee foam to dominate the taste profile. Dairy milk introduces higher fat content which slightly changes the foam's density.
How long can I store leftover Dalgona foam?
Store foam for 24 hours. The foam will eventually release moisture back into the liquid base during prolonged storage. You can revive the volume slightly with a brief re-whisk.
How To Make Dalgona Coffee
Ingredients:
Instructions:
Nutrition Facts:
| Calories | 147 kcal |
|---|---|
| Protein | 2.5 g |
| Fat | 2.5 g |
| Carbs | 28 g |
| Fiber | 1 g |
| Sugar | 18 g |
| Sodium | 160 mg |
