Pear Jelly Recipe: Silky Sweet Spread
- Time: Active 20 minutes, Passive 45 minutes, Total 1 hour 5 mins
- Flavor/Texture Hook: Silky, honey toned sweetness with a clean, firm set
- Perfect for: Holiday gifting, Sunday brunch, or beginner canners
- Crafting the Golden Glow of This Pear Jelly Recipe
- The Science of Why it Works
- Ingredient Deep Dive for Quality Control
- Building the Flavor Profile with Simple Elements
- Necessary Tools for Successful Home Canning Projects
- From Prep to Jar with Consistent Success Steps
- Resolving Common Jam and Jelly Texture Issues
- Creative Variations for Unique Fruit Preserve Batters
- Ensuring Freshness with Proper Storage and Safety
- Presentation Strategies for Beautiful Fruit Based Treats
- Recipe FAQs
- 📝 Recipe Card
Crafting the Golden Glow of This Pear Jelly Recipe
There is a specific, quiet magic that happens in the kitchen when the scent of simmering Bartlett pears starts to drift through the hallways. It smells like late summer turning into autumn, sweet and floral without being heavy.
For a long time, I was intimidated by the thought of making a homemade pear jelly recipe because I worried about the "set." Nobody wants a jar of fruit syrup when they were expecting a firm, spreadable treat.
But after a few sticky trials and one very memorable batch of pear flavored "soup," I found the rhythm that works every single time.
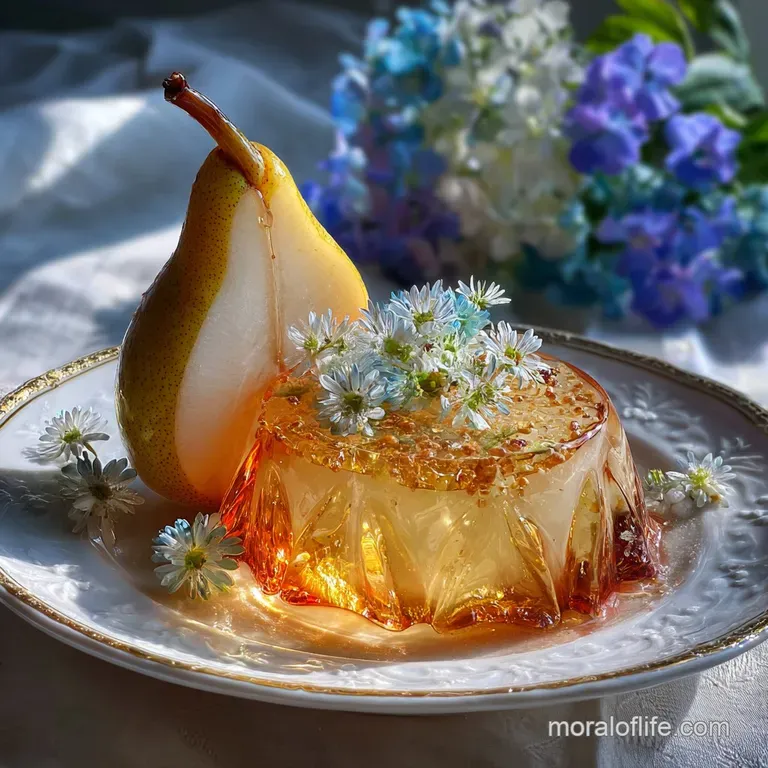
We aren't just boiling fruit here; we are extracting the very soul of the pear. The beauty of this preserve lies in its clarity. When you hold a jar up to the light, it should look like trapped sunshine.
It's a simple process, but it requires a bit of patience during the straining phase to ensure you get that professional looking, translucent finish. I've learned that rushing the fruit usually leads to cloudy results, so we’re going to take our time where it matters most.
This recipe is designed to be a crowd pleasing staple in your pantry. Whether you're spreading it over a warm biscuit or pairing it with a sharp Manchego cheese on a charcuterie board, it brings a level of sophisticated flavor that store-bought versions simply can't touch. If you’ve ever enjoyed the comforting warmth of a Baked Apples Recipe, you’ll recognize that same cozy, orchard fresh vibe here, just in a more refined, spreadable form.
The Science of Why it Works
Pectin Gelation: The Sure Jell pectin creates a structural mesh by bonding with sugar molecules in the presence of acid. Acid Catalysis: Lemon juice lowers the pH, which neutralizes the negative charges on pectin chains, allowing them to join together and "set" the liquid into a firm jelly.
| Method | Time | Texture | Best For |
|---|---|---|---|
| Stovetop | 45 minutes | Crystal clear, firm set | Traditional canning and gifting |
| Slow Cooker | 4 hours | Darker amber color, softer set | Small batches for immediate use |
| Oven (Fruit Prep) | 60 minutes | Deep, roasted flavor base | Developing complex "spiced" notes |
Choosing the stovetop method is almost always the way to go for this particular jelly because it allows for precise temperature control. You need that hard, rolling boil to activate the pectin properly, something that is difficult to replicate in an oven or slow cooker.
Ingredient Deep Dive for Quality Control
| Component | Science Role | Pro Secret |
|---|---|---|
| Bartlett Pears | Flavor and base | Use fruit that is just ripe; overripe pears have less natural pectin. |
| Lemon Juice | pH Regulator | Always use bottled juice for consistent acidity levels to ensure a safe set. |
| Granulated Sugar | Hydroscopic Binder | Sugar binds to water, allowing the pectin to form a solid network rather than staying liquid. |
| Butter | Surface Tension | A tiny amount breaks the surface tension to prevent foam from bubbling over the pot. |
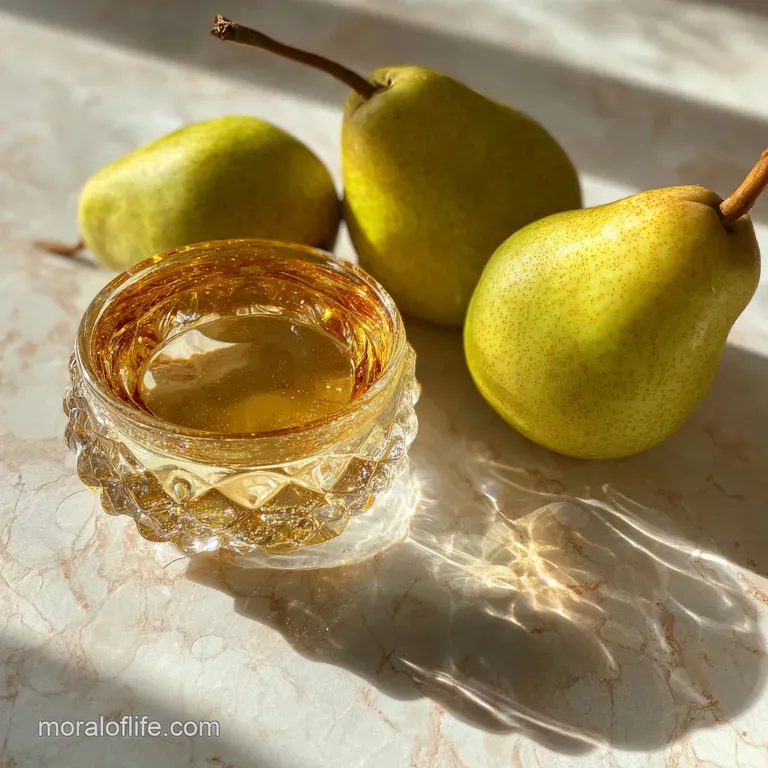
The key to a successful easy pear jelly recipe is starting with the right fruit. While Bartlett pears are the classic choice for their perfume like aroma, Anjou pears also provide a lovely, mild base.
Building the Flavor Profile with Simple Elements
- 4 lbs ripe Bartlett or Anjou pearsWhy this? Provides the aromatic juice base needed for the jelly liquid.
- 3 cups waterWhy this? Extracts the flavor from the fruit without diluting the essence too much.
- 5 cups granulated sugarWhy this? Essential for the preservation process and achieving the proper "gel" texture.
- 1/4 cup bottled lemon juiceWhy this? Necessary for the pectin to bond; provides a bright balance to the sugar.
- 1 box (1.75 oz) Sure Jell Premium Fruit PectinWhy this? Ensures a reliable, firm set even for beginners.
- 1/2 tsp butterWhy this? An old-fashioned trick to keep the foam down during the over high heat boil.
Substitutes and Impact
| Original Ingredient | Substitute | Why It Works |
|---|---|---|
| Granulated Sugar | Cane Sugar | Similar chemical structure; adds a very slight toasted undertone. |
| Sure Jell Pectin | Liquid Pectin | Uses a different addition order but achieves a similar firm set. |
| Bartlett Pears | Bosc Pears | Denser fruit that yields a slightly earthier, woodsy flavor profile. |
Necessary Tools for Successful Home Canning Projects
You don't need a professional laboratory, but a few specific tools make this old fashioned pear jelly recipe much easier. A heavy bottomed Dutch oven is my go to because it distributes heat evenly, preventing the sugar from scorching at the bottom.
You will also need a jelly bag or several layers of cheesecloth for straining. If you don't have a formal jelly stand, you can improvise by hanging the bag from a sturdy kitchen spoon balanced across a deep pitcher.
For the canning portion, grab a set of sterilized half pint jars and a large pot for the water bath. A jar lifter is one of those inexpensive tools that feels like a luxury when you're dealing with boiling water it prevents slips and burns.
Finally,, a candy thermometer can be helpful, though we’ll be using visual cues and timing for this specific Sure Jell method.
From Prep to Jar with Consistent Success Steps
1. Extracting the Essence
Wash and roughly chop the 4 lbs of pears, including the skins and cores. Place them in a large pot with 3 cups of water. Note: The skins and cores contain the most natural pectin, which helps the set.
2. Simmering the Fruit
Bring the mixture to a boil, then reduce heat and simmer for about 25 minutes. Cook until the pears are soft and mushy.
3. Straining for Clarity
Pour the mixture into a jelly bag suspended over a large bowl. Let it drip naturally for at least 4 hours or overnight. Note: Do not squeeze the bag, or your jelly will turn cloudy.
4. Measuring the Juice
Measure exactly 5 cups of the strained pear juice. If you have a little less, add a tiny bit of water to reach the 5 cup mark.
5. Incorporating the Pectin
Add the pear juice, lemon juice, and the 1.75 oz box of Sure Jell to a clean pot. Add the 1/2 tsp of butter to prevent foaming.
6. The First Boil
Bring the mixture to a full rolling boil (a boil that doesn't stop when stirred) over high heat. Stir constantly to prevent sticking.
7. Adding the Sugar
Stir in the 5 cups of sugar quickly. Return the mixture to a full rolling boil and boil for exactly 1 minute.
8. Filling the Jars
Remove from heat and skim off any remaining foam with a metal spoon. Ladle the hot liquid into sterilized jars, leaving 1/4 inch of headspace.
9. The Water Bath Finish
Wipe the rims, apply lids, and process in a boiling water bath for 10 minutes. Listen for the satisfying "pop" of the seals as they cool.
Resolving Common Jam and Jelly Texture Issues
One of the most frequent frustrations is a jelly that refuses to firm up. Usually, this happens if the boil wasn't "hard" enough or the measurements were slightly off. If you've ever made a Recipe for Fried Apples, you know that sugar and fruit can be temperamental when heat is involved.
Why Your Jelly Stayed Liquid
If your jelly is still runny after 24 hours, the pectin didn't bond correctly. This is often due to using old pectin or not hitting that crucial one minute mark for the final boil.
Why Your Jelly Is Cloudy
Cloudiness usually comes from "pulp fever." If you squeezed the jelly bag to get every last drop of juice, you forced tiny particles of fruit through the mesh. It’s better to have less juice that is clear than more juice that is murky.
| Problem | Root Cause | Solution |
|---|---|---|
| Syrup Consistency | Weak boil or under measurement of sugar | Re boil with a small amount of extra pectin and lemon juice. |
| Bubbles in Jar | Pouring too slowly or not tapping jars | Use a wide mouth funnel and tap jars gently on the counter before sealing. |
| Crystals in Jelly | Sugar didn't dissolve completely | Ensure the mixture returns to a full boil before starting the 1 minute timer. |
Common Mistakes Checklist
- ✓ Never double the batch; pectin doesn't always scale linearly and may fail to set.
- ✓ Use a pot that is at least three times the volume of the liquid to prevent boil overs.
- ✓ Don't use "light" or "reduced calorie" sugar unless the pectin box specifically allows it.
- ✓ Check that your jars are not chipped at the rim, which prevents a vacuum seal.
- ✓ Keep the jars upright and still for 24 hours after canning to let the gel set undisturbed.
Creative Variations for Unique Fruit Preserve Batters
1. Spiced Pear Jelly Recipe
For a warmer, more "fall" focused flavor, add two cinnamon sticks and three whole cloves to the initial fruit simmering stage. This creates a spiced pear jelly recipe that smells incredible and pairs perfectly with roasted pork or turkey. Remove the whole spices before straining the juice.
2. Pear Jelly Recipe Without Pectin
If you want to go the truly old school route, you can make a pear jelly recipe without pectin by using long boil methods. You will need to use slightly under ripe pears (which are higher in natural pectin) and cook the juice and sugar mixture until it reaches 220°F on a candy thermometer.
This results in a much darker, almost caramel colored jelly with a very intense fruit flavor.
Chef's Tip: If you want a "clear but colorful" look, add a single vanilla bean (split lengthwise) to the juice while it boils. The tiny black seeds will settle at the bottom, but the flavor will be velvety and rich.
Ensuring Freshness with Proper Storage and Safety
Properly canned pear jelly will stay vibrant and delicious for 12 to 18 months when stored in a cool, dark place like a pantry. Light is the enemy of color; a jelly stored on a sunny windowsill will eventually turn a dull brownish grey.
Once you crack the seal on a jar, it must be kept in the refrigerator and consumed within 3 to 4 weeks.
Don't let the fruit scraps go to waste! The leftover pear pulp from the straining bag can be pushed through a food mill to make a simple pear butter. Just add a little cinnamon and honey, simmer it down until thick, and you have a second "zero waste" treat from the same batch of fruit.
It’s not as clear as the jelly, but it’s wonderfully rustic.
Presentation Strategies for Beautiful Fruit Based Treats
When it comes to serving, the visual appeal of this homemade pear jelly recipe is half the fun. Because the jelly itself is quite pale, using color balance and garnish strategy is key to making it pop on the plate.
- Emerald Mint Sprigs: Place a small sprig of fresh mint on top of the jelly in a serving bowl. The vibrant green creates a stunning contrast against the amber liquid.
- Amber Cinnamon Sticks: If you are gifting a jar, tie a whole cinnamon stick to the side with twine. It signals the flavor profile immediately.
- Sparkling Gold Leaf: For a truly high end presentation (think holiday parties), you can gently swirl a tiny bit of edible gold leaf into the jelly just before it sets in the jars. It catches the light beautifully within the translucent preserve.
To get the most out of your jelly, try serving it at room temperature. Cold jelly can be a bit stiff and masks the delicate floral notes of the pear. Let it sit out for 15 minutes before breakfast, and you'll find it spreads much more smoothly across your toast.
It truly is one of those simple pleasures that reminds you why home canning is worth the effort.

Recipe FAQs
Can I make pear jelly?
Yes, absolutely. Pear jelly is a wonderful way to capture the delicate flavor of ripe pears and is quite achievable for home cooks.
What is the difference between pear jam and jelly?
Jelly is made from the strained juice of the fruit, while jam is made from crushed or chopped fruit. This means pear jelly will be clear and smooth, with no fruit pulp, whereas pear jam will contain pieces of pear and have a thicker, chunkier texture.
How much pectin for pear jelly?
Follow the pectin package instructions for the amount of fruit juice. Typically, for 5 cups of pear juice, you'll use one standard box (1.75 oz) of powdered fruit pectin like Sure Jell to ensure a proper set.
What can I make with lots of pears easily?
Pear jelly is a fantastic, easy option for using a surplus of pears. If you want something more rustic, consider making pear butter or even a simple pear crisp.
Can I use underripe pears for jelly?
Yes, underripe pears are actually ideal for jelly making. They contain higher levels of natural pectin, which is the gelling agent responsible for the jelly's firm set, leading to a more reliable result.
How do I get clear pear jelly?
Strain the pear juice through a jelly bag without squeezing. Gently let the juice drip for several hours or overnight; squeezing will force pulp through the mesh, resulting in cloudy jelly. This technique is key if you enjoyed controlling texture here, see how the same principle of gentle handling works in our Valentines Charcuterie Board: Effortless Pink Spreads.
Why did my pear jelly not set?
Insufficient boiling time or incorrect pectin measurement are the most common culprits. Ensure you reach a full, rolling boil for the specified time and that you've used the correct amount of pectin for the volume of juice.
Pear Jelly Recipe

Ingredients:
Instructions:
Nutrition Facts:
| Calories | 48 kcal |
|---|---|
| Protein | 0.1 g |
| Fat | 0.1 g |
| Carbs | 12.5 g |
| Fiber | 0.1 g |
| Sugar | 12.2 g |
| Sodium | 1 mg |
