Reeses Peanut Butter Pie
- Time: Active 15 minutes, Passive 4 hours, Total 4 hours 15 minutes
- Flavor/Texture Hook: Velvety peanut butter foam with a chocolate cookie shatter
- Perfect for: Crowd-pleasing potlucks or stress free birthday celebrations
- The Ultimate No Bake Reeses Peanut Butter Pie
- Mechanics of the Perfect Filling
- Component Analysis and Role
- Essential Elements for Creamy Pie
- Necessary Tools for Mixing
- Step-by-Step Assembly for Success
- Fixing Common Pie Mistakes
- Doubling or Halving the Recipe
- Tweaking for Special Diets
- Handling Leftovers and Scraps
- Professional Plating Style Guide
- Kitchen Myths Debunked
- Recipe FAQs
- 📝 Recipe Card
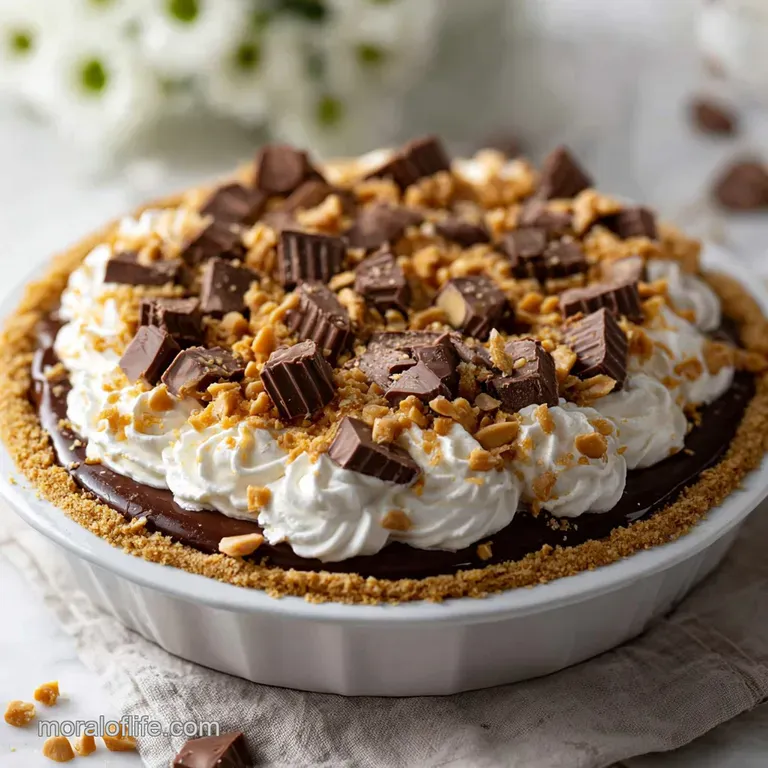
The Ultimate No Bake Reeses Peanut Butter Pie
The first time I served this reeses peanut butter pie, I actually felt like a bit of a fraud because it was just too easy. I had a dinner party planned, the main course took way longer than expected, and I realized I had zero time to bake.
I whipped this together in about fifteen minutes, shoved it in the fridge, and hoped for the best. When the first fork hit that chocolate crust and I heard that distinct "shatter" sound, I knew we were in business.
The room went silent as everyone took their first bite of that velvety, salty sweet filling. It’s basically like eating a giant, pillowy version of the famous candy cup, but with a much better texture.
You get the crunch from the cookie base, the tang from the cream cheese, and that unmistakable roasted nut flavor. Plus, there is no "perfection pressure" here because the toppings hide any little cracks or uneven spots.
We've all had those desserts that look great but taste like pure sugar. This isn't that. By using full fat cream cheese and a pinch of sea salt, we balance the sweetness so you actually want a second slice. It’s become my reliable secret weapon for when I want a huge reaction with minimal effort.
Trust me on this, once you make this homemade reeses peanut butter pie, you'll never go back to the store-bought versions.
Mechanics of the Perfect Filling
The Physics of the Peanut Cloud: Emulsification between the dense peanut butter and the aerated whipped topping creates a stable foam that holds its shape without gelatin. The cream cheese acts as a structural anchor, providing enough fat to keep the air bubbles trapped as the mixture chills.
- Fat Stabilization: The high fat content in peanut butter and cream cheese coats the air bubbles from the whipped topping, preventing them from collapsing.
- Sugar Suspension: Powdered sugar contains a small amount of cornstarch, which helps absorb excess moisture from the cream cheese and keeps the filling firm.
- Thermal Setting: Chilling the pie allows the saturated fats in the butter and cream cheese to solidify, turning a soft mousse into a sliceable wedge.
- Osmotic Balance: A pinch of sea salt doesn't just add flavor; it suppresses bitterness in the cocoa and amplifies the perception of sweetness without adding more sugar.
| Level | Plating Style | Garnishing Technique | Visual Goal |
|---|---|---|---|
| Simple | Casual Wedge | Direct sprinkle of chopped cups | Homestyle comfort |
| Polished | Clean Slice | Offset drizzle of chocolate and peanut butter | Neat and inviting |
| Restaurant | Artistic Flare | Whipped cream dollops with a vertical candy shard | Architectural elegance |
If you enjoy the flavor profile of this filling but want something more portable for a midday boost, you might love my Protein Balls recipe which uses similar ingredients in a bite sized format. Both recipes rely on the natural binding power of nut butters to create a satisfying texture without baking.
Component Analysis and Role
| Ingredient | Science Role | Pro Secret |
|---|---|---|
| Cream Cheese | Structural Base | Use full fat blocks only; "spreadable" versions have too much water and will cause a soupy center. |
| Peanut Butter | Flavor & Fat | Avoid "natural" oil separating brands here; the stabilizers in standard creamy brands help the pie set. |
| Powdered Sugar | Sweetener & Binder | Always sift first to ensure the filling stays velvety instead of developing tiny sugar clumps. |
| Cookie Crumbs | Foundation | Pulse them until they look like wet sand; too large and the crust will crumble when sliced. |
Essential Elements for Creamy Pie
This reeses peanut butter pie ingredients list is straightforward, but the quality of your choices will dictate the final result. I always suggest using name brand chocolate sandwich cookies for the crust because the filling in the cookies actually helps bind the crumbs together.
- 1.5 cups (170g) chocolate sandwich cookie crumbs: This is roughly 15-18 cookies. Why this? The cocoa provides a bitter contrast to the sweet filling.
- 5 tbsp (70g) unsalted butter, melted: Why this? Acts as the "glue" that hardens in the fridge to hold the crust.
- 1 pinch sea salt: Why this? Cuts through the richness of the fats.
- 8 oz (226g) full fat cream cheese, softened: Why this? Provides the necessary tang and structural stability.
- 1 cup (250g) creamy peanut butter: Why this? Standard creamy brands like Jif or Skippy work best for emulsion.
- 1 cup (120g) powdered sugar, sifted: Why this? Dissolves instantly for a smooth mouthfeel.
- 1 tsp (5ml) pure vanilla extract: Why this? Rounds out the nutty flavors.
- 8 oz (226g) chilled whipped topping: Why this? Provides the "lift" and airy texture.
- 1 cup (150g) chopped Reese's peanut butter cups: Why this? Adds texture and reinforces the brand flavor.
- 2 tbsp (30ml) chocolate fudge sauce: Why this? For a glossy, professional finish.
- 2 tbsp (30ml) melted peanut butter: Why this? Creates a beautiful color contrast on top.
For the crust, you can use a gluten-free cookie if needed. If you find yourself obsessed with this specific salty sweet combo, you should also check out this Chewy Peanut Butter recipe for a warm, baked version of these flavors.
Necessary Tools for Mixing
You don't need a professional kitchen for this easy reeses peanut butter pie, but a few specific tools make the process much smoother. A 9 inch pie plate is standard, though a springform pan also works if you want to remove the sides for a more dramatic presentation.
I highly recommend using a stand mixer or a hand mixer for the filling. Trying to whisk cream cheese and peanut butter by hand usually leads to small lumps that are impossible to get out once the whipped topping is added.
You’ll also want a flexible silicone spatula for the "folding" step this is where most people go wrong by being too aggressive and popping all those lovely air bubbles.
| Method | Time | Texture | Best For |
|---|---|---|---|
| Stovetop | 5 mins | Deeply toasted | A nuttier, firmer crust |
| Microwave | 1 min | Soft and buttery | Quick assembly with no cleanup |
| Oven | 8 mins | Snap crisp | Maximum structural integrity |
The stovetop method involves melting your butter in a skillet and tossing the crumbs there to toast them slightly before pressing into the pan. It adds a layer of flavor that the microwave just can't match.
step-by-step Assembly for Success
- Pulse the cookies. Place your sandwich cookies in a food processor and blitz until they are fine crumbs. Note: Larger chunks will make the crust fall apart.
- Bind the crust. Combine the 1.5 cups cookie crumbs with 5 tbsp melted butter and a pinch of salt. Mix until it feels like damp sand.
- Press the foundation. Firmly press the mixture into a 9 inch pie plate, going up the sides. Use the bottom of a measuring cup to get a flat, even surface.
- Cream the base. Beat the 8 oz cream cheese and 1 cup peanut butter until completely smooth and glossy.
- Add sweetness. Gradually mix in 1 cup powdered sugar and 1 tsp vanilla. Stop once the sugar is fully incorporated to avoid over beating.
- Fold the clouds. Gently fold in the 8 oz whipped topping using a spatula. Work in a figure eight motion until no white streaks remain.
- Fill the shell. Pour the mixture into the prepared crust. Smooth the top with a spoon to create a slight dome.
- Decorate the top. Sprinkle the 1 cup chopped peanut butter cups over the surface. Press them slightly into the filling so they stay put.
- Drizzle the finish. Warm the 2 tbsp chocolate sauce and 2 tbsp peanut butter. Flick the spoon back and forth for thin, elegant lines.
- Chill to set. Refrigerate for at least 4 hours. Wait until the center feels firm when lightly touched.
Fixing Common Pie Mistakes
The Filling is Runny
If your pie won't hold its shape, it’s usually because the cream cheese was too warm or you used a "natural" peanut butter. Natural oils stay liquid at room temperature, whereas the fats in standard creamy brands solidify when chilled.
To fix a runny pie that’s already made, you can move it to the freezer for 2 hours to help it firm up before serving.
The Crust Crumbles
A crumbling crust usually means there wasn't enough "glue" or it wasn't pressed hard enough. If you’re finding the crumbs aren't sticking, add another tablespoon of melted butter. When pressing it into the pan, really put your weight into it. The goal is a compact layer that can withstand the pressure of a fork.
| Problem | Root Cause | Solution |
|---|---|---|
| Grainy filling | Un sifted powdered sugar | Sift sugar and ensure cream cheese is room temp before mixing. |
| Sinking center | Over mixing the whipped topping | Fold gently; don't use the electric mixer for the final step. |
| Soggy crust | Too much butter | Measure crumbs accurately; 1.5 cups is the sweet spot for 5 tbsp butter. |
Common Mistakes Checklist
- ✓ Ensure the cream cheese is truly softened (room temp for 2 hours) to avoid lumps.
- ✓ Don't use a "natural" peanut butter that requires stirring; the oil separation ruins the emulsion.
- ✓ Chill the pie plate for 10 minutes after pressing the crust before adding the filling.
- ✓ Use a hot knife (dipped in warm water and wiped dry) to get those clean, restaurant style slices.
- ✓ Wait until the very end to add the drizzle so the sauces don't bleed into the filling.
Doubling or Halving the Recipe
Scaling a no bake reeses peanut butter pie is thankfully much easier than scaling a cake. If you want to make a giant version in a 9x13 pan, double everything but keep the salt at about 1.5 times the original amount. For a 9x13 pan, you might need a few extra cookies to ensure the bottom is fully covered.
If you are just making a small treat for two, you can halve the recipe and use small ramekins or a 6 inch springform pan. When halving, reduce the chilling time to about 2 hours since the smaller mass will reach the target temperature much faster.
Just remember that if you're using a hand mixer on a half batch, use a smaller bowl so the beaters can actually reach the ingredients.
Tweaking for Special Diets
Swapping for gluten-free Needs
This is one of the easiest recipes to adapt. Simply use gluten-free chocolate sandwich cookies. They have the same texture and fat content, so the butter ratio remains identical. Most major brands now offer a gluten-free version that is virtually indistinguishable in a crust.
Going dairy-free
You can swap the cream cheese for a plant based alternative (like almond based cream cheese) and use a dairy-free whipped topping. For the butter, a vegan butter stick works better than oil because it hardens when cold.
Note that the texture may be slightly softer, so I recommend keeping a dairy-free version in the freezer until 15 minutes before serving.
Handling Leftovers and Scraps
Storage Guidelines This pie lives in the fridge. Cover it loosely with plastic wrap or a pie dome to prevent it from picking up "fridge smells" like onions or garlic. It will stay fresh and velvety for up to 4 days. If you want to keep it longer, you can freeze the entire pie for up to 2 months.
Just wrap it tightly in a double layer of plastic wrap and then foil. To serve from the freezer, let it sit on the counter for 20 minutes to take the edge off the chill.
Zero Waste Tips If you have leftover cookie crumbs, don't toss them! They are incredible sprinkled over vanilla ice cream or mixed into yogurt. If you have extra peanut butter filling that didn't fit in the crust, spoon it into small jars for a "mousse" snack the next day.
Even the extra chopped peanut butter cups can be stored in the freezer for your next batch of cookies.
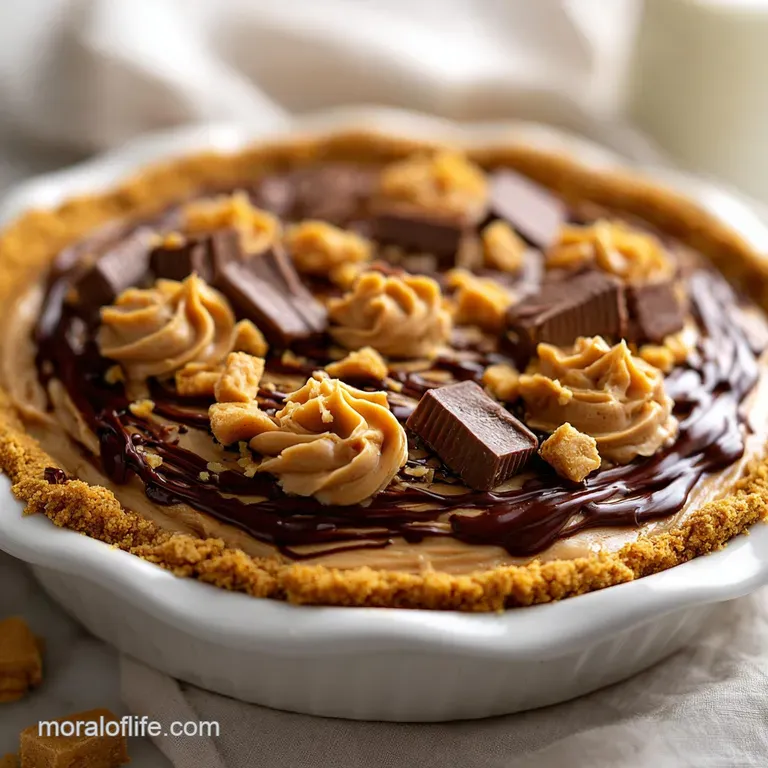
Professional Plating Style Guide
When it comes to serving your reeses peanut butter pie dessert, the presentation is what makes people go "wow" before they even take a bite. For a simple family dinner, a big wedge with a few extra crumbs is perfect.
But if you’re hosting, try the "Polished" approach: use a squeeze bottle for the chocolate and peanut butter drizzles to get perfectly even lines.
For a true "Restaurant" look, serve each slice with a small dollop of fresh whipped cream on the side. This provides a clean, unsweetened contrast to the rich pie. You can also take a whole peanut butter cup, cut it into a sharp triangle, and stand it upright in the filling.
It adds height and makes the dish look architectural. No matter how you plate it, the combination of the dark crust and the tan filling is naturally striking.
Kitchen Myths Debunked
Many people think you need to bake a cookie crust to make it stay together. That's actually a myth for no bake pies. While baking can add a toasted flavor, the "glue" is actually the butter and the sugar in the cookie filling.
As long as you press the crumbs firmly and chill the crust before filling, it will hold its shape perfectly.
Another common misconception is that "low-fat" cream cheese works just as well. It doesn't. low-fat versions have a higher water content and different stabilizers that won't give you that thick, sliceable texture. If you want the pie to set properly, stick to the full fat block.
The fat is what carries the flavor and provides the structural integrity that makes this recipe work.
Finally, don't believe the idea that you have to make your own whipped cream for this to be "authentic." While homemade whipped cream is lovely, it is much less stable than whipped topping.
For a pie that needs to sit out on a dessert table for an hour, the stabilized nature of whipped topping is actually a culinary advantage, not a shortcut. It ensures your pie stays pillowy instead of melting into a puddle.

Recipe FAQs
Can I substitute regular peanut butter for creamy?
No, stick with creamy. Natural peanut butters require stirring and their separated oils won't solidify properly when chilled, leading to a runny filling.
What is the best way to get a clean slice?
Use a hot knife. Dip your knife in hot water and wipe it dry before each cut. This melts the filling slightly, allowing for a smooth slice.
Why is my pie filling runny?
The cream cheese wasn't cold enough or you used natural peanut butter. Full fat, softened cream cheese is key for structure, and standard creamy peanut butter has stabilizers that help it set.
How long can I store leftover pie?
Up to 4 days in the refrigerator. Make sure to cover it loosely with plastic wrap to prevent it from absorbing other fridge odors.
Can I make this pie dairy-free?
Yes, with swaps. Use dairy-free cream cheese and whipped topping, and vegan butter for the crust. The texture might be slightly softer, so chilling it until just before serving is best.
Does baking the crust make a difference?
No, it's not necessary for structure. The butter and sugar in the cookie filling act as binders that harden when chilled. Baking adds a toasted flavor but isn't essential for a stable crust.
How do I make a gluten-free version?
Simply use gluten-free chocolate sandwich cookies. The cookie base provides the same binding and fat content, so the butter ratio stays the same for a perfectly crumbly crust.
Reeses Peanut Butter Pie
Ingredients:
Instructions:
Nutrition Facts:
| Calories | 565 kcal |
|---|---|
| Protein | 11.1 g |
| Fat | 38.5 g |
| Carbs | 45.1 g |
| Fiber | 2.8 g |
| Sugar | 34.5 g |
| Sodium | 382 mg |
