Simple Churro Cheesecake for Parties
- Time: Active 15 minutes, Passive 30 minutes, Total 45 minutes
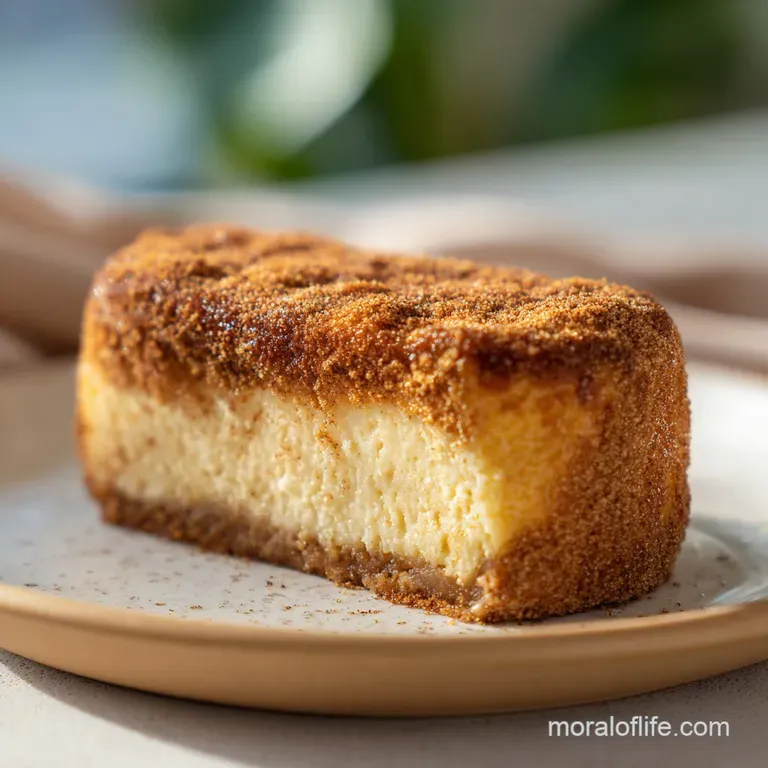
- Flavor/Texture Hook: Shatteringly crisp cinnamon crust with a velvety cheesecake heart
- Perfect for: Backyard barbecues, holiday potlucks, or easy weekend entertaining
- Simple Churro Cheesecake for Parties for Any Celebration
- The Science of Why This Recipe Stays Crisp
- A Component Analysis for First Try Success
- Selecting Elements for a Velvety Cream Cheese Center
- Tools for a Golden and Shatteringly Crisp Crust
- Step by Step Guide to a Flaky Finish
- Avoiding Common Mistakes for a Stable Filling
- Customizing the Recipe for Every Dietary Need
- Keeping Your Leftovers Fresh and Crispy
- Presentation Ideas for Your Next Big Gathering
- Recipe FAQs
- 📝 Recipe Card
Simple Churro Cheesecake for Parties for Any Celebration
The first time I pulled this out of the oven, the aroma of toasted cinnamon and bubbling butter filled my entire kitchen. It’s that specific, intoxicating smell you get when you’re walking past a fairground churro stand, only better because it’s mingling with the scent of baking dough.
I remember setting the pan down on the counter and watching the sugar topping shimmer as it cooled, forming a literal glass like sheet over the flaky crescent layers.
Honestly, I was skeptical the first time I heard about using crescent rolls for a "cheesecake," but trust me on this, it’s brilliant. I once made the mistake of trying to make a traditional pie crust for this, and it just didn't have that airy, fried dough vibe that we all love.
This version is the one that actually works because it balances that heavy cream cheese filling with a light, laminated shell that crunches when you bite into it.
We’ve all been at those parties where the dessert table is full of dry brownies or store-bought cookies. When you walk in with a tray of these bites, you're bringing the heat. They are easy to grab, not too messy, and they hit that perfect nostalgic note.
Plus, you can prep the whole thing in about 15 minutes, which is a total win when you're juggling three other party snacks at once.
The Science of Why This Recipe Stays Crisp
- Lamination Expansion: The "oven fry" effect happens because the butter between the thin layers of crescent dough evaporates, pushing the layers apart and creating tiny air pockets.
- Sugar Recrystallization: As the half cup of sugar on top melts and then cools, it forms a sucrose lattice that creates a shattering texture rather than a grainy one.
- Acid Stabilization: The lactic acid in the full fat cream cheese prevents the egg proteins from over coagulating, which is why the center stays silky instead of turning rubbery.
- Maillard Reaction: The combination of the 4 tablespoons of melted butter and the granulated sugar facilitates a rapid browning process at 350°F (175°C), developing deep toffee notes.
| Servings | Ingredient Adjustments | Pan Size | Cook Time |
|---|---|---|---|
| 12 people | 1 can dough, 8 oz cheese, 1/2 cup sugar | 8x8 inch square | 25-28 mins |
| 24 people | 2 cans dough, 16 oz cheese, 1 cup sugar | 9x13 inch rectangle | 30-33 mins |
| 48 people | 4 cans dough, 32 oz cheese, 2 cups sugar | Two 9x13 pans | 35 mins (rotate racks) |
Managing the crowd size is easy when you know the pan ratios. If you are serving these at a larger event, I recommend cutting them into smaller 1 inch squares rather than larger bars. This makes them go further and keeps the "grab and-go" energy of a true party snack.
A Component Analysis for First Try Success
| Ingredient | Science Role | Pro Secret |
|---|---|---|
| Cream Cheese (16 oz) | Provides the structural "gel" and tang | Use full fat only; low-fat has too much water and will make the bottom soggy |
| Granulated Sugar (1.5 cups) | Humectant for the filling and crust for the top | Don't use brown sugar on top; the moisture prevents the "shatter" effect |
| Large Egg (1 unit) | Binds the fats and liquids into a stable emulsion | Ensure it is room temperature so it incorporates without lumps |
Selecting Elements for a Velvety Cream Cheese Center
To get the best results, you need the right building blocks. For the dough, stick with the standard refrigerated cans of crescent rolls. You can use the "sheets" if you find them, which saves you the trouble of pinching the seams together. If you're looking to round out your party spread with something savory, these bites go surprisingly well alongside a Chili Sauce and recipe for meatballs.
- Crescent Roll Dough (2 cans): The shortcut to flaky lamination. Why this? Provides the "fried" texture without actual deep frying.
- Substitute: Puff pastry (will be much thicker and puffier).
- Cream Cheese (16 oz): The heart of the dish. Why this? Offers the necessary fat content for a stable, sliceable center.
- Substitute: Mascarpone (richer, less tangy).
- Granulated Sugar (1.5 cups total): Used for both sweetness and texture. Why this? It caramelizes better than liquid sweeteners.
- Substitute: Monk fruit sweetener (1:1 ratio, but won't crunch as much).
- Pure Vanilla Extract (1 tsp): Rounds out the spice. Why this? Masks the "eggy" scent of the filling.
- Substitute: Vanilla bean paste (adds beautiful black flecks).
- Ground Cinnamon (1 tbsp): The soul of the churro. Why this? Essential for the woodsy, warm aroma.
- Substitute: Apple pie spice (adds nutmeg and ginger notes).
Tools for a Golden and Shatteringly Crisp Crust

You don't need a professional bakery setup for this, but a few specific items make the job much cleaner. A standard 9x13 inch (23x33 cm) metal or glass baking pan is the primary requirement. Metal pans tend to brown the bottom crust more effectively than glass, which is helpful if you really want that "fried" crunch.
I also highly recommend using an electric hand mixer (like a Hamilton Beach) for the filling. Trying to whisk 16 oz of cream cheese by hand usually results in tiny white lumps that won't disappear in the oven.
A silicone spatula is also your best friend here for scraping every last bit of that velvety filling onto the dough layer.
step-by-step Guide to a Flaky Finish
- Preheat your oven to 350°F (175°C) and lightly grease your 9x13 pan with butter or non stick spray.
- Unroll one can of crescent dough and press it into the bottom of the pan. Note: Pinch all the perforated seams together tightly to prevent the filling from leaking through.
- Beat the 16 oz of softened cream cheese with 1 cup of granulated sugar until the mixture looks like smooth silk.
- Add the egg and 1 tsp of vanilla extract to the cheese mixture.
- Mix on low speed for 1 minute until fully combined and glossy.
- Spread the cream cheese filling evenly over the bottom dough layer using a spatula.
- Unroll the second can of dough and gently place it on top of the filling, stretching it to the edges.
- Pour 4 tbsp of melted butter over the top layer and spread it with a brush.
- Whisk the remaining 0.5 cup sugar with 1 tbsp cinnamon and sprinkle it heavily over the buttered dough.
- Bake for 30 minutes until the top is deeply golden and the sugar is bubbling.
| Method | Time | Texture | Best For |
|---|---|---|---|
| Oven Bake | 30 minutes | Flaky and crisp | Large parties and standard batches |
| Air Fryer | 18 minutes | Maximum crunch | Small "tester" batches (half recipe) |
| Stovetop | N/A | Doughy/Greasy | Not recommended for this recipe |
The oven method is the gold standard here. It allows the heat to circulate around the sugar, creating that signature crust that an air fryer might blow around or a stovetop would simply burn.
Avoiding Common Mistakes for a Stable Filling
One of the biggest hurdles is the "soggy bottom" syndrome. This happens when the moisture from the cream cheese seeps into the bottom dough before it has a chance to set. Another frequent issue is lumpy filling, which usually happens when people are too impatient to let their ingredients reach room temperature.
Why Your Cheesecake is Slumping
If you cut into the bars and the filling oozes out like a liquid, you likely didn't let them cool long enough. The proteins in the egg and the fats in the cheese need time to "set" as the temperature drops.
I know it's hard to wait when the kitchen smells that good, but 30 minutes of cooling is non negotiable.
To Eliminate Cream Cheese Lumps
Lumps are almost always caused by cold cheese. If you forgot to take it out of the fridge, you can microwave the unwrapped blocks for 15 seconds, but be careful not to melt them. You want "pliable," not "liquid."
| Problem | Root Cause | Solution |
|---|---|---|
| Dough is gummy | Underbaked or too much butter | Bake until the center doesn't jiggle when shaken |
| Sugar topping is grainy | Butter wasn't spread evenly | Use a pastry brush to ensure total coverage before topping |
| Filling is leaking | Seams weren't pinched | Spend an extra minute sealing the "perforations" in the dough |
Common Mistakes Checklist:
- ✓ Ensure cream cheese is completely soft before mixing (prevents lumps).
- ✓ Pinch every single seam in the crescent dough (prevents filling leaks).
- ✓ Don't skip the cooling time; the bars need to set to become sliceable.
- ✓ Use a metal pan if you want a crispier bottom crust.
- ✓ Spread the melted butter to the very edges so the sugar sticks everywhere.
Customizing the Recipe for Every Dietary Need
If you want to take this to the next level, you can lean into the Mexican heritage of the churro. Adding a drizzle of caramel over the finished bars is a classic move. For something even more authentic, you can try serving these alongside a slice of Dulce De Leche recipe for a caramel heavy dessert table.
To scale the recipe down for a small date night, simply halve all the ingredients and use an 8x8 inch pan. The bake time will drop to about 22-25 minutes. If you are scaling up for a huge wedding or graduation party, stick to making multiple 9x13 pans rather than one giant one.
Large pans often leave the middle undercooked while the edges burn. For spice adjustments, you can increase the cinnamon to 1.5 tbsp if you want a punchier, darker crust.
Keeping Your Leftovers Fresh and Crispy
Storage: These bars actually keep surprisingly well. You can store them in the fridge for up to 4 days. However, the sugar crust will eventually start to absorb moisture from the fridge air and the cheese filling, losing its "shatter." To prevent this, place a paper towel in the container with the bars to soak up excess humidity.
Freezing: You can freeze these for up to 2 months. Wrap individual squares in plastic wrap and then place them in a freezer bag. To eat, thaw them in the fridge overnight.
Zero Waste: If you have leftover scraps of the crescent dough, don't toss them! Roll them in the leftover cinnamon sugar mix and bake them on a separate tray for 8 minutes to make "churro fries" for the kids.
Presentation Ideas for Your Next Big Gathering
For a restaurant quality look, wait until the bars are completely cool before slicing them with a hot, sharp knife. Wipe the knife between every single cut to ensure the white cream cheese doesn't smear all over the dark cinnamon top. This creates those beautiful, clean layers that look so professional.
You can also serve these in individual cupcake liners. This makes them much easier for guests to pick up at a party without needing forks or plates. If you really want to wow people, serve them warm with a small scoop of vanilla bean ice cream and a pinch of extra sea salt on top to balance the sugar.
The contrast between the cold ice cream and the warm, spiced cheesecake is something your friends will be talking about for weeks. Simple Churro Cheesecake for Parties is all about that balance of ease and "wow" factor.

Recipe FAQs
Can I substitute puff pastry for the crescent roll dough?
No, it is not recommended. Puff pastry will be much thicker and will not achieve the intended flaky, airy texture of the laminated crescent dough.
How do I prevent the cream cheese filling from leaking through the bottom crust?
Pinch every seam tightly together. The raw dough needs a continuous, sealed barrier across the bottom layer before the filling is added; this prevents seepage during the initial bake.
What is the best way to slice the bars cleanly for serving at a party?
Use a long, sharp knife dipped in hot water. Wipe the knife clean between every single cut to ensure the white filling doesn't smear the dark cinnamon topping.
How long must the churro cheesecake cool before slicing?
Cool for at least 30 minutes at room temperature. This allows the proteins and fats in the filling to set properly, ensuring the bars hold their shape when cut.
Is it true that using brown sugar on top instead of granulated sugar creates a softer crust?
Yes, this is factually true. Brown sugar contains molasses, which is a liquid binder that prevents the crystalline structure needed for a true "shatter" effect.
How can I make this recipe ahead of time for a large catering event?
Bake completely, cool, cut, and then freeze the bars. If you’re worried about the texture loss, you can achieve similar successful binding techniques when making a rich custard base, like in our Arroz con Leche Recipe.
What temperature should the cream cheese and egg be when mixing the filling?
Both the cream cheese and egg must be at room temperature. This ensures they emulsify smoothly without creating any visible white lumps in the final baked product.
Simple Churro Cheesecake
Ingredients:
Instructions:
Nutrition Facts:
| Calories | 195 kcal |
|---|---|
| Protein | 2.4 g |
| Fat | 11.5 g |
| Carbs | 20.6 g |
| Fiber | 0.2 g |
| Sugar | 13.5 g |
| Sodium | 150 mg |
