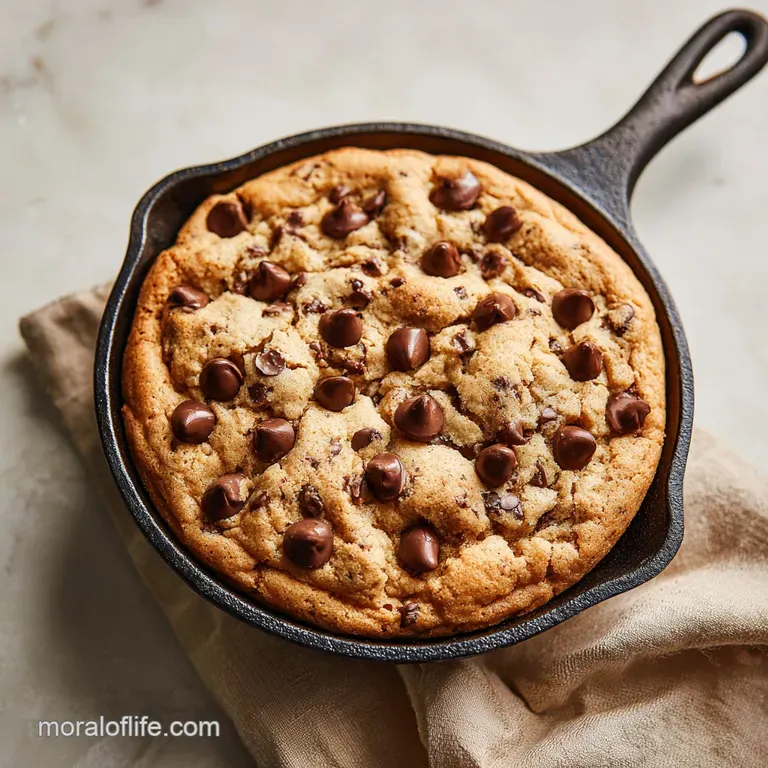
Skillet Chocolate Chip Cookie Recipe
- Time: Active 10 minutes, Passive 20 minutes, Total 30 minutes
- Flavor/Texture Hook: Shatter crisp edges with a velvety, molten center
- Perfect for: Family movie nights or effortless dinner party desserts
You know that specific smell when butter starts to foam and brown in a heavy pan? It’s that nutty, toasted aroma that practically pulls you into the kitchen by the nose. The first time I tried a Skillet Chocolate Chip Cookie, I was skeptical.
I thought, "Why not just make individual cookies?" Then I saw the way the cast iron creates this incredible, caramelized crust that a baking sheet just can't touch.
The real magic happened when I pulled it out of the oven and the center was still slightly wobbly, smelling like vanilla and dark sugar. We didn't even bother with plates; we just grabbed spoons and dove in while the chocolate was still molten.
It felt like a rebellious way to eat dessert, and honestly, I’ve never gone back to the standard scoop and bake method for weeknights since.
This recipe is designed for those moments when you want a crowd pleasing treat without the fuss of multiple baking trays. It’s reliable, fast, and yields a texture that's part fudgy, part crunchy.
We're skipping the fancy equipment here and focusing on simple mixing techniques that guarantee success on your very first try. Let's get that skillet ready.
Essential Recipe Performance Metrics
The Thermal Power of Cast Iron Cast iron retains heat significantly better than aluminum, creating a deep golden crust through constant contact. This high thermal mass ensures the center stays soft while the exterior achieves a distinct, satisfying shatter.
| Servings | Ingredient Adjustments | Pan Size | Cook Time |
|---|---|---|---|
| 4 people | Half all ingredients | 15cm Skillet | 15 minutes |
| 8 people | Use quantities below | 25cm Skillet | 20 minutes |
| 12 people | 1.5x all ingredients | 30cm Skillet | 25 minutes |
When you are deciding between a homemade version and the stuff you find in the refrigerated aisle, the choice usually comes down to texture. store-bought doughs are often loaded with preservatives to keep them shelf stable, which can lead to a weirdly oily finish when baked in a hot skillet.
| Feature | Fresh Homemade Dough | Shortcut Tub Dough |
|---|---|---|
| Texture | Crispy edges, velvety center | Often soft and uniform throughout |
| Flavor | Deep butter and vanilla notes | Mostly sweet with artificial hints |
| Control | You choose the chocolate quality | Pre mixed and often very sweet |
A fresh Skillet Chocolate Chip Cookie allows you to control the "gooey factor" by pulling it out exactly when the edges look set. This is much harder to achieve with pre made doughs that are formulated to bake evenly through.
Selecting the Right Components
Before we start mixing, let's look at why these specific ingredients matter for this cast iron bake. We aren't just tossing things in a bowl; we are building a structure that can stand up to the intense heat of the skillet.
Component Analysis
| Ingredient | Science Role | Pro Secret |
|---|---|---|
| Dark Brown Sugar | Adds moisture and acidity | Pack it tight for a deeper toffee flavor |
| Baking Soda | Promotes browning (Maillard) | Ensure it is fresh so the cookie rises |
| Unsalted Butter | Provides fat and flavor | Melt it slowly to avoid burning the solids |
For another rich treat that handles texture beautifully, you might enjoy my Puffy Peanut Butter recipe which uses similar fat to sugar ratios.
- 113g Unsalted butter
- Why this? Controlled salt levels allow the vanilla and chocolate to shine.
- 100g Dark brown sugar
- Why this? Higher molasses content creates a fudgier, more chewy texture.
- 65g Granulated sugar
- Why this? This is what gives those edges their signature crunch.
- 1 Large egg
- Why this? Provides the protein structure to hold the heavy chocolate chips.
- 5ml Pure vanilla extract
- Why this? Rounds out the sweetness with floral, earthy notes.
- 140g All purpose flour
- Why this? The perfect protein balance for a soft yet sturdy crumb.
- 1/2 tsp Baking soda
- Why this? Reacts with the brown sugar for a perfect lift.
- 1/2 tsp Flaky sea salt
- Why this? Cuts through the richness and enhances the dark chocolate.
- 170g Semi sweet chocolate chips
- Why this? They hold their shape better than chopped bars in high heat.
Required Kitchen Gear List
You don't need a stand mixer for this, which is part of the charm. A simple whisk and a sturdy spatula will do the trick. The most important player is, of course, the skillet. A 25cm (10 inch) cast iron skillet is the gold standard here because it distributes heat so evenly.
If you don't have cast iron, a heavy stainless steel oven proof frying pan can work, though you might lose some of that intense bottom browning. You'll also need a couple of mixing bowls one for the dry stuff and a larger one for the wet ingredients.
Chef Tip: Freeze your chocolate chips for 10 minutes before folding them in. This prevents them from melting instantly into the warm dough, giving you distinct pockets of chocolate rather than a brown tinted dough.
Executing the Perfect Bake
- Heat the oven. Set your temperature to 180°C (350°F) and place your rack in the middle position. Note: This ensures the heat circulates evenly around the skillet.
- Melt the butter. In your 25cm skillet over low heat, melt the 113g of butter until completely liquid but not bubbling.
- Mix the sugars. Pour the melted butter into a large bowl and whisk in the 100g dark brown sugar and 65g granulated sugar until the mixture looks like wet sand.
- Add the bind. Whisk in the egg and 5ml vanilla extract until the mixture becomes glossy and smooth.
- Whisk dry ingredients. In a separate small bowl, stir together the 140g flour, 1/2 tsp baking soda, and 1/2 tsp sea salt.
- Combine the base. Gradually stir the dry ingredients into the wet mixture until just a few streaks of flour remain. Note: Overmixing at this stage will make the cookie tough.
- Fold in chocolate. Gently stir in 170g of chocolate chips.
- Prepare the skillet. Wipe your skillet clean (it should still have a light coating of butter) and press the dough evenly into the bottom.
- Bake the cookie. Place in the oven for 18-20 minutes until the edges are golden brown and starting to pull away from the sides.
- Cool and set. Remove from the oven and let it sit in the skillet for at least 10 minutes. The center will firm up as it cools.
Similar to the technique used in my Skillet Pan Cookie recipe, the residual heat from the pan is what finishes the cooking process. If you pull it out when the center looks fully "done," it will end up dry and overcooked by the time you eat it.
Fixing Common Texture Issues

Even with a simple recipe, things can go sideways. Usually, it's a matter of temperature or timing. If your cookie feels more like a cake, you might have over creamed the butter and egg, incorporating too much air.
Solving a Greasy Bottom
Sometimes the butter separates from the dough during baking, leaving a pool of oil at the bottom. This usually happens if the butter was too hot when you added the sugars and egg.
| Problem | Root Cause | Solution |
|---|---|---|
| Oily Texture | Butter was boiling when mixed | Let melted butter cool for 5 mins before adding sugar |
| Hard/Dry Cookie | Overbaked in the skillet | Pull from oven while the center still jiggles slightly |
| Sunken Center | Too much baking soda or old soda | Double check measurements and expiration dates |
Common Mistakes Checklist
- ✓ Let the melted butter cool slightly before adding the egg to prevent "scrambling" it.
- ✓ Use a room temperature egg so it emulsifies properly with the fat.
- ✓ Avoid over mixing once the flour is added to keep the texture velvety.
- ✓ Don't skip the resting time; the skillet continues to bake the cookie for several minutes after leaving the oven.
- ✓ Measure your flour using the "spoon and level" method rather than packing it into the cup.
Adapting for Dietary Needs
If you're cooking for friends with specific needs, this recipe is actually quite flexible. Because we aren't relying on a complex rise like a souffle, swaps don't usually ruin the structural integrity of the dish.
| Original Ingredient | Substitute | Why It Works |
|---|---|---|
| All purpose Flour | gluten-free 1 to-1 Blend | Provides structure. Note: May result in a slightly grittier texture. |
| Semi sweet Chips | Dark Chocolate Chunks | Higher cocoa content. Note: Less sweet, more intense flavor. |
| Unsalted Butter | Coconut Oil (Solidified) | Similar fat ratio. Note: Adds a slight tropical aroma. |
Creating a Vegan Version
To make this vegan, swap the butter for a high-quality vegan buttery stick and use a "flax egg" (1 tablespoon ground flaxseed mixed with 3 tablespoons water). The texture will be slightly denser and more like a blondie, but it still gets those fantastic crispy edges in the cast iron.
Storing and Using Scraps
The best part about a Skillet Chocolate Chip Cookie is that it stays moist longer than individual cookies because of its thickness. However, you need to store it correctly to keep that edge from going stale.
- Fridge
- Store slices in an airtight container for up to 4 days.
- Freezer
- You can freeze baked wedges for up to 3 months. Wrap them tightly in plastic wrap then foil.
- Reheating
- To get that "just baked" feel, pop a slice in the microwave for 15 seconds or in a toaster oven at 150°C for 5 minutes.
Zero Waste Tips If you find the edges have become too hard after a few days, don't throw them away. Crumble the leftovers over vanilla bean ice cream or blend them into a thick milkshake. The caramelized bits add an incredible texture that fresh cookies just don't have.
You can also use the crumbs as a base for a cheesecake crust!
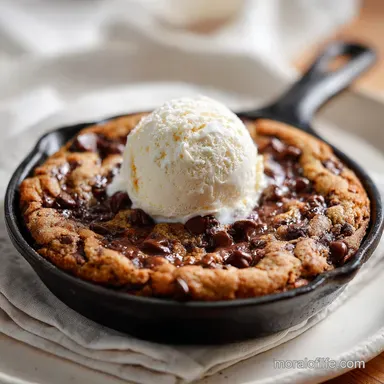
Serving for Maximum Impact
While you can certainly eat this plain, the heat of the skillet practically begs for a cold topping. The classic move is a massive scoop of vanilla ice cream right in the center of the pan. The way the ice cream melts into the warm chocolate crevices is exactly why we bake it in a skillet in the first place.
- The Salty Finish
- Sprinkle extra flaky sea salt and a drizzle of warm caramel over the top.
- The Nutty Crunch
- Add toasted pecans or walnuts on top of the dough before baking.
- The Fruit Twist
- Serve with fresh raspberries to cut through the heavy sugar.
- For a Molten Center
- Bake for 17 minutes and serve immediately.
- For a Chewy Slice
- Bake for 20 minutes and let it cool completely in the pan.
- For an Ultra Crisp Bottom
- Increase the granulated sugar by 20g and decrease the brown sugar by the same amount.
Whether you're making this for a birthday or just a random Tuesday, remember that the skillet is your best friend. It’s forgiving, it’s rustic, and it makes the whole house smell like a bakery. Just don't forget the spoons! For more cookie inspiration, check out my best chocolate chip cookies if you're ever in the mood for the traditional individual scoops.
Debunking Common Baking Myths
One big myth is that you must "season" the skillet specifically for cookies. While a well seasoned pan helps, the high fat content in this dough means it's very unlikely to stick. You don't need a special "dessert only" pan; the soap and water you use for your steaks won't flavor your cookie if rinsed well.
Another misconception is that the dough needs to be chilled. In a skillet recipe, chilling isn't necessary because we aren't worried about the cookies spreading too much on a flat sheet. The walls of the skillet hold everything in place, so you can go from mixing to eating in record time.
Searing the butter doesn't "lock in" moisture either; it simply changes the flavor profile to be more complex. high-quality vanilla and fresh soda are much more important for the final result.

Recipe FAQs
Should I use store-bought refrigerated dough instead of mixing from scratch?
No, stick with fresh dough. store-bought doughs often contain stabilizers that result in an oily texture instead of the desired crispy edges and gooey center.
How to prevent the skillet cookie from sticking to the cast iron pan?
Grease the skillet thoroughly with butter or oil, then lightly dust with flour or brown sugar. The high fat content of the dough helps, but a good initial coating ensures clean release when slicing.
Is it necessary to use cast iron, or can I use a regular cake pan?
No, cast iron is strongly recommended for optimal texture. Cast iron retains heat exceptionally well, creating the necessary deep, caramelized crust that standard aluminum pans cannot replicate.
What is the best method for cooling the skillet cookie before serving?
Cool in the skillet for at least 10 minutes on a wire rack. This crucial rest time allows the molten center to set enough so the cookie holds its shape when sliced, rather than collapsing.
How do I adjust the recipe if I want an ultra chewy texture instead of a fudgy one?
Increase the dark brown sugar content and slightly reduce the granulated sugar. The molasses in brown sugar introduces moisture and chewiness, similar to the principle we use for balancing flavor in our Chocolate Orange Cheesecake recipe.
What temperature should my oven be set to for this recipe?
Set your oven to 180°C (350°F). This moderate heat allows the edges to set and brown gradually without burning while the center finishes cooking through residual heat.
How can I store leftovers to maintain that fresh from-the-oven gooeyness?
Store slices airtight at room temperature for up to 4 days. For longer storage, wrap tightly and freeze; when reheating, use a toaster oven for 5 minutes to revive the crispy edges, much like the technique for crisping up day-old bread in our S'mores Bites in recipe.
Skillet Cookie Recipe Chocolate Chip
Ingredients:
Instructions:
Nutrition Facts:
| Calories | 356 kcal |
|---|---|
| Protein | 3.7 g |
| Fat | 17.5 g |
| Carbs | 46.7 g |
| Fiber | 2.2 g |
| Sugar | 32.5 g |
| Sodium | 215 mg |
