Smores Chocolate Cake: Rich Cocoa and Toasted Meringue
- Time: Active 30 minutes, Passive 35 minutes, Total 1 hours 5 mins
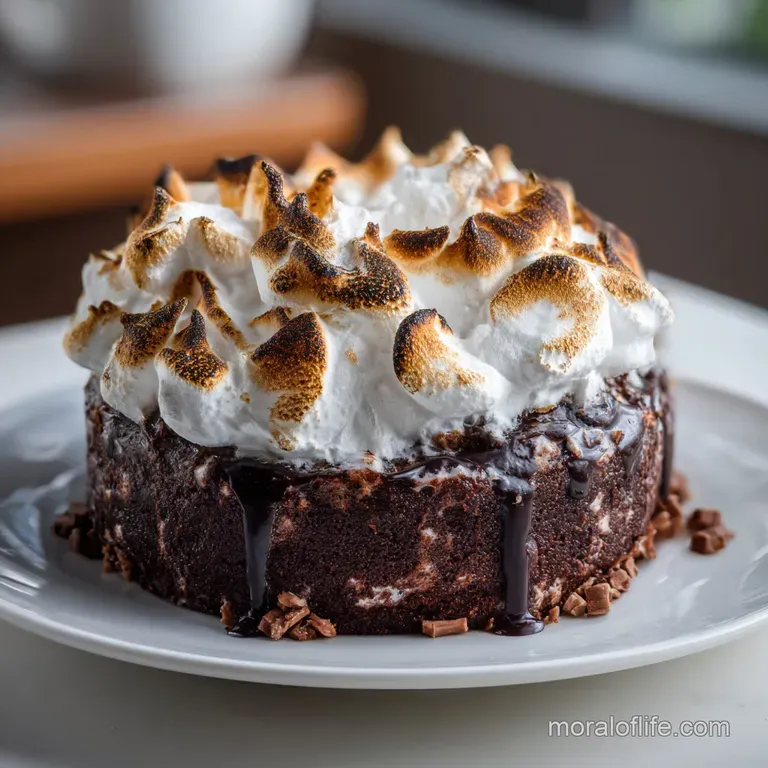
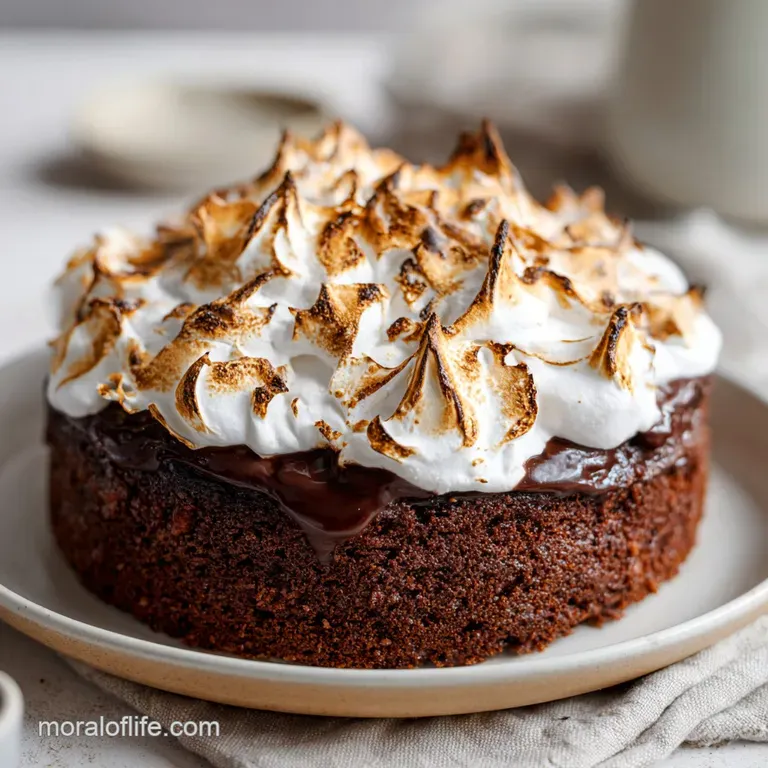
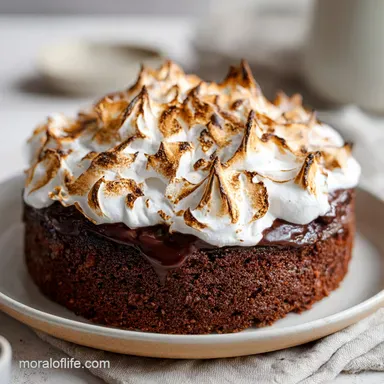
- Flavor/Texture Hook: A shatter crisp graham base topped with fudgy chocolate and a toasted, cloud like marshmallow finish.
- Perfect for: Outdoor dinner parties, birthday celebrations, or when you need a reliable, crowd-pleasing dessert that travels well.
- The Ultimate Recipe for a Homemade Smores Chocolate Cake
- Unlocking the Secrets of Moist Crumb and Toasted Topping
- The Numbers That Guarantee Your Baking Success
- Sourcing the Best Components for Your Chocolate Base
- The Gear You Need for Torching and Whipping
- Step by Step Path to a Gourmet Smores Masterpiece
- Fixing Sticky Meringue and Crumbly Crust Problems
- Creative Variations to Customize Your Dessert Layers
- Keeping Your Cake Fresh and Reducing Kitchen Waste
- How to Present and Pair Your Finished Treat
- Common Baking Misconceptions Debunked
- Recipe FAQs
- 📝 Recipe Card
The Ultimate Recipe for a Homemade Smores Chocolate Cake
There is something hypnotic about the blue orange flicker of a kitchen torch hitting a snowy peak of meringue. I remember the first time I tried making a Smores Chocolate Cake for a backyard get together.
I used a standard box mix and some store-bought fluff, thinking it would be "good enough." It wasn't. The fluff dissolved into a sticky puddle, and the cake was too sweet to finish. That’s when I realized the real hero of this dish isn't the marshmallow it's the Dutch processed cocoa powder.
Dutch processed cocoa is the secret to that dark, mahogany color and the mellow, smooth flavor that defines a high end chocolate bake. Unlike natural cocoa powder, which is acidic and can be a bit harsh, Dutch processed cocoa has been washed in an alkaline solution.
This neutralizes the acid and allows the earthy notes of the chocolate to shine without the bitter bite. In this recipe, it provides the perfect bitter sweet contrast to the honey sweetened meringue.
If you try to swap it for regular cocoa, the cake will be lighter in color and might react differently with the baking soda, potentially leaving you with a metallic aftertaste. Trust me on this: seek out the dark stuff. It’s the difference between a "nice" cake and one that people talk about for weeks.
We aren't just making a cake; we’re building a texture profile. We start with a base of whole wheat graham crackers, held together with grass fed butter and a hint of honey. Most people skip the egg white in the crust, but that’s a mistake I once made.
The egg white acts as a structural glue, ensuring the crust doesn't crumble into a sandy mess when you slice into it. You want that distinct snap when your fork hits the bottom.
It's these small details the choice of spelt flour for a nutty depth and avocado oil for a silky crumb that turn a simple treat into a sophisticated dessert.
Unlocking the Secrets of Moist Crumb and Toasted Topping
The Bloom Effect: Adding boiling water to the cocoa powder and espresso mixture dissolves the solids instantly, releasing trapped flavor compounds and ensuring a velvety, lump free batter.
Structural Binding: Using an egg white in the graham cracker base creates a protein network that prevents the melted butter from making the crust greasy or overly fragile after baking.
Honey Stability: Substituting honey for granulated sugar in the Swiss meringue results in a more elastic, stable foam that holds its "stiff peaks" longer without weeping or becoming grainy.
Buttermilk Acidity: The lactic acid in the buttermilk reacts with the baking soda to create tiny carbon dioxide bubbles, providing a light lift that counteracts the density of the spelt flour.
| Method | Total Time | Texture Outcome | Best For |
|---|---|---|---|
| Traditional Oven | 1 hours 5 mins | Crisp crust, tender crumb | Classic presentation and optimal flavor development |
| Individual Ramekins | 45 minutes | Maximum toasted surface area | Dinner parties where everyone wants their own "torch moment" |
| Sheet Cake Style | 50 minutes | Thinner layers, easy to slice | Large crowds, potlucks, and effortless transport |
Choosing the right method depends on your crowd, but I personally love the traditional 8 inch round pans. It gives you that height and drama when you pile the meringue on top. If you’re feeling adventurous, the ramekin method is a total crowd pleaser because everyone gets to watch you torch their dessert right at the table. For more inspiration on individual treats, you might enjoy reading about my Moist Homemade Chocolate Cupcakes which use a similar blooming technique to get that deep chocolate hit.
| Component | Science Role | Pro Secret |
|---|---|---|
| Dutch Processed Cocoa | Alkalized flavor | Sift it twice; it clumps more than natural cocoa due to the processing method. |
| Spelt Flour | Structural protein | Don't overmix; spelt has a more delicate gluten structure than all purpose wheat. |
| Avocado Oil | Fat/Moisture | Use oil over butter for a crumb that stays soft even if the cake is refrigerated. |
| Egg Whites (Meringue) | Aeration | Ensure the bowl is glass or metal; even a drop of fat from a plastic bowl will deflate your peaks. |
The Numbers That Guarantee Your Baking Success
When you're aiming for that first try success, timing is everything. I've spent enough time staring at an oven door to know that 350°F (175°C) is the sweet spot for this specific batter.
Any hotter and the spelt flour can dry out; any cooler and the baking soda won't get that initial "kick" it needs to lift the heavy cocoa. We are looking for three specific checkpoints during this process. First, the crust should bake for exactly 8 minutes until it smells like toasted honey.
Second, the cake layers take 25 to 30 minutes you're looking for a toothpick to come out with just a few moist crumbs, not a dry stick. Finally, that meringue needs to hit 160°F over the double boiler.
This isn't just for safety; it's the temperature where the egg proteins denature and wrap around the air bubbles you're about to whip in, creating that signature marshmallow fluffiness.
Everything about this Smores Chocolate Cake is designed for the modern home cook who wants reliability without sacrificing the "wow" factor. We're using whole wheat graham crumbs for a more robust flavor and coconut sugar to keep the sweetness from being cloying.
The recipe yields 12 generous servings, making it perfect for a weekend gathering. You can even prep the cake layers a day in advance. In fact, the flavor often deepens overnight as the moisture redistributes.
Just wait to do the meringue and torching until you're nearly ready to serve, as that toasted aroma is best when it's fresh.
Sourcing the Best Components for Your Chocolate Base
Before you head to the shop, let's talk about the quality of these ingredients. Since this cake is all about the contrast of textures, the "hero" items really matter. For the graham crumbs, I prefer a whole wheat version. It adds a grainier, more rustic texture that stands up to the silky chocolate.
If you can’t find them pre crushed, just pulse some high-quality graham crackers in a food processor until they look like coarse sand.
- 150g Whole wheat graham cracker crumbs
- Substitute: Digestive biscuits (same weight). Why this? Provides the essential "campfire" crunch and structural base for the cake.
- 42g Unsalted grass fed butter, melted
- Substitute: Coconut oil (refined). Why this? Binds the crumbs and adds a rich, creamy mouthfeel to the crust.
- 1 tbsp Honey
- Substitute: Maple syrup. Why this? Adds floral sweetness and helps the crust caramelize during the 8 minute bake.
- 1 Egg white
- Substitute: 1 tbsp aquafaba. Why this? The "glue" that prevents the crust from crumbling when sliced.
- 210g Spelt flour
- Substitute: All purpose flour. Why this? Offers a subtle, nutty flavor that complements the graham cracker base perfectly.
- 75g Dutch processed cocoa powder
- Substitute: high-quality natural cocoa (though the flavor will be more acidic). Why this? Crucial for the dark color and smooth, intense chocolate profile.
- 1 tsp Espresso powder
- Substitute: Instant coffee granules. Why this? Doesn't taste like coffee; it simply makes the chocolate taste more "chocolatey."
- 1.5 tsp Baking soda
- Substitute: 4.5 tsp baking powder (if omitting buttermilk). Why this? Reacts with buttermilk for a perfect, airy rise.
- 0.5 tsp Salt
- Substitute: Sea salt. Why this? Sharpens the flavors and balances the sweetness of the meringue.
- 100g Coconut sugar
- Substitute: Brown sugar. Why this? Provides a caramel like depth without being overly processed.
- 1 cup low-fat buttermilk
- Substitute: 1 cup milk + 1 tbsp lemon juice. Why this? Tenderizes the spelt flour's gluten for a soft crumb.
- 0.5 cup Avocado oil
- Substitute: Light olive oil or melted coconut oil. Why this? Ensures the cake remains moist even after being refrigerated.
- 2 Large eggs
- Substitute: Flax eggs (may be denser). Why this? Provides structure and richness to the batter.
- 1 cup Boiling water
- Substitute: Hot brewed coffee. Why this? "Blooms" the cocoa, intensifying the flavor and smoothing the batter.
For the frosting, we are using a Swiss Meringue method. You’ll need 4 egg whites, 200g honey, 0.5 tsp cream of tartar, and 1 tsp pure vanilla bean paste.
The vanilla bean paste is a small luxury, but seeing those tiny black specks in the white frosting makes the cake look so much more professional.
The Gear You Need for Torching and Whipping
You don't need a professional bakery setup for this Smores Chocolate Cake, but a few specific tools will make your life much easier. First and foremost: a kitchen torch. While you can use the oven broiler to toast the meringue, it’s risky.
The broiler heats the whole cake, which can cause the meringue to melt or the cake to dry out. A torch gives you surgical precision. You can "paint" the brown highlights exactly where you want them.
A stand mixer (like a KitchenAid) is also a massive help for the meringue. You’ll be whisking those egg whites for about 5 to 7 minutes to get those stiff, glossy peaks. Doing that by hand is a workout you probably don't want while you're trying to host a party.
Also, make sure you have two 8 inch round cake pans. Lining them with parchment paper is non negotiable here because the graham cracker base can be a bit sticky due to the honey.
Chef's Tip: To get the cleanest slices, dip your knife in hot water and wipe it dry between every single cut. This prevents the sticky meringue from pulling at the delicate chocolate cake layers.
step-by-step Path to a Gourmet Smores Masterpiece
- Preheat and Prep. Set your oven to 350°F (175°C). Line the bottoms of two 8 inch round pans with parchment paper and grease the sides lightly. Note: This ensures the honey rich crust doesn't weld itself to the pan.
- Forge the Foundation. In a medium bowl, stir together the 150g graham crumbs, 42g melted butter, 1 tablespoon of honey, and that essential egg white. Press this mixture firmly into the bottom of your prepared pans.
- Bake the Base. Slide the pans into the oven for 8 minutes until golden and fragrant. Remove them and let them sit while you prep the batter. This "pre bake" is what gives you that distinct shatter crisp texture.
- Sift the Drys. In a large mixing bowl, sift the 210g spelt flour, 75g Dutch cocoa, 1 tsp espresso powder, baking soda, and salt. Note: Sifting is vital because Dutch cocoa is prone to stubborn lumps.
- Whisk the Wets. In a separate bowl, beat the 2 eggs with 100g coconut sugar, 1 cup buttermilk, and 0.5 cup avocado oil until smooth and pale.
- The Great Merge. Pour the wet ingredients into the dry. As you stir, slowly pour in the 1 cup of boiling water. The batter will be thin don't panic! This is exactly what you want for a fudgy, moist result.
- The Second Bake. Divide the batter over the pre baked crusts. Bake for 25-30 minutes until a toothpick comes out clean. Let the cakes cool completely in the pans before trying to remove them.
- The Meringue Bath. Place 4 egg whites and 200g honey in a heatproof bowl over a pot of simmering water. Whisk constantly until the mixture hits 160°F. It should look opaque and feel hot to the touch.
- Whip to Glory. Remove from heat. Add the cream of tartar and vanilla bean paste. Whip on high speed for about 5 minutes until stiff, glossy peaks form and the bowl feels cool.
- The Final Torch. Stack your cake layers with a bit of meringue in the middle. Pile the rest on top in big, dramatic swoops. Use your kitchen torch to brown the edges until they look like toasted marshmallows.
Fixing Sticky Meringue and Crumbly Crust Problems
Why Your Meringue Is Soupy
If your meringue refuses to form peaks, it’s usually one of two things: fat or temperature. Even a tiny speck of egg yolk or a bit of grease on your whisk will prevent the proteins from bonding. Always wipe your bowl with a little lemon juice or vinegar before starting.
Also, if you don't heat the honey and whites to 160°F, the structure won't be stable enough to hold the air you're whipping in.
The Crust Is Falling Apart
A crumbly base usually means it wasn't pressed down firmly enough or the egg white was skipped. You really need to use the bottom of a flat measuring cup to pack those graham crumbs into a solid disc.
If it's already baked and falling apart, you can often "save" it by letting the cake cool completely in the fridge, which helps the butter and honey solidify the structure.
| Problem | Root Cause | Solution |
|---|---|---|
| Cake is Dry | Overbaking or too much flour | Pull the cake when the toothpick has a few moist crumbs; don't wait for it to be bone dry. |
| Crust is Soggy | Not pre baking long enough | Ensure the crust is golden and "set" before adding the liquid batter. |
| Meringue Weeps | Humidity or under whipping | Add a pinch more cream of tartar and ensure you whip until the bowl is cool to the touch. |
Common Mistakes Checklist:
- ✓ Never skip sifting the cocoa; Dutch processed cocoa loves to form little pebbles that won't dissolve.
- ✓ Use room temperature eggs and buttermilk to ensure the avocado oil emulsifies properly.
- ✓ Don't open the oven door during the first 20 minutes of baking, or you'll lose the "lift" from the baking soda.
- ✓ Ensure your boiling water is actually boiling when you add it to "bloom" the cocoa.
- ✓ Let the cake layers cool 100% before frosting, or the meringue will slide right off.
Creative Variations to Customize Your Dessert Layers
If you want to scale this recipe down for a smaller gathering, you can easily halve the ingredients. For a half batch, use a single 8 inch pan and reduce the bake time by about 5 minutes.
If you’re doubling it for a big party, keep the spices and salt at 1.5x the original amount to avoid overwhelming the palate. For the liquids, reduce the total by about 10% when doubling to ensure the structure remains sound.
If you’re looking for a different flavor profile altogether, you could try an "Orange Smores" version by adding 2 tablespoons of orange zest to the batter and a splash of orange liqueur to the meringue. It reminds me of the classic flavor combo in my Chocolate Orange Cheesecake, which is another fantastic option for a crowd.
| Feature | Fresh Method | Shortcut Hack | Trade off |
|---|---|---|---|
| Crust | Homemade Graham/Honey | store-bought Graham Crust | Less nutty flavor, higher sugar content. |
| Frosting | Swiss Meringue | Marshmallow Fluff | Fluff is much sweeter and can be unstable/runny. |
| Cocoa | Dutch processed | Standard Box Mix | Loses the deep, dark mahogany color and fudgy texture. |
Keeping Your Cake Fresh and Reducing Kitchen Waste
Storage for this Smores Chocolate Cake is a bit unique because of the meringue. It’s best eaten the day it's made, but it will keep in the fridge for up to 3 days. The meringue might lose some of its fluffiness, but it still tastes like a dream.
If you need to make it ahead, bake the cake layers, wrap them tightly in plastic wrap, and freeze them. They’ll stay fresh for up to 2 months. Just thaw them in the fridge overnight before adding the fresh meringue and torching.
Don't toss those leftover graham cracker crumbs! You can toss them with a little extra melted butter and sugar, bake them for 5 minutes, and use them as a "graham granola" over yogurt or ice cream.
If you have leftover egg yolks from the meringue, use them to make a rich lemon curd or a batch of homemade vanilla pudding. My goal in the kitchen is always zero waste every ingredient has a second life if you're creative enough.
How to Present and Pair Your Finished Treat
To really lean into the occasion ready angle, serve this cake on a rustic wooden board or a slate platter. The dark chocolate and toasted white meringue look stunning against natural textures.
If you’re serving this at a dinner party, a small pile of fresh raspberries on the side adds a bright, tart contrast to the rich chocolate.
For drinks, avoid anything too sweet. A bitter espresso or a dark roast coffee is the traditional choice, but a glass of cold milk is the nostalgic winner. If you're serving adults, a smoky bourbon or a glass of stout beer actually pairs beautifully with the charred honey notes of the meringue. If you love the combination of chocolate and honey as much as I do, you definitely need to check out these Homemade Peanut Butter Buckeyes for another bite sized treat that hits those same nostalgic notes.
Common Baking Misconceptions Debunked
One of the biggest myths I hear is that "boiling water will cook the eggs in the batter." It won't! If you add the water slowly while whisking, the temperature distributes evenly, and the only thing that happens is the cocoa "blooms," becoming more intense and flavorful.
Another common one is that you need "special" marshmallow sugar for the topping. You don't. The honey in this recipe acts as the invert sugar, which provides that stretchy, marshmallow like pull without needing corn syrup or stabilizers. It’s simpler, cleaner, and honestly, tastes much better.
Finally, people often think spelt flour makes a cake "healthy and dry." While spelt is a whole grain, it actually has a higher water solubility than wheat, meaning it can produce an incredibly moist crumb if you don't overwork the batter.
Treat it gently, and it will reward you with a texture that is light yet satisfyingly substantial.

Recipe FAQs
How to ensure the graham cracker base stays firm?
Press the mixture firmly into the parchment lined pans before baking for 8 minutes. Using the egg white as a binder prevents the crust from crumbling when you slice the final cake.
Is it necessary to use boiling water in the batter?
Yes, it is essential for the best flavor. Adding boiling water blooms the cocoa powder, which releases a deeper, more intense chocolate profile throughout the crumb.
How to achieve the perfect Swiss Meringue texture?
Whisk the egg whites and honey over a double boiler until the mixture reaches exactly 160°F. If you enjoyed mastering this velvety whipped mousse texture, you will appreciate how heat denaturing the proteins creates a stable, glossy structure that holds its shape perfectly.
Is it true I can bake the crust at 425°F for a faster result?
No, this is a common misconception. You must keep the oven at 350°F to ensure the honey in the crust does not burn or turn bitter during the 8-minute bake time.
How to tell when the cake layers are fully baked?
Check that a toothpick inserted into the center comes out clean after 25-30 minutes. The cake should feel springy to the touch, indicating the structure is set.
Can I store the finished cake in the refrigerator?
Yes, but keep it in an airtight container to prevent the meringue from absorbing other fridge odors. For the best texture, let the cake return to room temperature before serving so the crumb is tender.
How to safely toast the meringue without a professional blowtorch?
Use a small kitchen torch on a low flame, moving it constantly across the surface. Avoid holding the flame in one spot to prevent the honey based meringue from scorching or melting too quickly.
Smores Chocolate Cake
Ingredients:
Instructions:
Nutrition Facts:
| Calories | 339 kcal |
|---|---|
| Protein | 7.7 g |
| Fat | 14.7 g |
| Carbs | 49.7 g |
| Fiber | 4.4 g |
| Sugar | 31.5 g |
| Sodium | 292 mg |
