Fried Chicken: Extra Crispy and Juicy
- Time: Active 30 minutes, Passive 4 hours 20 mins, Total 4 hours 50 mins
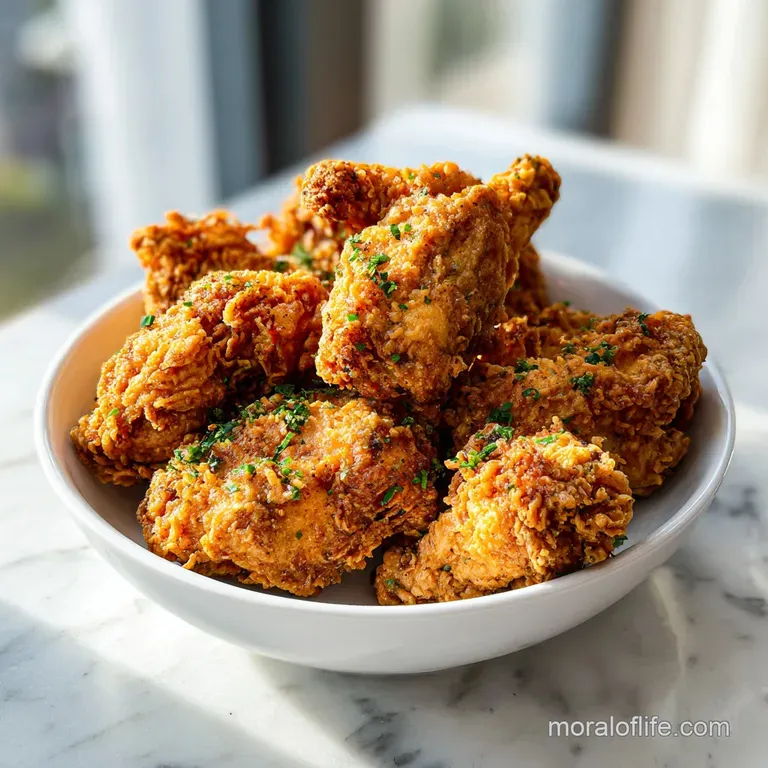
- Flavor/Texture Hook: A shatter crisp crust protecting juice heavy, tender meat.
- Perfect for: A dependable Sunday family feast or a normal Tuesday when you need a win.
- Achieving the Perfect Golden Crunch with Fried Chicken
- Why This Works
- Essential Recipe Specifications
- Everything You Need to Prepare
- Basic Tools for Success
- The Step-by-Step Frying Guide
- Fixing Common Frying Mishaps
- Flavor Variations and Substitutions
- Storing and Reusing Leftovers
- Plating and Serving Suggestions
- Kitchen Truths and Myths
- CRITICAL: Very High in Sodium
- Recipe FAQs
- 📝 Recipe Card
Achieving the Perfect Golden Crunch with Fried Chicken
There is a specific sound that happens when you lower a piece of floured chicken into 180°C oil. It isn't just a sizzle, it's a rhythmic, bubbling roar that tells you the moisture is escaping and the crust is setting. I remember the first time I got this right in my own kitchen.
I used to think you needed a deep fryer with a digital thermometer and a professional grade setup, but honestly, my old reliable Dutch oven does a better job. The house fills with that savory, peppery aroma that brings everyone into the kitchen before the timer even goes off.
We’ve all had that disappointing piece of chicken where the skin is soft or the meat is dry, but when you hear that first "shatter" as you bite into a leg, you know you've found something special.
The real hero of this entire operation isn't the oil or even the spice cabinet. It is the buttermilk. If you've ever wondered why some chicken is stringy and tough while others seem to melt, the answer is sitting in that carton. I used to skip the long soak because I was impatient, but that was a huge mistake.
The lactic acid in full fat buttermilk is gentle. It doesn't "cook" the meat like a vinegar heavy marinade would, but it slowly breaks down those lean proteins. It’s the difference between a meal that feels like work and a meal that feels like a hug.
We are using 480 ml (2 cups) of the good stuff here because it creates the perfect glue for our flour.
We’re going for a Southern style finish that stays crispy even after it cools down a little. This recipe is built for real life. It uses ingredients you probably already have in the pantry, like cornstarch and smoked paprika, but it uses them in a way that maximizes their potential.
We aren't just making dinner; we're building a reliable technique you can repeat with confidence every single week. It’s about being smart with your tools and respecting the time it takes for a marinade to actually work its magic.
Why This Works
- Enzymatic Tenderization: Lactic acid in buttermilk gently unravels protein strands, ensuring the meat stays juicy even at high frying temperatures.
- Starch Hybridization: Mixing cornstarch with all purpose flour lowers the overall gluten content, which prevents the crust from becoming tough or bread like.
- The Crag Effect: Drizzling marinade into the dry flour creates "pebbles" that fry into extra crunchy jagged bits for maximum surface area.
- Thermal Buffering: Using bone in pieces allows the bone to act as a heat conductor, cooking the meat from the inside while the oil handles the outside.
| Method | Time | Texture | Best For |
|---|---|---|---|
| Deep Frying | 15 minutes | Thick, craggy crust | The classic "shatter" crunch |
| Air Fryer | 25 minutes | Lighter, thinner skin | A lower fat weeknight option |
| Shallow Fry | 20 minutes | Uneven, rustic browning | Smaller batches in a skillet |
I usually stick to the Dutch oven method because it holds heat so much better than a shallow pan. If you choose the air fryer, you'll need to spray the chicken generously with oil, or you'll end up with dry flour spots. But for that dependable, gold standard finish, the deep fry is king.
Essential Recipe Specifications
When we talk about "Recipe Specs," we're looking at the hard data that makes this dish work. It’s easy to get lost in the "vibes" of cooking, but frying is a bit of a science project. You’re managing the moisture inside the bird against the intense heat of the peanut oil. We are working with 1.36 kg (3 lbs) of chicken, which is usually one whole bird broken down into eight or ten pieces. This feeds about 5 people comfortably, especially if you serve it with a side like a Broccoli Casserole recipe.
| Component | Science Role | Pro Secret |
|---|---|---|
| Buttermilk | Protein Softener | The fat content keeps the breast meat from drying out. |
| Cornstarch | Moisture Barrier | It stops the flour from absorbing too much oil and getting greasy. |
| Egg | Protein Binder | Acts as the "glue" that keeps the crust from sliding off. |
| Hot Sauce | Enzyme Catalyst | Vinegar and peppers add subtle heat and help the buttermilk penetrate. |
If you want the crust to be truly legendary, don't skimp on the rest time. Most people want to eat the second the chicken leaves the oil. But if you let it sit on a wire rack for exactly 5 minutes, the internal juices redistribute and the crust fully hardens.
It’s the most important "passive" step in the whole process.
Everything You Need to Prepare
For the Chicken
- 1.36 kg (3 lbs) Bone in, skin on chicken pieces (Thighs and drumsticks stay juiciest)
- 10 g (2 tsp) Kosher salt
For the Marinade
- 480 ml (2 cups) Full fat buttermilk Why this? The fat provides a richer flavor and better browning.
- 30 ml (2 tbsp) Fermented hot sauce
- 1 large Egg
For the Craggy Breading
- 375 g (3 cups) All purpose flour
- 125 g (1 cup) Cornstarch Why this? This is the secret to a "shatter" texture.
- 7 g (1 tbsp) Smoked paprika
- 8 g (1 tbsp) Garlic powder
- 8 g (1 tbsp) Onion powder
- 2 g (1 tsp) Cayenne pepper
- 4 g (2 tsp) Black pepper
- 18 g (1 tbsp) Salt
For the Frying
- 950 ml (1 quart) Peanut or vegetable oil Why this? High smoke points prevent the oil from burning.
| Original Ingredient | Substitute | Why It Works |
|---|---|---|
| Buttermilk | Plain Yogurt + Milk | Provides the same acidity and thickness for the dredge. |
| Cornstarch | Potato Starch | Offers a very similar crispy finish, though slightly heavier. |
| Peanut Oil | Canola Oil | Neutral flavor and high smoke point, though less "nutty" than peanut. |
Using the right flour is actually a big deal here. I always stick with all purpose. Bread flour has too much protein, which can make your fried chicken coating feel like a tough piece of toast rather than a delicate, crispy shell.
And don't worry about the hot sauce making it "spicy" it mostly just provides a tang that cuts through the richness of the fried skin.
Basic Tools for Success
You don't need a pantry full of gadgets to get this right. In fact, keeping it simple usually leads to better results because you can focus on the temperature. A heavy bottomed pot is your best friend here.
1. The Dutch Oven
A 5 quart cast iron Dutch oven is the gold standard. It holds onto heat like a champ. When you drop cold chicken into hot oil, the temperature naturally dips. A thin pot will struggle to recover, leading to greasy, soggy chicken. The thick walls of a Dutch oven keep things stable.
2. Instant Read Thermometer
Trusting your "gut" on when chicken is done is a recipe for raw centers. You need to hit 74°C (165°F) at the thickest part of the meat. It also helps you monitor the oil. If the oil gets too hot, the outside burns before the inside cooks.
If it's too cool, the breading just soaks up grease.
3. Wire Cooling Rack
Never, ever rest your fried chicken on paper towels. I know that’s what our grandmas did, but paper towels trap steam under the chicken. Steam is the enemy of crispiness. A wire rack allows air to circulate all the way around the piece, keeping the bottom just as crunchy as the top.
The step-by-step Frying Guide

- Prep the chicken. Season the 1.36 kg of chicken pieces with 2 tsp of salt. Note: This pre salting helps the flavor penetrate deep into the bone.
- Mix the marinade. Whisk the 480 ml of buttermilk, egg, and 2 tbsp of hot sauce in a large bowl.
- The long soak. Submerge the chicken in the buttermilk mixture. Cover and refrigerate for at least 4 hours, though 12 hours is better for maximum tenderness.
- Whisk the dry goods. In a separate large bowl, combine the 375g flour, 125g cornstarch, and all the spices (paprika, garlic, onion, cayenne, peppers, and salt).
- Create the crags. Drizzle 2 3 tablespoons of the liquid buttermilk marinade into the dry flour. Use a fork to fluff it until small, shaggy clumps form.
- The dredging process. Remove chicken from the liquid one piece at a time. Press it firmly into the flour mixture, ensuring those clumps stick to the skin. The chicken should look rugged and bumpy.
- Heat the oil. Pour the quart of oil into your Dutch oven. Heat over medium high until it reaches 180°C (350°F).
- The first batch. Carefully lower 3-4 pieces of chicken into the oil. Fry for 15–20 minutes, turning once, until the crust is deep mahogany gold and crackling.
- Check for doneness. Use your thermometer to ensure the internal temp is 74°C (165°F). The juices should run clear when pierced.
- The final rest. Place the finished chicken on a wire rack for 5 minutes. Note: This prevents the crust from steaming itself soft.
Chef's Tip: If the oil temperature drops below 160°C after adding the chicken, turn up the heat slightly for two minutes to help it recover, then dial it back down. Stability is everything.
Fixing Common Frying Mishaps
Frying can be intimidating because so much is happening at once. If your first batch doesn't look like the pictures, don't panic. Usually, it's a simple fix involving heat management or moisture control.
1. The Crust is Dark
If your breading looks like it’s burning but the meat is still raw near the bone, your oil is too hot. This often happens on electric stoves where the heat cycles. The sugar in the buttermilk and the flour will caramelize very quickly if the oil stays above 190°C.
If this happens, take the pot off the heat for two minutes, add a splash of room temperature oil to cool it down, and try again at a lower setting.
2. The Coating is Falling Off
This is the most heartbreaking problem. It usually happens for two reasons: either the chicken was too wet when it hit the flour, or you moved it too much in the pot. Once you drop the chicken in, leave it alone for the first four minutes. The crust needs time to "set" and bond to the skin.
If you poke it with tongs too early, you'll tear the coating right off.
| Problem | Root Cause | Solution |
|---|---|---|
| Greasy Chicken | Oil temperature was too low (under 160°C). | Ensure oil returns to 180°C before adding the next batch. |
| Floury Spots | Chicken wasn't pressed firmly enough into the dredge. | Use your palms to "sandwich" the flour onto the meat. |
| Blood near bone | Chicken was fried straight from the fridge. | Let the marinated chicken sit at room temp for 20 mins before frying. |
Common Mistakes Checklist
- ✓ Never overcrowd the pot; leave at least 2 inches of space between pieces so the steam can escape.
- ✓ Always use a thermometer for both the oil and the meat; guessing leads to dry or dangerous food.
- ✓ Don't skip the cornstarch; flour alone creates a "bready" crust that sags quickly.
- ✓ Ensure your chicken pieces are similar in size; don't fry a giant breast and a tiny wing at the same time.
- ✓ Use a neutral oil with a high smoke point; olive oil or butter will burn and taste bitter.
Flavor Variations and Substitutions
1. Crispy Fried Chicken Without Buttermilk
If you don't have buttermilk, you can use a "quick sour" method. Mix 480 ml of whole milk with 2 tablespoons of lemon juice or white vinegar. Let it sit for 10 minutes until it looks slightly curdled. It won't be quite as thick as the real deal, so you might need to add an extra egg to the liquid to ensure the flour sticks. If you want a different flavor profile, you could even try a Crispy Chicken Caesar style seasoning by adding dried oregano and parmesan to the flour.
2. Air Fryer Fried Chicken Adaptation
For those days when you don't want to deal with a quart of oil, the air fryer is a solid backup. To make this recipe work, you must spray the breaded chicken very thoroughly with oil spray until no white flour is visible.
Air fry at 190°C (375°F) for 12 minutes per side. It won't have the same "craggy" depth as the deep fried version, but it's remarkably dependable for a weeknight meal.
| Adjustment Type | Change | Outcome |
|---|---|---|
| Spicier Kick | Double the cayenne and add 1 tbsp chili flakes. | High heat that lingers on the tongue. |
| Herb Crust | Add 1 tbsp dried thyme and 1 tbsp dried sage. | A savory, "poultry seasoning" vibe. |
| gluten-free | Use 1:1 GF flour blend and double the cornstarch. | Very crispy, but browns faster; watch the heat! |
If you are scaling this recipe up for a party (10+ people), don't double the salt in the flour. Spices don't always scale linearly. I recommend increasing the flour and cornstarch, but keeping the salt and cayenne at 1.5x the original amount, then tasting a small "test scrap" of breading to see if it needs more.
Storing and Reusing Leftovers
Storage: Fried chicken is actually one of those rare foods that tastes great cold, but if you want to keep it, it stays fresh in the fridge for up to 4 days. Store it in a container with a piece of paper towel at the bottom to absorb any stray moisture.
Freezing: You can freeze fried chicken for up to 3 months. Wrap each piece tightly in foil, then put them in a freezer bag. To reheat, don't use the microwave unless you want a soggy mess.
Put the frozen pieces on a wire rack in a 190°C (375°F) oven for about 15–20 minutes. It’ll come back to life beautifully.
Zero Waste: Don't throw away that leftover frying oil! If it isn't burnt, let it cool, strain it through a coffee filter or fine mesh sieve, and store it in a cool, dark place. You can reuse it at least two more times.
Also, if you have tiny bits of fried batter left in the bottom of the pot (the "crumbs"), save them! They are incredible sprinkled over a salad or a bowl of mac and cheese for a little hit of salty crunch.
Plating and Serving Suggestions
1. The "Hot Honey" Drizzle
One of my favorite ways to serve this is to take a little bit of honey, microwave it for 15 seconds, and stir in a teaspoon of the same hot sauce we used in the marinade. Drizzle that over the hot chicken right before it hits the table. The sweet and spicy combo against the salty crust is just perfection. It pairs incredibly well with a Fried Pickle Dipping Sauce if you want that tangy contrast.
2. The Southern Spread
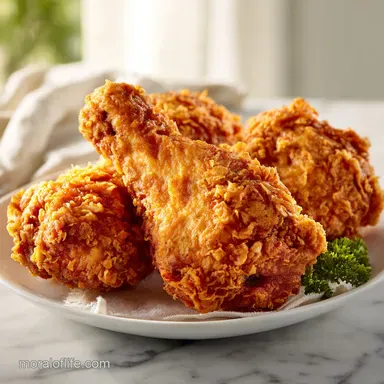
Fried chicken is a social food. I like to serve it family style on a big wooden board or a platter lined with brown parchment paper. Surround the chicken with lemon wedges the acid really helps cut through the fat of the fry.
If it’s a normal Tuesday, just some simple slaw and a piece of cornbread is enough. If you're feeling fancy, a few sprigs of fresh parsley or even some pickled jalapeños can make the plate pop.
3. Precision Checkpoints for Success
- The Soak: Minimum 4 hours. Anything less and the lactic acid hasn't had time to penetrate the fibers.
- The Oil: 180°C (350°F). If you drop below 160°C, the breading will absorb oil and become "heavy."
- The Internal Temp: 74°C (165°F). This is the safety line where the meat is fully cooked but hasn't started to dry out yet.
Kitchen Truths and Myths
One of the biggest myths in frying is that you need to "seal in the juices" by searing the meat at high heat. That’s not actually how physics works. The moisture in chicken stays inside because the crust forms a physical barrier and the proteins tighten just enough to hold onto the water.
Searing is about flavor the Maillard reaction not a "seal." Another myth is that you can't use the same oil for chicken and fish. You actually can, as long as you strain it well, though the chicken oil might take on a very slight "ocean" scent if the fish was particularly oily.
Finally, don't believe the idea that you have to use a thermometer for every single piece. Once you've checked the first few and you know your oil is stable at 180°C, and your timing is consistently 18 minutes, you can trust the process. Frying is about building a rhythm.
Once you get that golden mahogany color down, you'll be able to tell it's done just by the way the bubbles start to slow down. When the bubbling quietens, it means the moisture is mostly gone from the crust, and that is your cue that the crunch is locked in.
Trust your senses, keep your oil steady, and you'll have a dependable masterpiece every time.

CRITICAL: Very High in Sodium
1940 mg 1940 mg of sodium per serving (84% 84% of daily value)
The American Heart Association recommends a limit of about 2,300mg of sodium per day, with an ideal limit of less than 1,500mg for most adults.
Tips to Reduce Sodium
-
Drastically Reduce Added Salt-25%
The recipe calls for a combined 3 tsp of salt. Omit both 2 tsp of Kosher salt and 1 tbsp of salt entirely. You can always add salt at the table if needed.
-
Choose Low-Sodium Hot Sauce-20%
Fermented hot sauce can be a significant source of sodium. Look for a low-sodium or no-salt added variety to replace the 2 tbsp in the recipe.
-
Amplify Flavor with Herbs and Spices
Enhance the flavor profile by increasing the amounts of garlic powder, onion powder, smoked paprika, and cayenne pepper. Consider adding fresh herbs like parsley or chives for brighter notes.
-
Rinse Chicken Before Use-5%
Although bone-in, skin-on chicken is used, a quick rinse under cold water can help remove some surface sodium, especially if the chicken was brined.
Recipe FAQs
What is the secret to making good fried chicken?
The secret is the craggy crust. Drizzle 2 3 tablespoons of your marinade into the flour mixture before dredging, as this creates small crumbs that become extra crunchy when fried.
How to cook chicken for diabetic patients?
Prioritize skin removal after frying and serve with fiber rich sides. Since fried items are high in calories, balancing the meal with lighter options like our lemon chicken orzo can help manage overall glycemic impact.
Can heart patients eat fried chicken?
No, it is generally not recommended for heart health. Due to the high saturated fat content from the frying process, this dish should be considered an occasional indulgence rather than a dietary staple.
Do you dip the chicken in egg or flour first?
Dip the chicken into the buttermilk and egg marinade first. After soaking for 4 to 12 hours, remove the pieces and dredge them directly into the flour mixture, pressing firmly to ensure the coating adheres.
How to ensure the chicken stays crispy after frying?
Rest the chicken on a wire cooling rack for 5 minutes before serving. This prevents the bottom of the chicken from steaming against a plate, which keeps the crust firm and crunchy.
Is it true I can crowd the pot to save time?
No, this is a common misconception that leads to soggy crusts. You must leave at least 2 inches of space between pieces so steam can escape; overcrowding drops the oil temperature and ruins the texture.
How to check if the chicken is cooked safely?
Use a digital thermometer to verify the internal temperature reaches 165°F. Never guess by color, as the exterior can brown before the center is fully cooked through.
Southern Fried Chicken
Ingredients:
Instructions:
Nutrition Facts:
| Calories | 864 calories |
|---|---|
| Protein | 44 g |
| Fat | 48 g |
| Carbs | 64 g |
| Fiber | 3 g |
| Sugar | 4 g |
| Sodium | 1940 mg |
