Valentine Strawberries
- Time: Active 20 minutes, Passive 30 minutes, Total 50 minutes
- Flavor/Texture Hook: Shatter crisp dark chocolate meeting a velvety, juice heavy berry
- Perfect for: Low stress romantic surprises, crowd-pleasing party platters, or a simple weeknight treat
- Making Better Valentine Strawberries at Home
- Important Prep and Timing Metrics
- Selecting Your Dipping Components
- Essential Gear for Dipping Berries
- Step by Step Coating Guide
- Fixing Common Coating Problems
- Swaps for Special Diets
- No Fail Kitchen Myths
- Storage and Leftover Tips
- Creative Presentation and Pairing Ideas
- Valentine Strawberries FAQs
- 📝 Recipe Card
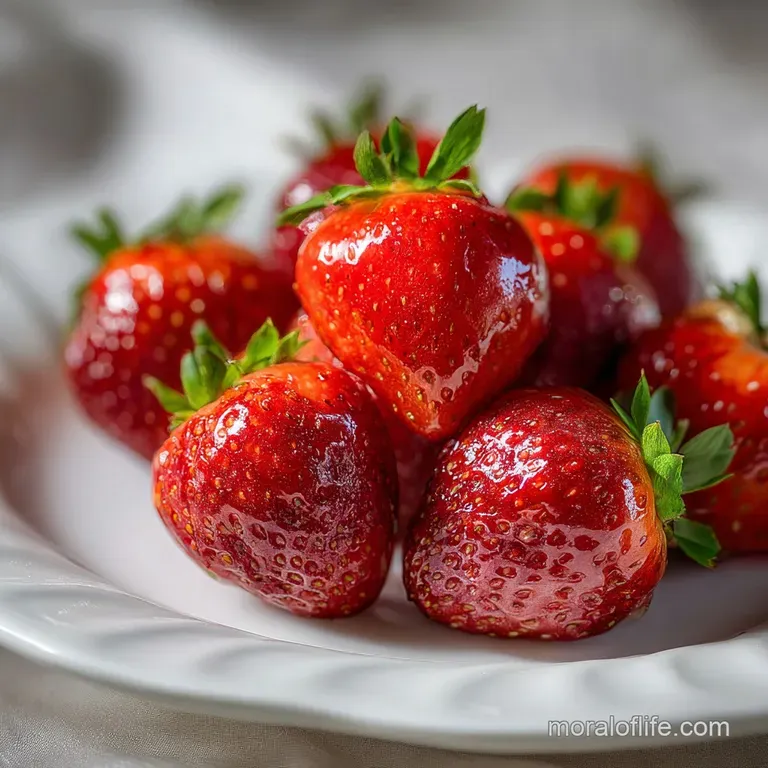
Imagine the sound of that first bite a clean, sharp shatter of dark chocolate followed immediately by the cool, floral burst of a ripe berry. We've all been there, though, haven't we?
You buy a beautiful box of fruit, melt some chocolate, and ten minutes later the coating is sliding off into a puddle of pink juice. It's frustrating and, honestly, a waste of good chocolate.
I used to think you needed a culinary degree or a fancy marble slab to get that professional look. I was wrong. After a few messy Valentine's Days and a lot of trial and error in my own kitchen, I figured out that the secret isn't in the equipment. It's in the timing and the "bone dry" rule.
If you can dry a strawberry and stir a bowl, you can make these.
We are going to skip the over complicated tempering and focus on a reliable, simple method that works every single time. Whether you're making these for a partner, your kids, or just as a treat for yourself, this guide covers the tiny details that turn a "good try" into a masterpiece.
Let's get your kitchen smelling like a boutique chocolatier.
Making Better Valentine Strawberries at Home
Getting that glossy finish on your valentine strawberries depends entirely on how you handle the fat in the chocolate. We add a tiny bit of coconut oil to help the coating flow smoothly and give it a slight sheen that doesn't look dull once it hits the fridge.
It's a reliable trick I've used for years to avoid that chalky, grey appearance that sometimes happens with melted bars.
The Science of Why it Works
Lipid Stabilization: The coconut oil lowers the melting point of the chocolate solids, creating a velvety texture that resists cracking when you bite in. Surface Tension: Removing every trace of water prevents the chocolate from "seizing" into a gritty paste, ensuring a smooth bond between the fruit skin and the coating.
Why must the berries be bone dry?
Water is the absolute enemy of chocolate. Even one stray droplet on a leaf can cause an entire bowl of melted dark chocolate to turn into a clumpy, unusable mess. This happens because the sugar in the chocolate attracts the water, forming a syrup that separates from the cocoa butter.
I always wash my berries at least two hours before I plan to dip them, letting them air dry on a clean kitchen towel.
How does the "Healthier Version" angle work?
By using 70% dark chocolate and adding hemp seeds, we're cutting down on the cloying sweetness found in store-bought versions. The hemp seeds add a mild, nutty flavor and a bit of crunch that balances the juicy acidity of the organic fruit.
It’s a simple mixing of textures that feels indulgent but leaves you feeling much better than a box of processed candy would.
Chef's Tip: Freeze your raspberry dust for 10 minutes before sifting it over the berries. Cold dust stays vibrant and doesn't clump when it hits the warm chocolate.
Important Prep and Timing Metrics
When we talk about making these treats, timing is everything. You don't want to rush the cooling process. If you shove warm chocolate into a freezing cold fridge immediately, you might get "sugar bloom," which are those weird white streaks. They are totally safe to eat, but they don't look great for a gift.
| Method | Texture Outcome | Prep Effort |
|---|---|---|
| Fresh Organic Berries | Firm, juicy, and floral | High (requires thorough drying) |
| Shortcut Frozen Berries | Soft, mushy once thawed | Low (not recommended for dipping) |
| store-bought Pre washed | Convenient but often bruised | Medium (check for soft spots) |
Giving yourself that 30 minute window for the chocolate to set at room temperature (if your kitchen is cool) or a gentle chill in the fridge is what makes the difference. I've found that patience is the most important ingredient in this recipe. While the berries set, you can get started on something like a Valentines Charcuterie Board recipe to round out the spread.
Selecting Your Dipping Components
The quality of your chocolate is the main event here. Since we aren't using a lot of ingredients, each one needs to pull its weight. I always reach for high-quality dark chocolate with at least 70% cocoa solids because it has a deeper flavor and stands up well to the natural sweetness of the fruit.
- 1 lb fresh organic strawberries: Look for medium sized ones with bright green, sturdy stems. Why this? Organic berries often have less water content and more concentrated flavor.
- 8 oz dark chocolate: Use a bar meant for eating rather than chocolate chips if possible. Why this? Eating bars contain more cocoa butter, leading to a smoother melt.
- 1 tsp virgin coconut oil: This is our secret for the "gloss" factor. Why this? It thins the chocolate just enough for a professional looking drip.
- 2 tbsp freeze dried raspberry dust: For that beautiful pink color accent. Why this? It provides an intense tartness without adding moisture.
- 1 tbsp hemp seeds: Our green color accent and texture booster. Why this? Adds a sophisticated, earthy crunch that balances the sugar.
- 2 oz white chocolate: For the classic drizzle. Why this? Provides a sharp color contrast against the dark base.
For the Base
The dark chocolate and coconut oil form the foundation. When you melt them together, avoid the temptation to stir constantly. Let the heat of the bowl do the work. If you find dark chocolate too bitter, you can easily swap it out, much like how you might adjust the sweetness in a Valentines Brunch recipe.
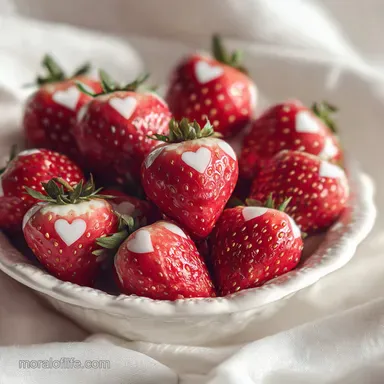
For the Valentine Decorations
This is where we focus on color balance. We have three main accents: the Ruby Red (raspberry dust), the Soft Cream (white chocolate), and the Earthy Green (hemp seeds). Adding these at different stages of the setting process creates a layered, professional look.
The raspberry and hemp seeds go on while the chocolate is "tacky" (partially set), while the white chocolate drizzle happens once the base is firm.
| Original Ingredient | Substitute | Why It Works |
|---|---|---|
| Dark Chocolate (8 oz) | Milk Chocolate (8 oz) | Sweeter profile. Note: Lower cocoa content means it sets softer. |
| Raspberry Dust (2 tbsp) | Beet Powder (1 tbsp) | Provides deep red color. Note: Use sparingly as it has an earthy taste. |
| Hemp Seeds (1 tbsp) | Finely Chopped Pistachios | Similar green hue and crunch. Note: Adds a distinct nutty flavor. |
If you are looking for a more savory route for your evening, you might consider how these flavors pair after a meal like this Valentines Food Idea recipe. The acidity of the berries is the perfect palate cleanser after a rich steak dinner.
Essential Gear for Dipping Berries
You don't need a lot of equipment, but the right bowl makes a huge difference. I prefer using a deep, narrow glass or ceramic bowl rather than a wide, shallow one. A narrow bowl allows you to submerge the entire strawberry even as the chocolate level drops.
- Small Glass Bowl: For the "double boiler" method or microwave melting.
- Parchment Paper: Essential for easy removal once the berries are set.
- Micro sifter: To get that raspberry dust perfectly even.
- Small Piping Bag: Or a simple plastic sandwich bag with the corner snipped for the white chocolate drizzle.
Chef's Tip: If you don't have a piping bag, use a fork to flick the white chocolate back and forth over the berries. It creates a more "artisan" and rustic look that's actually very trendy right now.
step-by-step Coating Guide

Making valentine strawberries is a tactile process. You’ll start to feel the weight of the chocolate on the berry as you dip. If it feels too heavy, you need to swirl it a bit longer to let the excess drip off.
- Wash and dry the berries. Ensure the 1 lb fresh organic strawberries are completely dry to the touch. Note: Any moisture will ruin the chocolate bond.
- Melt the dark chocolate. Place 8 oz dark chocolate and 1 tsp virgin coconut oil in a bowl over simmering water. Cook 3-5 min until silky and smooth.
- Prepare the landing zone. Line a flat tray with parchment paper. Note: This prevents the chocolate from sticking to the plate.
- Dip the first berry. Hold the strawberry by the stem and submerge it into the chocolate. Dip until the red skin is mostly covered.
- Swirl and lift. Slowly rotate the berry as you lift it out to let excess chocolate fall back into the bowl.
- Apply the first accents. While the chocolate is still wet, sprinkle 1 tbsp hemp seeds on the "shoulder" of half the berries.
- Add the raspberry dust. Sift 2 tbsp freeze dried raspberry dust over another section of the berries. Finish until the color is vibrant.
- Set the base. Let the berries sit on the parchment for 15 minutes until the chocolate no longer looks shiny.
- Melt the white chocolate. Use a clean bowl for the 2 oz white chocolate. Heat 30 seconds until just pourable.
- Drizzle and finish. Use a bag or fork to create thin lines over the set dark chocolate. Wait 10 mins until the drizzle is firm.
Step 1: The Critical Dehydration Phase
I cannot stress this enough: your berries must be dry. I’ve seen people try to use a hair dryer on cool settings, but honestly, just a good pat with a paper towel and an hour on the counter does the trick. If the stems are damp, they will drip water into your dipping bowl while you're working.
Step 3: The Deep Dip Technique
When you dip, don't just go straight down and up. Go in at a slight angle and rotate. This ensures that the area under the green leaves gets covered. Leaving a tiny bit of red showing at the top is actually a classic "Valentine strawberries ideas" look it lets people know exactly what's inside.
Fixing Common Coating Problems
Even with the best intentions, things happen. Maybe your kitchen is too humid, or the chocolate got a little too hot. Don't panic. Most chocolate issues are reversible if you catch them early.
Why is my chocolate sweating?
If you see tiny beads of moisture on the surface of your finished berries, it’s usually because of a temperature shock. Moving them from a very hot dipping station to a very cold fridge causes condensation.
I like to let mine sit in the coolest part of the kitchen for 20 minutes before they ever see the inside of a refrigerator.
Why did my chocolate turn thick and lumpy?
This is called "seizing." It usually happens if a drop of water got in or if you overheated it. Dark chocolate is sensitive. If it's just a little thick, you can sometimes save it by stirring in another half teaspoon of coconut oil.
If it's truly gritty and hard, it's unfortunately time to start a new batch of chocolate.
| Problem | Root Cause | Solution |
|---|---|---|
| Chocolate sliding off | Berries were too cold or damp | Dry berries at room temp for 1 hour before dipping. |
| Dull, matte finish | Chocolate was overheated | Melt slowly and stop when 20% of chunks remain; stir to melt the rest. |
| White streaks (Bloom) | Temperature shock | Cool at room temperature before refrigerating. |
If you find yourself struggling with the chocolate consistency, it might be worth checking out a similar technique used in this Valentines Chocolate Covered Strawberry recipe which goes into even more detail on the "snap" factor.
Swaps for Special Diets
One of the best things about making these at home is that you can cater to everyone’s needs. Since we are already using dark chocolate and fruit, we are halfway to a lot of dietary goals anyway.
- Downscaling: If you're just making a treat for one, use half a pound of berries and 4 oz of chocolate. Use a very small, deep ramekin for dipping so the chocolate stays deep enough to submerge the fruit.
- Upscaling: For a party, double the recipe. Work in batches of 8 berries at a time so your chocolate doesn't cool down too much while you're decorating.
- Vegan: Ensure your dark chocolate is dairy-free (most 70% bars are, but check the label). Use a vegan certified white chocolate for the drizzle.
- Keto Friendly: Swap the standard chocolate for a brand sweetened with stevia or erythritol (like Lily’s). Skip the raspberry dust if you are being very strict, and double up on the hemp seeds.
How do I make these keto friendly?
Most organic strawberries are relatively low in carbs in small servings. By using a sugar-free dark chocolate and hemp seeds, you're looking at a very keto friendly treat. The fat from the coconut oil actually helps with satiety too.
Just be careful with the white chocolate drizzle, as white chocolate is typically very high in sugar look for a keto specific version for that part.
No Fail Kitchen Myths
There are a few "old wives' tales" about chocolate dipping that actually make the process harder. Let's clear those up so you can work with confidence.
- Myth: You must use a microwave to melt chocolate. Truth: While convenient, the microwave often hot spots and burns the cocoa solids. A glass bowl over a pot of barely simmering water (a bain marie) gives you much more control and a silkier finish.
- Myth: Refrigerating berries makes them last longer. Truth: Once dipped, the strawberry starts to release moisture from the inside out. The fridge actually speeds up the "weeping" process. They are best eaten within 6 to 12 hours of being made.
- Myth: Adding water thins out thick chocolate. Truth: This is the fastest way to ruin a batch. Water will cause the chocolate to seize instantly. If you need to thin it, always use a fat like coconut oil or cocoa butter.
Storage and Leftover Tips
Chocolate covered strawberries are a "live" product. The moment you dip them, the salt and sugar interactions start pulling moisture out of the berry.
- Storage: Keep them in a cool, dry place. If you must refrigerate, place them in a single layer in a container lined with paper towels. Do not seal the lid tightly; leave it cracked a bit so moisture can escape.
- Freezing: Honestly, don't do it. Strawberries are mostly water, and when water freezes, it expands and breaks the cell walls. When you thaw a frozen chocolate covered strawberry, it becomes a mushy, watery mess inside a cracked shell.
- Zero Waste: If you have leftover melted chocolate, don't throw it out! Stir in the remaining hemp seeds and raspberry dust, pour it onto parchment paper, and let it set. You've just made a quick chocolate bark. If you have "ugly" berries that didn't dip well, chop them up and fold them into yogurt or oatmeal the next morning.
Creative Presentation and Pairing Ideas
If you're giving these as a gift, presentation is half the fun. A simple "valentine strawberries box" can be made by lining a small cardboard box with tissue paper and cupcake liners. Putting each berry in its own liner prevents them from rolling around and scuffing the chocolate finish.
The Bubbly Pairing
The bitterness of the 70% dark chocolate and the tartness of the raspberry dust pair beautifully with a dry sparkling wine. Look for a Brut Rosé; the berry notes in the wine will mirror the fresh fruit. It's a classic combination for a reason it just works.
The Valentine Charcuterie
Instead of just a plate of berries, try adding them to a larger board. Surround them with salty elements like marcona almonds or a soft brie cheese. The contrast between the sweet, snappy chocolate and the creamy, salty cheese is incredible.
You can see how I set up my boards in my other posts to get a feel for the layout.
At the end of the day, these don't have to look like they came from a high end department store. The fact that you picked out the berries, melted the chocolate, and added those little touches like the hemp seeds and raspberry dust means so much more.
Enjoy the process, and definitely enjoy the "tester" berry it's the cook's reward!

Valentine Strawberries FAQs
Why do people give strawberries on Valentine's Day?
It's traditional and symbolic. Strawberries have long been associated with love, romance, and desire due to their heart shape, vibrant red color, and sweet, luscious taste.
Why are strawberries a symbol of love?
Multiple factors contribute. Their heart like shape, rich red hue evoking passion, and aphrodisiac qualities historically linked to Venus, the Roman goddess of love, cement their romantic reputation.
Why can't you put chocolate covered strawberries in the fridge?
Condensation causes bloom. Refrigeration creates moisture on the chocolate's surface, leading to "bloom" (white streaks or spots) and can make the chocolate shell sticky or dull.
What is the most unpopular Valentine's Day candy?
It's often chalky conversation hearts. While nostalgic for some, their polarizing texture and flavor make them a frequent target for dislike among Valentine's Day treats.
How do I get a glossy finish on chocolate covered strawberries?
Use a touch of coconut oil. Adding a small amount of virgin coconut oil to melted chocolate thins it perfectly, creating a smooth, glossy coating without compromising snap.
Why must strawberries be completely dry before dipping?
Water makes chocolate seize. Even a tiny amount of moisture will cause melted chocolate to clump and become gritty, making it impossible to coat the berries smoothly.
Can I freeze chocolate covered strawberries?
No, it ruins their texture. Freezing causes the water within the strawberry to expand, breaking down its cell structure, resulting in a mushy mess upon thawing with cracked chocolate.
Valentine Strawberries
Ingredients:
Instructions:
Nutrition Facts:
| Calories | 120 kcal |
|---|---|
| Protein | 1.7 g |
| Fat | 7.9 g |
| Carbs | 11.0 g |
| Fiber | 2.1 g |
| Sugar | 7.2 g |
| Sodium | 6.3 mg |
