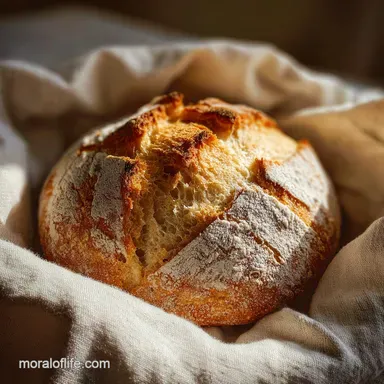
No-Mess Bread in a Bag

- Time: 15 min active + 45 min rising + 30 min baking
- Flavor & Texture: Soft and pillowy
- Perfect for: Beginner bakers, kids, or a classroom lesson plan
Bread in a Bag Basics
Did you know you can make a full loaf of bread without ever touching your kitchen counter? Most people think you need a heavy stand mixer or an hour of grueling manual kneading to get a soft, bakery-style crumb.
It turns out you can get the same result using a heavy duty plastic bag. This bread in a bag recipe keeps the mess contained and the process simple. It's a great way to get that homemade smell in the house without the stress of cleaning flour out of every corner.
The result is a deep golden brown loaf with a tender inside. It's dependable enough for a normal Tuesday and simple enough for children to help with.
The Trick to the Bag
- Bagged Kneading: Kneading through plastic stops you from adding extra flour, which often happens on a counter. This keeps the dough hydrated and the loaf soft.
- Heat Trap: The sealed plastic acts as a small insulator. It keeps the yeast warm, which helps the dough rise faster and more evenly.
| Method | Time | Texture | Best For |
|---|---|---|---|
| Bag Kneading | 15 min prep | Soft and pillowy | No-mess baking |
| Counter Kneading | 30 min prep | Chewier and denser | Traditionalists |
Recipe Specs
The process follows a simple flow: mix, knead, rise, and bake. Since the bag does the heavy lifting, you spend more time waiting and less time working.
Precision Checkpoints
- Water Temp: 105-115°F (must be warm, not hot)
- Rise Time: 45-60 minutes (until doubled in size)
- Bake Temp: 375°F (190°C)
Why These Ingredients Work
Each item here has a job. The sugar feeds the yeast, and the oil keeps the crumb tender.
| Ingredient | Role | If You Don't Have It |
|---|---|---|
| Active Dry Yeast | Lift and air | Instant yeast (use slightly less) |
| Granulated Sugar | Yeast food | Honey (approx 1:1 ratio) |
| All-Purpose Flour | Structure | Bread flour (results in a chewier loaf) |
What You'll Need
- 1 cup warm water (105-115°F)
- 1 tbsp granulated sugar Why this? Feeds the yeast for a better rise
- 2 1/4 tsp active dry yeast
- 2 tbsp olive oil
- 1 tsp salt
- 3 cups all-purpose flour Why this? Provides the basic structure
Essential Tools
You only need a few basics. Use a gallon-sized heavy duty freezer bag. Do not use a thin sandwich bag, as it might pop during the kneading phase. You will also need an 8x4-inch loaf pan and a kitchen thermometer for the water.
Bringing It Together
Phase 1: The Bag Mix
Pour 1 cup warm water, 1 tbsp granulated sugar, and 2 1/4 tsp active dry yeast into a gallon-sized heavy duty freezer bag. Seal it tightly and shake gently for 30 seconds. Add 2 tbsp olive oil and 1 tsp salt to the bag.
Slowly pour in 3 cups all-purpose flour, one cup at a time. After each cup, seal the bag and massage the dough through the plastic until the flour is fully incorporated. Stop when the dough forms a cohesive, slightly tacky ball that pulls away from the sides of the bag.

Phase 2: The Low-Effort Knead
With the dough still in the bag, push, fold, and turn the dough through the plastic for 3–5 minutes. Stop until the dough feels smooth and springs back slowly when poked.
Push all air out of the bag, seal completely, and place it in a warm spot for 45–60 minutes. The dough should double in size and look plump.

Phase 3: Shaping and Baking
Preheat the oven to 375°F (190°C) and lightly grease an 8x4-inch loaf pan. Carefully punch down the dough inside the bag to release air. Gently slide the dough into the prepared loaf pan and shape the top into a smooth mound using dampened fingers.
Bake for 30 minutes until the top is deep golden brown and the bottom sounds hollow when tapped.

Avoiding Common Pitfalls
When making bread in a bag, the most common issue is the temperature of the water. If the water is too hot, it kills the yeast; if it's too cold, the yeast stays dormant. This results in a heavy, flat loaf.
When Dough Won't Rise
Check your water temperature. If the dough hasn't moved in 45 minutes, the yeast likely failed. Start over and ensure the water feels like warm bathwater.
Preventing a Dense Loaf
This usually happens if the dough wasn't kneaded enough through the plastic. Make sure you feel the dough transition from a shaggy mess to a smooth, springy ball before letting it rise.
Stopping Pan Sticking
If the bread clings to the sides, you might not have used enough grease. I like using a bit of olive oil or a butter spray to ensure it slides out cleanly.
| Problem | Fix |
|---|---|
| Dough didn't rise | Check water temp (105-115°F) |
| Loaf is too dense | Knead for full 3-5 minutes |
| Sticking to pan | Grease pan more thoroughly |
Flavor Variations to Try
This recipe is a great base for other flavors. For a bread in a bag experiment, try adding 1 tsp of garlic powder and 1 tbsp of dried rosemary during the flour stage.
If you're heading out, this works as a bread in a bag for camping if you have a Dutch oven over a fire. You can also swap the sugar for honey to get a slightly deeper, floral sweetness. For something even more decadent, try this Cinnamon Applesauce Bread.
Storage Guidelines
Once your bread in a bag is cool, store it in a bread box or a sealed bag at room temperature for up to 3 days. Avoid the fridge, as it makes the bread stale faster.
If you want it to last longer, slice the loaf first. Freeze the slices in a sealed bag for up to 3 months. To reheat, toast the slices for a crisp edge. If you want that soft texture back for a whole slice, wrap it in foil and warm it at 300°F (150°C) for 5 minutes.
How to Serve and Enjoy

This bread is best enjoyed warm. Cut thick slices and spread them with salted butter while still steaming. It also makes an excellent foundation for grilled cheese or a leisurely French toast breakfast. For a light snack, I suggest toasting a slice and adding a touch of honey.
Before You Start Cooking
What does a bread bag do?
It allows you to mix and knead the dough without getting flour on your hands or counters. The plastic creates a contained environment that makes cleanup nearly nonexistent.
What is hobo bread?
This is another name for bread made in a bag. It refers to the simple, portable method of preparing dough without using traditional bowls or kneading boards.
How to make bread in a bag?
Combine warm water, sugar, and yeast in a heavy-duty freezer bag, then add oil, salt, and flour. Massage the dough through the plastic before letting it rise and baking at 375°F.
Why is this recipe great for a classroom?
The bag method eliminates the need for heavy mixing equipment and messy cleanup. Students can easily observe the yeast activation and dough growth through the clear plastic.
How can I keep the loaf soft after baking?
Store the cooled bread in a bread box or a sealed bag at room temperature for up to 3 days. Avoid the refrigerator as it makes the bread stale faster.
Can this bread be frozen?
Freeze slices in a sealed bag for up to 3 months to maintain freshness. Warm a slice in foil at 300°F for 5 minutes to restore the soft texture.
Why didn't my bread rise in the bag?
The water may have been outside the 105-115°F range, which prevents the yeast from activating. Ensure the bag is placed in a warm spot for 45-60 minutes for the best results.
Bread in a Bag with Yeast