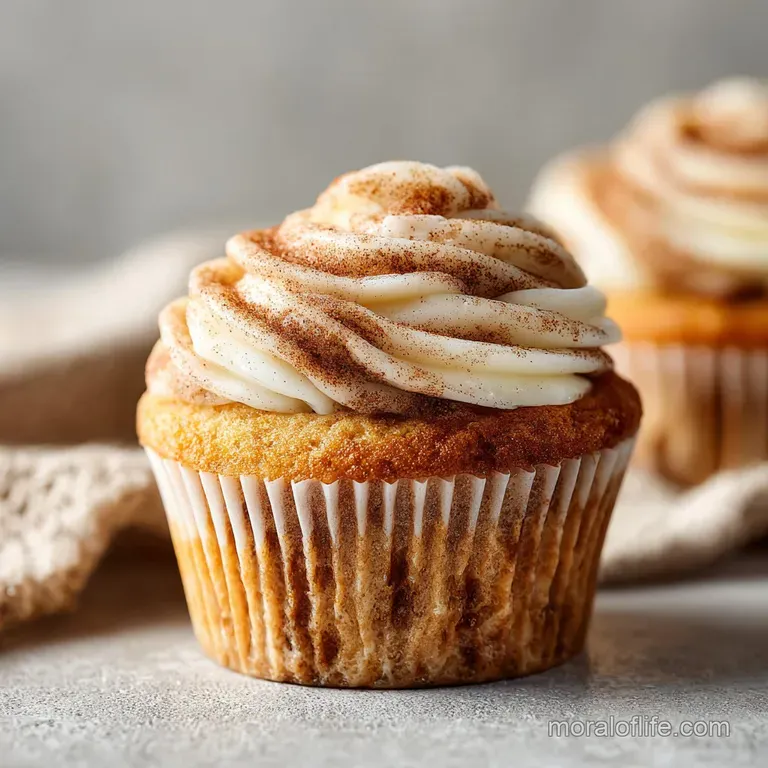
Cinnamon Sugar Swirl Cupcakes: Fluffy and Moist
- Time: Active 20 minutes, Passive 20 minutes, Total 40 minutes
- Flavor/Texture Hook: Plush vanilla cake with a crackling spice swirl
- Perfect for: Weekend brunch treats or crowd-pleasing bake sales
- Why the Reverse Creaming Method Works
- Essential Recipe Specifications and Timing
- Selecting the Best Quality Ingredients
- Tools for a Flawless Bake
- Step by Step Assembly Process
- Solving Common Baking Texture Issues
- Simple Swaps for Dietary Needs
- Freshness and Temperature Control Tips
- Finishing Touches for Visual Appeal
- Recipe FAQs
- 📝 Recipe Card
Why the Reverse Creaming Method Works
Most of us were taught to cream butter and sugar together until fluffy, then add eggs, then flour. That’s great for airy cakes, but for these cupcakes, we want something more substantial. We’re using the "reverse creaming" method, and here is why it’s brilliant:
- Fat Protection: By mixing the butter directly into the flour and sugar first, you’re essentially "waterproofing" the flour particles with fat. This prevents the liquid ingredients from sparking too much gluten development when they’re added later.
- Tender Crumb: Because gluten is kept in check, the resulting cake doesn't have large, irregular air pockets. Instead, it has a uniform, velvety texture that feels much more professional and keeps the swirl from falling through.
- Emulsion Stability: Adding the sour cream and eggs at the end allows the batter to emulsify quickly without the risk of over beating the structural elements of the cake.
- Moisture Retention: The high fat to protein ratio in this method ensures that the cupcakes stay moist for days, rather than drying out the moment they hit the cooling rack.
If you enjoy experimenting with different textures, you might notice that this technique is similar to how we prep the base for moist chocolate cupcakes, where keeping the crumb tight is essential for carrying heavy inclusions.
| Servings | Flour (All Purpose) | Muffin Tin Size | Bake Time |
|---|---|---|---|
| 6 Cupcakes | 95g | 6 cup standard | 18-20 minutes |
| 12 Cupcakes | 190g | 12 cup standard | 20 minutes |
| 24 Cupcakes | 380g | Two 12 cup tins | 22-25 minutes |
Since we are aiming for first try success, knowing how much to scale helps when you're baking for a larger crowd or just a small tea party. The timing stays fairly consistent, but always check the center with a toothpick because oven hotspots are real.
Essential Recipe Specifications and Timing
When we talk about baking, precision is everything. I’ve learned the hard way that "room temperature" isn't just a suggestion it's a requirement. If your butter is too cold, it won't coat the flour properly during the reverse creaming stage.
If your eggs are cold, they’ll break the emulsion of the sour cream and butter.
Timing is also a major factor. We are looking at exactly 20 minutes of active prep and 20 minutes in the oven. That 40 minute total window is tight, so have your ingredients weighed out before you start.
Use a kitchen scale if you have one; 190g of flour is much more accurate than a "cup" which can vary depending on how much you pack it down.
| Component | Science Role | Pro Secret |
|---|---|---|
| Sour Cream | Acidic tenderizer | Use full fat only for the best structural "lift" without dryness. |
| Unsalted Butter | Fat barrier | Ensure it is soft enough to leave a thumbprint but not oily. |
| Baking Powder | Leavening agent | Check the expiration date; fresh powder ensures a domed top. |
| Dark Brown Sugar | Humectant | The molasses in the sugar keeps the swirl "gooey" instead of just sweet. |
The interaction between the baking powder and the acidity in the sour cream creates a lovely lift. It’s a gentle chemical reaction that happens the moment the wet hits the dry, which is why we don't want the batter sitting around too long before it goes into the oven.
Selecting the Best Quality Ingredients
For these cinnamon sugar swirl cupcakes, the quality of your spice is going to dictate the entire flavor profile. Don't grab that dusty jar from three years ago. Go for a high-quality ground cinnamon.
If you can find Saigon cinnamon, use it it has a much higher oil content and a more "red hot" spicy punch that stands up to the sugar.
Then there’s the sugar. We use granulated sugar in the base for a clean sweetness and structure, but the swirl absolutely demands dark brown sugar. The extra molasses provides a damp, sticky quality that mimics the inside of a cinnamon roll.
If you use light brown sugar, it’s fine, but you’ll miss out on that deep, toffee like undertone.
- All purpose flour (190g): This provides the necessary protein (around 10-11%) to hold the swirl in place. Cake flour is too weak here.
- Granulated sugar (200g): Standard white sugar helps with the browning and the "crunch" on the edges.
- Unsalted butter (115g for base, 225g for frosting): Using unsalted lets us control the seasoning perfectly.
- Large eggs (2): These act as the binder. Make sure they are room temp!
- Full fat sour cream (120g): The secret to the moisture. Don't even look at the low-fat stuff.
- Vanilla extract (1 tbsp): Use real extract, not imitation, for that floral aroma.
- Ground cinnamon (1.5 tbsp for swirl, 1 tsp for frosting): The star of the show.
For the swirl specifically, we mix the cinnamon and brown sugar with a little bit of flour and melted butter. This creates a "paste" rather than a dry powder. Dry powder just disappears into the cake; a paste creates a distinct, visible ribbon that you can actually bite into.
Tools for a Flawless Bake
You don't need a professional kitchen, but a few specific tools make this so much easier. A stand mixer is your best friend for the reverse creaming method because it can consistently break down the butter into the flour without warming it up with your hands.
Chef's Tip: If you don't have a stand mixer, a handheld electric mixer works, but be patient during the "breadcrumb" stage. You want those butter bits tiny!
I also highly recommend using paper liners. Some people like to grease the tin directly, but for these, the sugar in the swirl can sometimes caramelize and stick to the metal, making the cupcakes impossible to remove without breaking them. The liners also keep the sides of the cake tender and pale.
- 12 cup muffin tin: Standard size is perfect.
- Toothpicks: Essential for the "swirl" technique and checking doneness.
- Kitchen scale: For measuring your 190g of flour and 200g of sugar accurately.
- Piping bag and tips: If you want that bakery style finish on the buttercream.
When it comes to melting the butter for the swirl, a quick blast in the microwave is easiest. Just make sure it isn't bubbling hot when you mix it with the sugar, or it might dissolve the sugar granules too much before they even hit the oven.
step-by-step Assembly Process

- Preheat and Prep: Set your oven to 350°F (175°C). Line your 12 cup muffin tin with paper liners so they're ready to go.
- Make the Swirl Paste: In a small bowl, whisk together the 65g dark brown sugar, 1.5 tablespoons of cinnamon, 1 tablespoon of flour, and 1 tablespoon of melted butter. It should look like a thick, gritty paste.
- Mix Dry Ingredients: In your stand mixer, combine the 190g flour, 200g granulated sugar, 1.5 tsp baking powder, and 0.5 tsp salt. Run it on low for 30 seconds just to aerate everything.
- Add Butter: Drop the 115g of softened butter into the dry mix, one cube at a time, while the mixer is on low. Continue mixing until it looks like fine, sandy breadcrumbs.
- Incorporate Liquids: Add the 2 eggs, 120g sour cream, and 1 tbsp vanilla. Increase the speed to medium and beat for 60 seconds. The batter will turn pale and very smooth.
- Layer the Batter: Fill each cupcake liner about halfway. Drop a small teaspoon of the cinnamon paste right in the middle.
- Swirl and Top: Cover the paste with the remaining batter. Take a toothpick and swirl it through the layers in a figure eight motion. Stop before you over mix, or you'll just have a brown cupcake instead of a swirl.
- Bake: Slide them into the oven for 20 minutes. They are done when a toothpick comes out clean and the tops spring back when lightly touched.
- Cool Completely: Let them sit in the tin for 5 minutes, then move to a wire rack. If you frost them while warm, the buttercream will slide right off.
- Frost: Whip up your buttercream (225g butter, 480g powdered sugar, cinnamon, cream, and salt) until it's light and fluffy, then pipe it high.
The magic happens in step 4. That sandy texture is exactly what you want. It might feel wrong if you're used to the traditional method, but trust the process. It's the secret to that tight, professional crumb.
Solving Common Baking Texture Issues
Even with the best intentions, baking can go sideways. The most common issue with sugar swirl cupcakes is the "sink." This is when the heavy cinnamon paste drops straight to the bottom of the liner, leaving you with a sticky mess at the base and a plain cake on top.
Why the Swirl Sinks
If your swirl is ending up at the bottom, your paste might be too heavy or your batter too thin. By adding that one tablespoon of flour to the cinnamon sugar mix, we give it some "grip." Also, make sure you aren't over swirling. Three or four loops with the toothpick is plenty.
If you keep going, you break the tension of the batter that's supposed to hold the swirl in place.
Dense or Heavy Crumb
If the cupcakes feel like lead bricks, check your butter temperature. If the butter was melted instead of softened when you added it to the flour, it won't create those tiny air pockets needed for lift. Also, make sure your sour cream was room temperature.
Cold sour cream can cause the butter to clump back up, ruining the "sandy" texture we worked so hard for.
| Problem | Root Cause | Solution |
|---|---|---|
| Greasy Bottoms | Butter was too warm | Ensure butter is "cool room temp" (65°F/18°C). |
| Dry Cake | Overbaked or low-fat dairy | Pull at 20 mins; always use full fat sour cream. |
| No Visible Swirl | Over mixing with toothpick | Only swirl 3-4 times in a figure eight pattern. |
Common Mistakes Checklist:
- ✓ Using cold eggs (shatters the emulsion)
- ✓ Forgetting the salt (the flavors will taste flat)
- ✓ Overfilling the liners (they will spill over and lose their shape)
- ✓ Frosting while the cakes are still "vaguely warm" (melts the butter)
- ✓ Using "spreadable" butter from a tub (it has too much water/oil)
If you find that you're consistently getting a "tough" cake, you might be over beating the batter after adding the eggs and sour cream. Stick to the 60 second rule. It feels short, but it's all you need to get the air in without toughening the gluten. If you want to try a different flavor profile with a similar method, my pumpkin dream cupcakes use a very similar moisture balancing act.
Simple Swaps for Dietary Needs
I get asked a lot if these can be made dairy-free or gluten-free. The short answer is yes, but the texture will change. These cupcakes rely heavily on the protein in the flour and the fat in the sour cream.
- gluten-free: Use a high-quality 1:1 gluten-free flour blend (the kind with xanthan gum already in it). Note: the crumb will be slightly more "sandy" and less velvety.
- dairy-free: Substitute the butter for a high fat vegan butter stick (not tub margarine) and the sour cream for a thick, plain coconut yogurt. The flavor will have a slight coconut hint, but the moisture will still be there.
- Egg Free: A commercial egg replacer works best here. I wouldn't recommend flax eggs for this specific recipe as they can make the swirl look "muddy."
| Original Ingredient | Substitute | Why It Works |
|---|---|---|
| Full fat Sour Cream | Greek Yogurt (5%) | Similar acidity and thickness. Note: Slightly more tangy flavor. |
| Dark Brown Sugar | Coconut Sugar | Similar caramel notes. Note: Result will be slightly drier. |
| Unsalted Butter | Vegan Butter Sticks | Maintains the fat ratio. Note: Choose a brand with high oil content. |
If you decide to go the Greek yogurt route, make sure it’s the thick, strained kind. If it's too watery, your batter will be loose, and that cinnamon swirl will sink faster than a stone in a pond.
Freshness and Temperature Control Tips
Storage is where most people lose the battle. Because these cupcakes have a high moisture content from the sour cream, they can get "sweaty" if you put them in a plastic container while they are even slightly warm. Always wait until they are stone cold.
Fridge vs. Room Temp: I personally think these are best at room temperature. The butter in the cake and the frosting is soft and flavorful at around 70°F. If you store them in the fridge, the butter solidifies, making the cake feel dry and the frosting feel hard.
If you must refrigerate them (because of the heavy cream in the frosting), take them out at least an hour before you plan to eat them.
Freezing: These freeze beautifully! You can freeze the unfrosted cupcakes for up to 3 months. Wrap them individually in plastic wrap and then put them in a freezer bag. When you're ready for a treat, let them thaw on the counter and then whip up a fresh batch of buttercream.
I don't recommend freezing them with the frosting on, as the texture of the buttercream can become grainy once thawed.
Zero Waste Tip: If you have leftover cinnamon sugar paste, don't throw it out! Smear it on a piece of toast or stir it into your morning oatmeal. It's essentially the "guts" of a cinnamon roll, so it never goes to waste in my house.
Finishing Touches for Visual Appeal
Presentation is the final step in making these look like they came from a fancy boutique. For the frosting, I like to use a large round tip or an open star tip. Start in the center, spiral outward, and then build upward into a classic "swirl" shape. It mimics the look of the swirl inside the cake!
If you want to go the extra mile, save a tiny bit of the cinnamon sugar (just the dry mix, not the paste) and sprinkle it over the top of the piped buttercream. It adds a little "shatter" and crunch that contrasts beautifully with the velvety frosting.
Another trick is the "Stovetop vs Oven" approach for the butter. While we melt the butter for the swirl in the microwave or on the stovetop, the butter for the cake must be softened in the oven's ambient heat or on the counter.
Never try to use melted butter in the cake base it will completely change the crumb from "velvety" to "dense."
| Method | Best For | Result |
|---|---|---|
| Softened (Room Temp) | Cupcake Base | Aerated, light, and velvety crumb. |
| Melted (Liquid) | Cinnamon Swirl | Creates a cohesive paste that won't disappear. |
Finally,, don't be afraid of the salt. That pinch of salt in the buttercream is what makes the cinnamon "pop." Without it, the sugar just tastes like sugar. With it, the spice becomes the star. These cupcakes are simple, reliable, and honestly, a total crowd pleaser every single time I pull them out of the oven.
Trust me on the sour cream it’s the secret you'll be telling all your friends about. Happy baking!

Recipe FAQs
How to achieve the perfect marble effect in the batter?
Insert the toothpick into the center and drag it in a figure eight motion. Be careful not to over mix the cinnamon paste, or you will lose the distinct swirl pattern in the final cupcake.
Is it necessary to use room temperature eggs for this recipe?
Yes, using room temperature eggs is vital for a smooth, emulsified batter. Cold eggs can cause the butter to solidify, creating a grainy texture instead of a pale, fluffy consistency.
Can I bake these cupcakes at a higher temperature to speed up the process?
No, you must keep the oven at 350°F (175°C) to ensure an even rise. If you enjoyed mastering the crumb structure here, you will find that consistent heat is equally important for our moist lemon cupcakes.
How to tell when the cupcakes are finished baking?
Insert a toothpick into the center and pull it out; it should come out clean. If you notice the tops spring back when lightly touched, they are ready to be pulled from the oven.
Why did my buttercream come out too thin?
You likely added the heavy cream too quickly or the butter was too warm. Ensure your butter is softened but not melted, and add the cream gradually while whipping until you reach a stable, pipeable consistency.
Is it true I can substitute regular brown sugar for dark brown sugar?
No, this is a common misconception. Dark brown sugar contains more molasses, which is necessary to achieve the correct depth of flavor and texture for the cinnamon swirl paste.
How to store these cupcakes for maximum freshness?
Keep them in an airtight container at room temperature for up to two days. Storing them in the refrigerator can cause the cake to dry out and the buttercream to harden unnaturally.
Cinnamon Sugar Swirl Cupcakes
Ingredients:
Instructions:
Nutrition Facts:
| Calories | 558 kcal |
|---|---|
| Protein | 3.1 g |
| Fat | 28.1 g |
| Carbs | 75.8 g |
| Fiber | 0.9 g |
| Sugar | 62.7 g |
| Sodium | 184 mg |
