Best Way to Cook Red Snapper
- Time: Active 10 minutes, Passive 6 minutes, Total 16 minutes
- Flavor/Texture Hook: Shatter crisp skin with buttery, citrus infused flakes
- Perfect for: A dependable weeknight dinner or a quick date night meal
- Discover the best way to cook red snapper
- Time and Nutrition Specs for Success
- Fresh Ingredients and Smart Pantry Swaps
- Essential Tools for a Shatter Crisp Skin
- Mastering the Perfect Pan Searing Process
- Avoiding Mistakes and Troubleshooting Problems
- Exciting Flavor Variations for Every Night
- Keeping Leftovers Fresh and Tasting New
- Myths Regarding Fish Cookery
- Perfect Side Dishes for Your Meal
- Scaling Guidelines
- High in Sodium
- Recipe FAQs
- 📝 Recipe Card
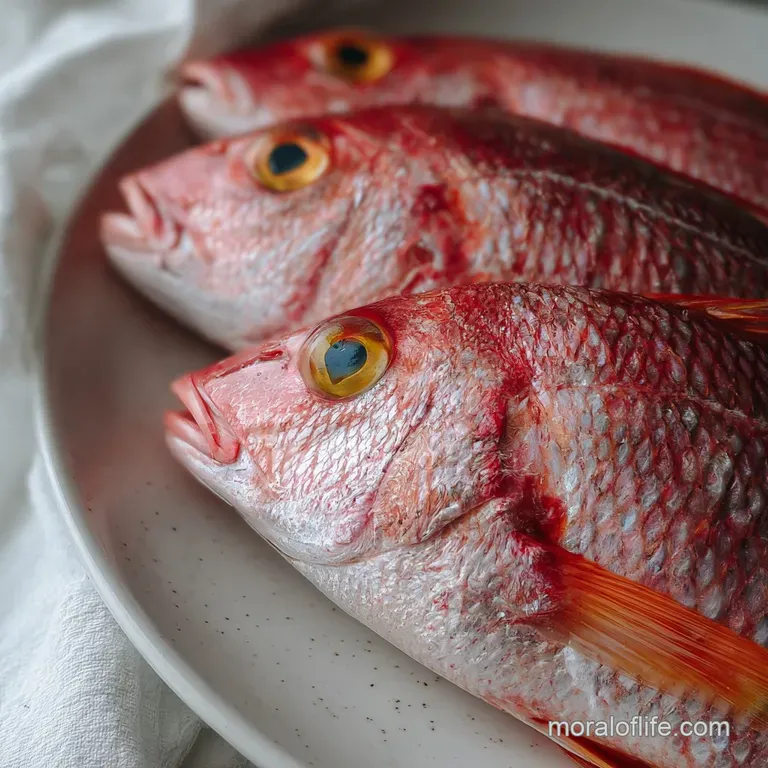
Discover the best way to cook red snapper
There is nothing quite like the sound of a cold piece of fish hitting a shimmering hot pan. That instant hiss is the first sign that you are on your way to something special. For a long time, I was terrified of cooking fish like red snapper.
I would always end up with the skin stuck to the bottom of the pan, or even worse, the middle would stay raw while the outside looked burnt. It felt like a gamble every time I turned on the stove, which is why I mostly stuck to ordering it at restaurants.
But here is the thing: once you understand the rhythm of the pan, this becomes one of the most dependable meals in your rotation. It is the kind of recipe you can pull out on a normal Tuesday when you have zero energy but want something that feels fancy. We are going to skip the complicated breading or deep frying.
Instead, we are focusing on the best way to cook red snapper by using a technique called pan searing, followed by a quick butter baste. It is fast, it uses ingredients you probably already have, and it works every single time.
We have all been there staring at a beautiful, expensive fillet and worrying we are about to ruin it. I have made all the mistakes so you do not have to. I have forgotten to pat the skin dry (hello, soggy mess) and I have tried to flip the fish too early (goodbye, beautiful skin).
Today, we are going to walk through the process together. By the time we are done, you will be able to repeat this with confidence, knowing exactly when to turn the heat down and when to throw in that knob of butter.
Time and Nutrition Specs for Success
When we talk about the best way to cook red snapper, we have to look at the chemistry of the heat. Red snapper is a lean fish, meaning it does not have a lot of internal fat to protect it from drying out. This is why we use a over high heat initial sear followed by a lower temperature finish with butter.
The Science of Why it WorksMaillard Reaction: High heat creates a complex chemical reaction between amino acids and reducing sugars, resulting in a crispy, brown crust.
Protein Denaturation: Gentle basting at the end prevents the muscle fibers from tightening too quickly, which keeps the moisture trapped inside.
| Fillet Thickness | Internal Temp | Rest Time | Visual Cue |
|---|---|---|---|
| 0.5 inch | 145°F (63°C) | 2 minutes | Flesh is opaque and flakes easily |
| 1.0 inch | 145°F (63°C) | 3 minutes | Skin is golden and rigid |
| 1.5 inches | 145°F (63°C) | 4 minutes | Center is no longer translucent |
Cooking fish is all about timing and observation. Because we are using 7 oz fillets, they cook incredibly fast. You want to watch the side of the fillet as it sits in the pan. You will see the white, cooked color creeping up from the bottom toward the top.
When that color reaches about two thirds of the way up the side, that is your signal that it is time to flip.
Achieving the Maillard Reaction
To get that deep golden color, the pan must be hot enough to evaporate surface moisture instantly. If the pan is too cool, the fish will steam in its own juices rather than sear. This is why avocado oil is our best friend here; it has a high smoke point that can handle the heat.
Regulating Internal Temperature
Once the fish is flipped, the residual heat from the pan and the hot butter baste will finish the job. We want to hit exactly 145°F (63°C). If you go even five degrees over, the fish can start to feel chalky.
Taking it off the heat just before it hits the mark allows carryover cooking to do the rest of the work.
Balancing the Flavor Profile
The richness of the 3 tbsp unsalted butter needs something to cut through it. That is where the 0.5 lemon comes in. The acidity balances the fats, making the whole dish feel light rather than heavy. It is a classic combination for a reason it just works.
Fresh Ingredients and Smart Pantry Swaps
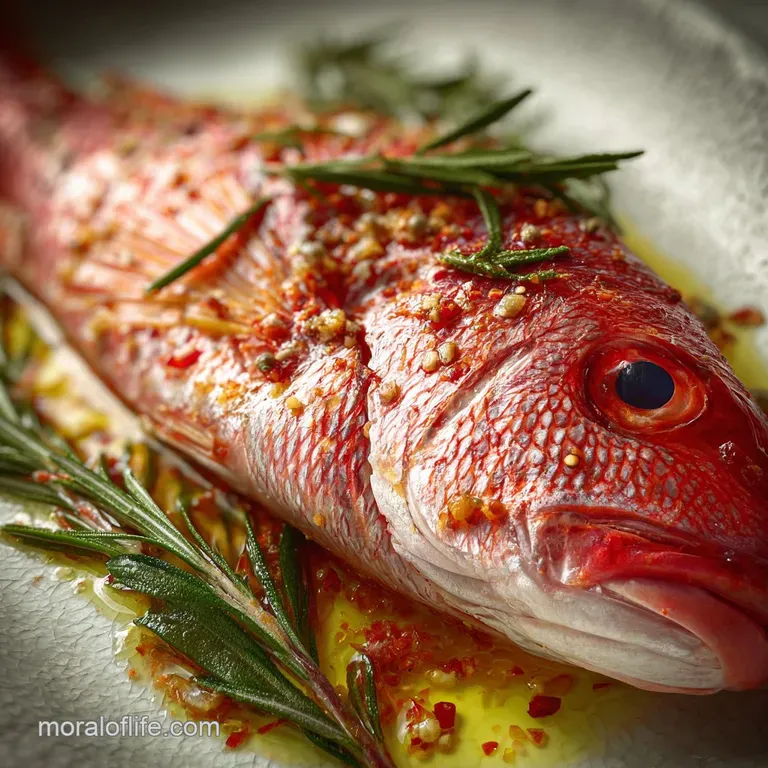
Selecting your ingredients is the foundation of this dish. While red snapper is the star, the supporting cast like the 3 sprigs of fresh thyme and 2 cloves of garlic are what give it that "restaurant" aroma.
I always suggest using the best quality you can find, but I also know that sometimes the grocery store does not cooperate on a weeknight.
| Component | Science Role | Pro Secret |
|---|---|---|
| Red Snapper Fillets | Lean Protein | Keep the skin on to protect the delicate flesh. |
| Avocado Oil | High Smoke Point | Prevents the oil from breaking down and tasting bitter. |
| Kosher Salt | Moisture Extraction | Draws out surface water to help the skin crisp up faster. |
If you are looking to round out this meal with something green, this crispy snapper would taste great next to a salad topped with my Vidalia Onion Dressing Recipe. The sweetness of the onions pairs beautifully with the salty, crispy skin of the fish.
For the Snapper
- 2 (7 oz) Red Snapper Fillets: Ensure the skin is on and pin bones are removed. Why this? The skin acts as a heat shield and provides a satisfying crunch.
- Substitute: Sea bass or Grouper. Note: These are thicker, so add 2 minutes to cook time.
- 1.5 tsp Kosher salt: Use a coarse salt for better coverage. Why this? It seasons more evenly than fine table salt.
- Substitute: Sea salt. Note: Use slightly less as it can be saltier by volume.
- 0.5 tsp Freshly cracked black pepper: Grind it fresh for the best aromatics. Why this? Pre ground pepper loses its spicy punch over time.
- Substitute: White pepper. Note: Provides a milder heat and stays invisible on the fish.
For the Aromatics & Basting
- 2 tbsp Avocado oil: This is for the over high heat sear. Why this? It won't smoke at the temperatures needed for crispy skin.
- Substitute: Grapeseed oil. Note: Similar high smoke point and neutral flavor.
- 3 tbsp Unsalted butter: Use chilled butter for the best basting control. Why this? Controls the browning speed so the garlic doesn't burn.
- Substitute: Ghee. Note: Can handle higher heat but lacks the milky "brown butter" flavor.
- 3 sprigs Fresh thyme: Adds an earthy, herbal note. Why this? The oils release slowly into the butter.
- Substitute: Fresh oregano or rosemary. Note: Rosemary is much stronger; use only 1 sprig.
- 2 cloves Garlic: Smashed to release the oils. Why this? Provides flavor without the risk of burnt minced bits.
- Substitute: Garlic confit. Note: Adds a much mellower, sweeter garlic taste.
- 0.5 Lemon: Sliced into rounds. Why this? The slices caramelize in the pan for extra flavor.
- Substitute: Lime. Note: Adds a more tropical, tart zing to the finish.
Essential Tools for a Shatter Crisp Skin
You do not need a kitchen full of gadgets, but a few specific tools will make your life much easier. For another crunchy texture to serve alongside, check out this Daniel Fast Snack recipe which uses similar over high heat principles.
- Cast Iron or Stainless Steel Skillet: You need something that holds heat well. Avoid thin non stick pans if you want a truly crispy skin.
- Fish Spatula: These are thin and flexible, allowing you to get under the delicate skin without tearing it.
- Paper Towels: This might be the most important "tool." You must get the fish bone dry before it touches the oil.
- Spoon: A simple large spoon for the butter basting process.
Chef's Tip: If you find your fish always curls up when it hits the pan, use your spatula to press down firmly on the fillet for the first 30 seconds. This forces the skin to stay in contact with the heat and prevents it from shrinking into a "C" shape.
Mastering the Perfect Pan Searing Process
This process is fast, so have all your ingredients measured and ready to go before you even turn on the burner. The goal is to move smoothly from the sear to the baste without any pauses that could let the pan cool down.
- Dry the fish. Pat the 2 (7 oz) Red Snapper Fillets thoroughly with paper towels on both sides. Note: Moisture is the enemy of a crispy sear.
- Season the fillets. Sprinkle the 1.5 tsp Kosher salt and 0.5 tsp black pepper evenly over the skin and flesh.
- Heat the pan. Add 2 tbsp avocado oil to a heavy skillet over medium high heat until the oil is shimmering and just starting to wisp smoke.
- Start the sear. Place the fillets skin side down in the pan. Press firmly with a spatula for 30 seconds until the fish lies flat and doesn't curl.
- Cook undisturbed. Let the fish cook for 3 to 4 minutes. Watch for the edges to turn golden brown and the flesh to become opaque.
- Flip carefully. Use a fish spatula to gently turn the fillets over. The skin should be rigid and release easily from the pan.
- Add the aromatics. Lower the heat to medium and toss in 3 tbsp chilled butter, 3 sprigs thyme, 2 smashed garlic cloves, and 0.5 lemon slices.
- Execute the baste. Tilt the pan slightly so the melting butter pools at the bottom. Use a spoon to continuously pour the hot, foaming butter over the fish for 2 minutes until the fish is cooked through.
- Rest the fish. Remove the snapper from the pan and place it on a warm plate. Let it sit for 2 minutes until the juices redistribute throughout the fillet.
Avoiding Mistakes and Troubleshooting Problems
Even with the best intentions, things can go sideways. The most common heartbreak is the skin sticking. Usually, this happens because we are too impatient. Fish will naturally "release" from the pan once the proteins have properly seared. If you try to force it, you will leave that delicious skin behind.
Reasoning Behind Sticking Skin
If the fish is resisting the spatula, it usually needs another 30 to 60 seconds. The bond between the protein and the metal is broken by the formation of that crispy crust. Also, make sure your oil is truly hot before the fish goes in. If the oil is cold, the fish will just soak it up and glue itself to the pan.
| Problem | Root Cause | Solution |
|---|---|---|
| Soggy Skin | Excess surface moisture | Pat the fish dry multiple times right before cooking. |
| Burnt Garlic | Heat was too high during basting | Lower the flame before adding butter and aromatics. |
| Rubbery Texture | Overcooking | Remove from pan at 140°F and let carryover heat reach 145°F. |
Every kitchen is different, and every stove has its own personality. I remember a time I tried to cook this on a portable induction burner, and it took twice as long because the pan didn't hold the heat. It is all about adjusting to your environment and trusting your senses.
Common Mistakes Checklist
- ✓ Never crowd the pan; if the fillets are touching, they will steam instead of sear.
- ✓ Do not use extra virgin olive oil for the initial sear; its smoke point is too low.
- ✓ Avoid moving the fish around once it hits the pan; let it sit and do its thing.
- ✓ Ensure the butter is chilled when adding it to the pan to prevent it from burning too quickly.
- ✓ Always rest the fish for at least 2 minutes to ensure the flakes stay velvety and moist.
Exciting Flavor Variations for Every Night
Once you have the basic technique down, you can start to play with the flavors. This is the "dependable" part of the recipe the method stays the same, but the vibe changes based on what is in your pantry. If you want to experiment with different rubs, you might find inspiration in this Tri Tip Seasoning recipe, though you will want to go lighter on the spices for delicate fish.
- Mediterranean Style: Replace the thyme with fresh oregano and add a tablespoon of drained capers to the butter baste. The salty pop of the capers is incredible against the snapper.
- Caribbean Zest: Rub the flesh side of the fish with a little lime zest and a pinch of cayenne before searing. Use lime rounds instead of lemon in the pan.
- Miso Butter Finish: Whisk a teaspoon of white miso into the melting butter before you start basting. It adds a deep, savory "umami" that is hard to beat.
Selecting the Best Method
While pan searing is my favorite, you can also bake or grill red snapper. However, for fillets, the pan is almost always superior because it gives you the most control over the skin texture.
| Method | Time | Texture | Best For |
|---|---|---|---|
| Pan Sear | 6 minutes | Shatter crisp skin, tender flesh | Most textures and flavor. |
| Oven Baked | 12 minutes | Soft, delicate, and moist | Larger groups or thicker fillets. |
| Grilling | 8 minutes | Smoky and charred | Outdoor cooking and whole fish. |
Keeping Leftovers Fresh and Tasting New
Fish is always best right out of the pan, but life happens. If you have leftovers, the goal is to prevent them from becoming "fishy" or dry. When reheating, do not use the microwave if you can help it. It turns the fish into rubber and destroys that skin we worked so hard on.
Storage Guidelines Store cooked red snapper in an airtight container in the fridge for up to 2 days. For the freezer, wrap the fillets tightly in plastic wrap and then foil; they will stay good for about 2 months. To thaw, leave them in the fridge overnight.
Zero Waste Tips If you have leftover bits of fish, do not throw them away! Flake the cold snapper into a bowl with a little mayo, lemon juice, and herbs for a high end fish salad. Or, toss the flakes into a quick pasta with garlic and olive oil.
If you bought a whole fish and have the bones, they make an incredible light stock for risotto or seafood soup.
Myths Regarding Fish Cookery
Searing seals in the juices. This is a classic kitchen myth. Searing actually causes the fish to lose moisture because of the high heat. We sear for the flavor and texture of the crust (the Maillard reaction), not to "trap" liquid inside. The juiciness comes from not overcooking the proteins.
Fresh fish should never smell. While "fishy" is bad, fresh sea fish should have a faint, clean scent of the ocean. If it smells like nothing at all, it might have been frozen and thawed multiple times. If it smells like ammonia, it is past its prime. Trust your nose!
You must flip fish multiple times. Actually, the less you touch it, the better. Flipping multiple times increases the chance of the fillet breaking apart. One solid sear on the skin side and one quick finish on the flesh side is all you need for the best results.
Perfect Side Dishes for Your Meal
When thinking about what to serve with your red snapper, look for things that can soak up that beautiful lemon butter sauce. A simple bed of jasmine rice or some crusty sourdough bread is a must. If you are keeping things light, a quick sauté of asparagus or green beans works perfectly.
Since the fish only takes 6 minutes to cook, I usually start my sides well in advance. There is nothing worse than having a perfectly crispy piece of snapper sitting on the counter getting cold while you wait for your potatoes to finish.
This is meant to be a stress free, dependable meal, so keep the sides simple and let the snapper be the star of the show.
Scaling Guidelines
Scaling Down (1 serving): If you are cooking for one, the process is exactly the same. Use a smaller skillet so the butter doesn't spread too thin and burn during the basting phase. You can still use the 2 cloves of garlic for maximum flavor!
Scaling Up (4-6 servings): Do not try to cram 6 fillets into one pan. Work in batches of two. Keep the finished fillets on a wire rack over a baking sheet in a 200°F (95°C) oven to stay warm and crispy while you finish the rest.
You will need to wipe the pan out between batches to prevent the old butter from tasting bitter. Increase the salt and pepper linearly, but you only need to increase the aromatics by about 50% rather than doubling them.

High in Sodium
920 mg mg of sodium per serving (40% % of daily value)
The American Heart Association recommends limiting sodium intake to about 2,300mg per day for optimal health.
Tips to Reduce Sodium in Your Red Snapper:
-
Reduce Salt-25%
Reducing the added salt will significantly lower the sodium. Try using only 0.75 tsp of kosher salt instead of 1.5 tsp. This simple step can make a big difference in the overall sodium content.
-
Lemon Enhancement-10%
Increase the lemon flavor! Using more lemon juice and zest can enhance the dish, allowing you to use even less salt while still achieving a delicious taste. Consider squeezing some lemon juice over the fillets after cooking.
-
Consider Salted Butter Alternatives-5%
While the recipe calls for unsalted butter, ensure you are not accidentally using salted butter. Also, be mindful that some brands of unsalted butter still contain trace amounts of sodium. Check the label!
-
Herb Power
Experiment with more fresh herbs and spices! Thyme is a great start. Consider adding dill, chives, or a pinch of red pepper flakes for added flavor without adding sodium.
Recipe FAQs
What is the best way to eat red snapper?
Pan-seared with lemon butter. This method highlights its delicate flavor and creates a satisfying crispy skin, perfect for a quick yet elegant meal.
How to cook perfect snapper?
Pat it bone dry and sear on high heat, skin side down. Moisture is the enemy of crispy skin; ensure the fillet is completely dry before it hits a hot pan. Cook undisturbed until golden, then finish with a butter baste.
Is red snapper better grilled or fried?
Pan-seared is generally superior for fillets. While grilling offers a smoky flavor and frying provides crispiness, pan-searing gives you the best control over achieving shatteringly crisp skin on delicate red snapper fillets.
What is the best sauce for red snapper?
A simple lemon butter sauce with herbs. The richness of butter, the brightness of lemon, and the aromatics of thyme or parsley cut through the fish's delicate flavor beautifully.
Can I pan-sear red snapper indoors?
Yes, with proper ventilation and a good skillet. Use a heavy bottomed pan like cast iron, ensure the oil is hot before adding the fish, and consider opening a window or using your exhaust fan to manage the aroma.
What temperature should red snapper be cooked to?
145°F (63°C) is the recommended internal temperature. This ensures the fish is cooked through, opaque, and flakes easily without becoming dry or rubbery. Always let it rest for a few minutes after cooking.
What can I serve with pan-seared red snapper?
Asparagus and a simple starch like rice or crusty bread. These sides are great for soaking up any extra lemon butter sauce, making the entire dish cohesive and satisfying.
Cook Red Snapper

Ingredients:
Instructions:
Nutrition Facts:
| Calories | 258 calories |
|---|---|
| Protein | 40.8 grams |
| Fat | 10.2 grams |
| Carbs | 1.4 grams |
| Fiber | 0.2 grams |
| Sugar | 0.3 grams |
| Sodium | 920 milligrams |
