S'mores Bites: Handheld Campfire Classic
- Time: Active 15 minutes, Passive 10 mins, Total 25 minutes
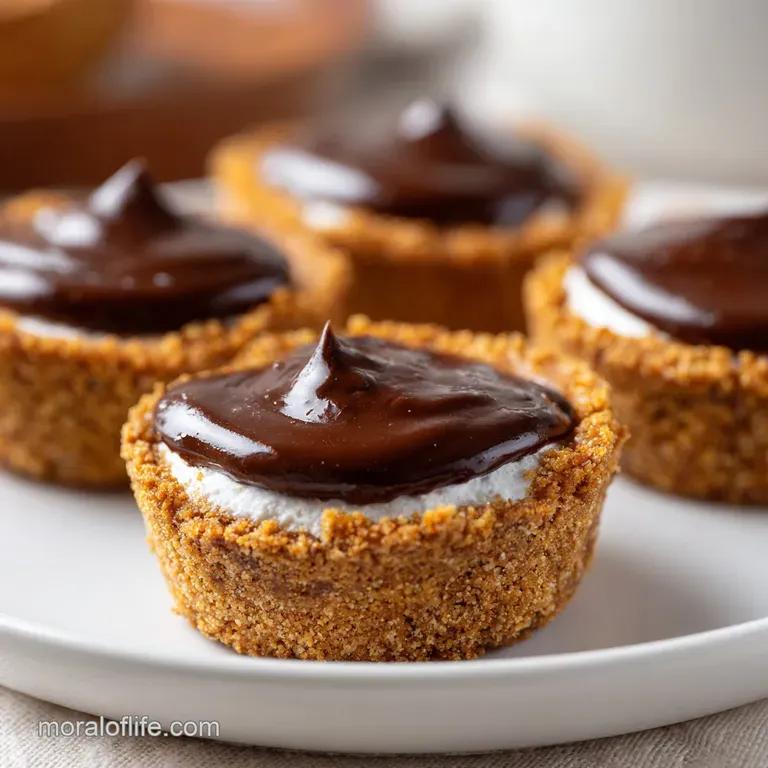
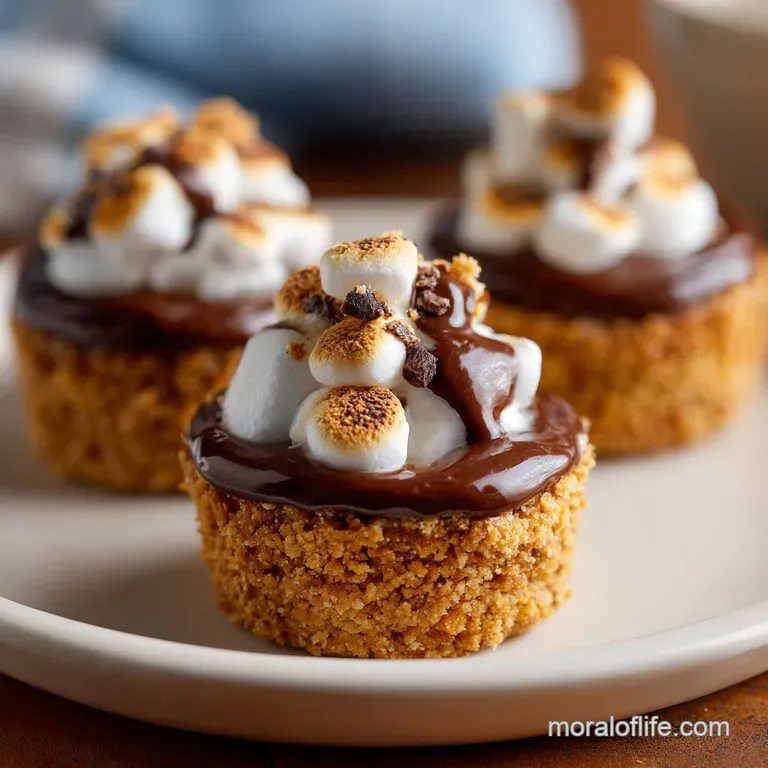
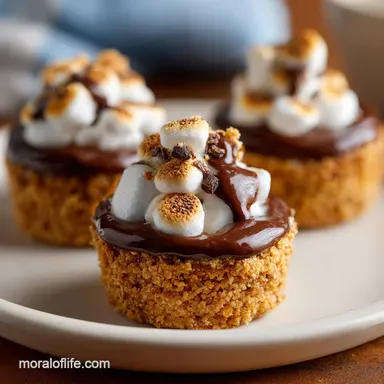
- Flavor/Texture Hook: A buttery graham cracker base with a velvety chocolate center and toasted marshmallow top.
- Perfect for: Rainy day indoor camping, school bake sales, or quick weeknight cravings.
- Creating the Ultimate S'mores Bites for Every Occasion
- The Science of the Marshmallow Puff
- Timing and Yield for Your Treats
- Selecting Components for the Best Texture
- Essential Tools for a Clean Bake
- Step by Step Guide to Toasty Bliss
- Avoiding Sticky Situations and Common Fails
- Creative Flavor Twists for Your Batch
- Keeping Your Treats Fresh and Tasty
- Perfect Pairings for a Dessert Spread
- Recipe FAQs
- 📝 Recipe Card
Creating the Ultimate S'mores Bites for Every Occasion
The first time I tried making these, I was dodging raindrops during a family reunion. We had all the ingredients for traditional s'mores, but the charcoal was soaked and the kids were hovering near the kitchen like hungry seagulls.
I grabbed a mini muffin tin, shoved some crushed crackers into the bottom, and hoped for the best. The aroma of toasted sugar hit the kitchen like a warm hug, and when the first batch came out, the marshmallow tops had that beautiful golden brown tan you usually only get from a perfect flame.
Honestly, the sound is what got me first. When you bite into one of these, you get that distinct shatter of the buttery graham cracker crust followed by the silent, velvety pull of a melted marshmallow.
There is no sticky face, no chocolate dripping on your shirt, and zero chance of a flaming marshmallow landing on the carpet. It is just pure, concentrated comfort in a two bite package.
We have all been there, trying to balance a hot marshmallow on a thin cracker while the chocolate refuses to melt. This recipe flips the script. By baking everything together, the chocolate softens into the crust and the marshmallow fuses to the top, creating a structural masterpiece that actually stays together.
If you are looking for a way to bring the outdoors in without the smoke, these s'mores bites are exactly what you need.
The Science of the Marshmallow Puff
Thermal Aeration: Heat causes the air bubbles trapped inside the marshmallow to expand, while the sugar softens into a liquid state, creating that iconic gooey pull.
Starch Gellation: The fine flour in the graham crackers absorbs the melted butter during the par bake, transforming loose crumbs into a rigid, crunchy cup.
Sugar Carbonization: High heat triggers the Maillard reaction on the marshmallow surface, turning white sugar into complex, toasted caramel notes.
| Servings | Ingredient Adjustments | Pan Size | Cook Time |
|---|---|---|---|
| 12 bites | Half all ingredients | 12 cup mini muffin tin | 4-5 mins (marshmallows) |
| 24 bites | Standard recipe quantities | 24 cup mini muffin tin | 10 mins (total) |
| 48 bites | Double all ingredients | Two 24 cup tins | 12-14 mins (staggered) |
Scaling this recipe is incredibly straightforward because the mini muffin tin acts as a natural portion controller. If you are feeding a whole neighborhood, you can easily double the batch without losing any of that signature texture, though you should rotate your pans halfway through the marshmallow toast to ensure even browning across both tins.
Timing and Yield for Your Treats
When we talk about efficiency, this recipe is the gold standard for home bakers. You can go from a craving to a finished tray in under half an hour, which is faster than most people can get a campfire started.
The yield of 24 bites is usually enough for a small party, though in my house, they tend to disappear before they even hit the cooling rack.
| Method | Total Time | Texture | Best For |
|---|---|---|---|
| Fresh Baked | 25 minutes | Crisp crust, molten core | Immediate serving |
| store-bought | 0 mins | Soft, often chewy/stale | Emergency pantry stash |
| Reheated | 2 mins | Softened crust, gooey core | Midnight snacks |
The difference between a fresh s'mores bite and the pre packaged versions you find at the grocery store is night and day. A fresh crust has a specific snap that store-bought versions lose due to moisture migration over time. Plus, you get to control the level of "toastiness" on your marshmallows, which is half the fun.
Selecting Components for the Best Texture
Selecting the right ingredients for your s'mores bites is more about physics than flavor. We need a crust that is sturdy enough to hold its shape but tender enough to bite through without it exploding into dust. The balance of fat and sugar in the base is what makes this possible.
| Ingredient | Science Role | Pro Secret |
|---|---|---|
| Graham Crumbs | Provides structural framework | Pulse them until they look like wet sand for better compaction |
| Melted Butter | Acts as the "glue" and fat source | Use unsalted to control the seasoning precisely |
| Large Marshmallows | Creates the aerated, sticky topping | Snipping them with wet scissors prevents sticking |
Chef Tip: Freeze your chocolate squares for 10 minutes before placing them on the hot crust. This delays the melting just long enough for the marshmallow to toast without the chocolate turning into a liquid puddle that leaks out.
For the base, you will need 1.5 cups graham cracker crumbs (150g). If you can't find pre crushed ones, just toss about 10-12 full sheets into a food processor. Add 6 tbsp unsalted butter, melted (85g) and 0.25 cup granulated sugar (50g).
Don't forget a pinch fine sea salt it’s the secret to making the chocolate flavor really pop. For the fillings, use 3.5 oz milk chocolate, broken into 24 squares (100g) and 12 large marshmallows, halved horizontally (90g).
Essential Tools for a Clean Bake
You don't need a professional pastry kitchen for this, but a few specific tools will make your life much easier. The most important is a non stick mini muffin tin. Even with the butter in the crust, the marshmallows can be aggressive "climbers" and might try to stick to the top edges of the pan if you aren't careful.
A small tart tamper or even the bottom of a shot glass is perfect for pressing the crust into the tins. You want to apply enough pressure to make the base solid, but not so much that you turn it into a brick.
If you find the crumbs sticking to your tamper, a tiny bit of cooking spray on the tool will fix that instantly.
If you enjoy making bite sized snacks, this process is very similar to the prep for my Protein Balls recipe, where getting the right ratio of "sticky" to "dry" is the key to success. Having a set of nesting mixing bowls and a reliable pair of kitchen shears for those marshmallows will save you a lot of frustration.
step-by-step Guide to Toasty Bliss
- Preheat your oven. Set it to 350°F (180°C) until the internal thermometer is steady. Note: Accuracy here prevents the crust from burning before the sugar sets.
- Mix the base. Combine 1.5 cups graham cracker crumbs, 6 tbsp melted butter, 0.25 cup sugar, and a pinch of salt. Mix until it looks like wet sand.
- Form the cups. Press about 1 tablespoon of the mixture into each mini muffin cup. Press firmly to create a solid base.
- Par bake the crusts. Bake for 4-5 minutes until the edges just start to darken. Note: This sets the structure so the chocolate doesn't sink.
- Add the chocolate. Place one square of milk chocolate into each warm crust. Watch for the chocolate edges to soften.
- Prepare the marshmallows. Use wet scissors to cut 12 large marshmallows in half horizontally. The sticky center should face down.
- Top the bites. Place one marshmallow half, cut side down, onto each chocolate square. Press down slightly to anchor it.
- Final toast. Bake for another 2-4 minutes until the tops are golden brown and puffed.
- Cool the pan. Let the bites sit in the tin for at least 15 minutes. Wait until the crust feels firm to the touch.
- Release and serve. Use a thin knife to gently pop each bite out. Listen for the clean click of the crust releasing.
Avoiding Sticky Situations and Common Fails
One of the biggest hurdles with s'mores bites is the marshmallow "explosion." If you leave them in the oven even thirty seconds too long, the air inside the marshmallow expands so much that it can topple over or fuse to the neighboring bite. It is a spectacle, but a messy one.
Why Your Crust Is Crumbly
If your bites fall apart as soon as you lift them, the culprit is usually the pressure. You really have to pack those crumbs down. If they are loose before they go in the oven, the melted butter won't be able to bind the sugar and crumbs into a cohesive unit.
Another reason could be the ratio of butter; if you measured your crumbs too loosely, you might need an extra teaspoon of butter to get that "wet sand" feel.
| Problem | Root Cause | Solution |
|---|---|---|
| Marshmallow fell off | Not pressed into chocolate | Gently tap the marshmallow down after placing it |
| Crust stuck to tin | Sugar caramelized on the metal | Run a warm knife around the edge while still slightly warm |
| Chocolate didn't melt | Oven temp too low | Ensure your oven is fully preheated to 350°F (180°C) |
Common Mistakes Checklist
- ✓ Don't over process the graham crackers into dust; a few tiny grains add better texture.
- ✓ Always use large marshmallows cut in half rather than mini marshmallows, which tend to melt into nothingness.
- ✓ Let the tin cool on a wire rack; trapping heat underneath the pan can make the bottoms soggy.
- ✓ Use a light colored muffin tin if possible; dark pans can scorch the butter in the crust too quickly.
- ✓ Wait for the "firmness test" before removing; if the crust feels soft, it hasn't set yet.
Creative Flavor Twists for Your Batch
Once you have the basic s'mores bites down, the variations are endless. I love swapping out the milk chocolate for a dark chocolate with sea salt or even a thin layer of peanut butter under the chocolate square. It adds a savory depth that balances out the intense sweetness of the marshmallow.
| Original Ingredient | Substitute | Why It Works |
|---|---|---|
| Milk Chocolate | Dark Chocolate (70%) | Less sweet; provides a sophisticated, bitter contrast |
| Graham Crumbs | Biscoff Cookie Crumbs | Adds a deep cinnamon and caramel spice profile |
| Granulated Sugar | Brown Sugar | Adds moisture and a hint of molasses flavor |
If you want a truly decadent version, try the "PB & S'more." Just drop a half teaspoon of creamy peanut butter into the crust before the chocolate. The heat from the oven will swirl them together into a velvety center that tastes like a gourmet candy bar.
Keeping Your Treats Fresh and Tasty
The best way to store these is in an airtight container at room temperature. They will stay perfectly snappy for about 2 to 3 days. I don't recommend the fridge, as the cold air can actually make the marshmallow go stale and the crust lose its crunch.
If you live in a very humid climate, tossing a piece of white bread into the container can help absorb any excess moisture that might soften the crackers.
For zero waste baking, if you have leftover graham cracker crumbs, don't throw them away! You can stir them into yogurt or use them as a topping for oatmeal. Any leftover marshmallow halves are perfect for a cup of hot cocoa later that evening.
Freezing and Reheating: You can freeze these for up to a month. To reheat, just pop them in a 300°F (150°C) oven for about 3-5 minutes. This wakes up the chocolate and softens the marshmallow without burning the crust.
Just avoid the microwave; it turns the marshmallow into a rubbery mess in seconds.
Perfect Pairings for a Dessert Spread
When you are serving these at a party, balance is everything. Since they are quite sweet and rich, they pair beautifully with something slightly bitter or tart. A big bowl of fresh raspberries or strawberries offers a refreshing acidity that cleans the palate between bites.
If you are setting up a full dessert table, consider adding some savory elements too. These bites look great alongside a platter of salted nuts or even some sharp cheddar cheese. For drinks, nothing beats a cold glass of milk or a strong, dark roast coffee.
The bitterness of the coffee cuts right through the sugar, making you want to reach for "just one more."
You could also lean into the campfire theme by serving them with a smoky tea like Lapsang Souchong. It sounds fancy, but it really emphasizes that outdoor flavor we all love. No matter how you serve them, these bites are guaranteed to be the first thing to disappear from the tray.
Trust me, you might want to hide a couple for yourself before the guests arrive!
The Graham Cracker Myth
A common misconception is that you can just use any cracker for the base. Some people try saltines, but the lack of sugar in the dough means the crust won't caramelize or "set" the same way. The honey in graham crackers is actually a functional binder that works with the melted butter to create that firm, snappy cup.
The Melting Point Myth
People often think you need to broil the marshmallows to get them brown. While broiling works, it is very easy to burn the crust or the chocolate. A steady bake at 350°F (180°C) provides enough ambient heat to brown the sugar gently and thoroughly, ensuring the center of the marshmallow is just as gooey as the top.

Recipe FAQs
What are s'mores bites?
They are miniature, handheld versions of traditional s'mores. These treats feature a buttery graham cracker crust base, a layer of melted chocolate, and a toasted marshmallow top, all baked neatly in a muffin tin for easy serving.
How sweet eats S More's bites?
They are very sweet, balanced by the rich dark chocolate notes. The sweetness comes primarily from the marshmallow and the sugar in the crust, but using dark chocolate helps cut through the intense sugary profile.
Is S Mores unhealthy?
Yes, they are an indulgent dessert high in sugar and fat. Like any treat, they should be enjoyed in moderation, as they offer minimal nutritional value beyond carbohydrates and calories.
What is the best candy for smores?
Milk chocolate bars like Hershey's are traditional, but dark chocolate works best here. Dark chocolate (60-70% cacao) offers a better flavor contrast to the super sweet marshmallow.
How do I prevent the marshmallow tops from collapsing or burning?
Bake the marshmallow layer for only 2 to 4 minutes at 350°F (180°C). Watch them closely; once they puff up and turn golden brown, pull the tray immediately to stop the sugar carbonization.
How do I make the graham cracker crust hold together firmly?
Press the crumb mixture firmly into the muffin cups after mixing with melted butter. Par-baking the crust for 4-5 minutes before adding fillings sets the structure, preventing it from crumbling when cooled.
Can I make these ahead of time for a party?
Yes, assemble the crusts and chocolate up to 24 hours in advance. Store the assembled, unbaked tins covered in the refrigerator, then add the marshmallows just before the final baking stage.
Easy S Mores Bites Recipe
Ingredients:
Instructions:
Nutrition Facts:
| Calories | 95 kcal |
|---|---|
| Protein | 0.8 g |
| Fat | 4.9 g |
| Carbs | 12.2 g |
| Fiber | 0.3 g |
| Sugar | 8.1 g |
| Sodium | 46 mg |
