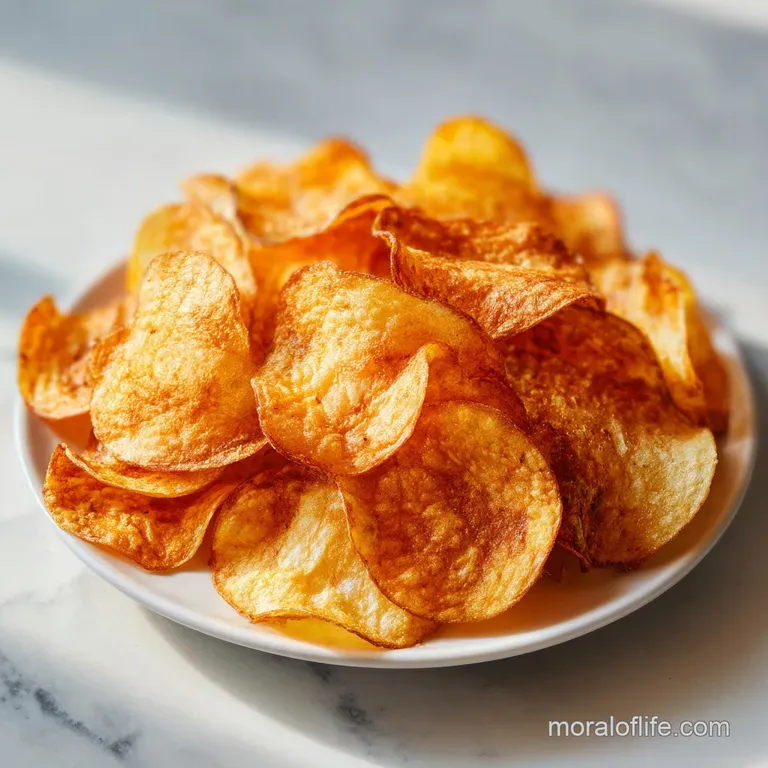
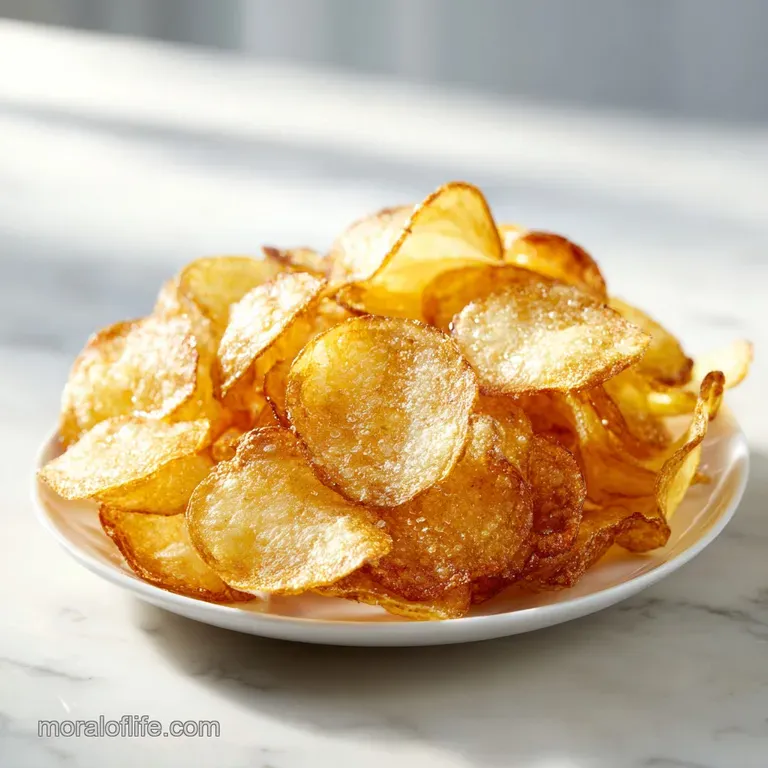
Crispy Potato Chips: Golden and Crunchy
- Time: Active 50 minutes, Passive 20 minutes, Total 70 minutes
- Flavor/Texture Hook: Shattering, golden brown crunch with a clean, salty finish
- Perfect for: High energy game nights, meal prep snacks, or showing off at a backyard barbecue
- Crafting the Ultimate Crispy Potato Chips
- Essential Methods for Shattering Texture
- Precision Timing and Temperature Guides
- Shopping List for Crispy Potato Chips
- Tools for Uniform Snack Slices
- Step-by-Step Fry Station Workflow
- Avoid These Common Frying Mistakes
- Efficient Scaling for Larger Batches
- Bold Seasoning and Flavor Variations
- Debunking Common Snacking Myths
- Preserving the Crunch and Reheating
- Best Sides for Salty Snacks
- Recipe FAQs
- 📝 Recipe Card
Crafting the Ultimate Crispy Potato Chips
Close your eyes and listen to that specific, high pitched crack when you snap a professional chip in half. It is not a dull thud or a bendy sigh; it is a sharp, clean shatter that echoes. That sound is exactly what we are chasing today.
I remember the first time I tried making these, I ended up with a pile of brown, limp circles that tasted more like oily cardboard than actual snacks. It was frustrating because I thought "it's just a potato and oil," but the reality is that moisture is the enemy of the crunch.
We are going to move past the soggy mistakes and focus on what actually works for a busy home cook. This isn't about standing over a stove for three hours while your kitchen smells like a fast food joint. It is about a disciplined, practical approach to the potato.
We use Russets because their high starch content and low moisture make them the prime candidate for a crisp finish that stays rigid even after cooling. If you follow this timeline, you will have a batch of chips that rivals anything you find in a blue or red bag at the corner shop.
Expect a workflow that values precision over guesswork. We are going to use a mandoline for speed and uniformity, an ice bath for starch extraction, and a specific oil temperature to ensure the chips fry rather than soak.
By the time we are done, you will have a bowl of golden chips that are so loud they will drown out the television. Let's get into the mechanics of how we make this happen without wasting your entire afternoon.
Essential Methods for Shattering Texture
To get that specific texture, we have to look at the potato on a structural level. Potatoes are full of starch, and while starch is what makes them crispy, surface starch is what makes them stick together and burn.
By submerged rinsing, we are essentially "washing" the outside of every slice so they remain individual units in the hot oil. This prevents that annoying clump of three chips that never quite cooks in the middle.
Thermal mass is the next big factor in our success. When you drop cold potatoes into hot oil, the temperature of that oil plummets. If the oil drops below 300°F (150°C), the potato starts absorbing the fat instead of searing. This is why we work in small batches.
It might feel slower, but it is actually the most efficient way to get a consistent result. It is better to do five quick batches than one giant batch that turns into a greasy mess.
Starch Purge: Ice cold water pulls the simple sugars and surface starches away from the cut edge. This prevents the chips from turning a bitter, dark brown before they actually get crispy.
Uniformity Factor: Using a mandoline set to exactly 1/16th-inch (1.5mm) ensures every single chip finishes at the same second. No more fishing out burnt ones while others are still raw.
Moisture Evaporation: The "sizzle" you hear is actually water leaving the potato. Once the bubbling subsides, you know the moisture is gone and the chip is structurally sound.
Peanut Oil Stability: We use peanut oil because it has a high smoke point and stays chemically stable at 350°F (177°C), meaning it won't break down or leave a "burnt" aftertaste on your food.
| Method | Time | Texture | Best For |
|---|---|---|---|
| Deep Fry | 20 minutes | Shattering & Light | Authentic snack experience |
| Oven Bake | 35 minutes | Hard & Crunchy | Lower fat preference |
| Air Fryer | 25 minutes | Rigid & Dry | Small individual servings |
The choice of method really depends on your goals for the day. If you want that classic, airy snap, the deep fry is the only way to go. The oil surrounds the potato instantly, creating a steam jacket that puffs the cells slightly before they harden.
Oven versions are practical for health, but they often lack that delicate "give" that makes a potato chip so addictive.
Precision Timing and Temperature Guides
Getting the temperature right is not just a suggestion; it is a requirement for this recipe. If you don't have a clip on thermometer for your pot, I strongly suggest grabbing one before you start. It takes the anxiety out of the process.
You'll see the oil fluctuate as you add the potatoes, and knowing exactly when to nudge the heat up or down is the secret to a professional batch.
| Component | Science Role | Pro Secret |
|---|---|---|
| Russet Potato | High Specific Gravity | Use older potatoes; they have less water and more starch for a crispier bite. |
| Peanut Oil | Heat Transfer | Don't toss it after one use; filtered oil can be reused 2-3 times for frying. |
| Sea Salt | Hygroscopic Seasoning | Grind your salt into a fine powder so it sticks to the chips without falling off. |
The "Specific Gravity" of a Russet is just a fancy way of saying it has more solids and less water compared to a Red or Yukon Gold potato. This is why Russets are the gold standard for frying. If you try this with a waxy potato, you will struggle to get that dry, flaky interior that we all love.
Shopping List for Crispy Potato Chips
You only need three ingredients, so do not settle for subpar versions of them. Since the ingredient list is so short, the quality of each item carries the entire flavor profile. Go for the biggest Russets you can find to get those satisfyingly large, wide chips.
- 2 lbs Russet potatoes: Look for firm ones with no green tint on the skin. Why this? Russets provide the highest starch to moisture ratio for a sturdy, rigid chip.
- 2 quarts Peanut oil: A neutral oil with a high smoke point is essential. Why this? It handles the heat without smoking and leaves no heavy oily residue.
- 1.5 tsp Fine sea salt: The finer the grain, the better it clings to the curves of the chip. Why this? It provides a clean saltiness without the chemical metallic taste of table salt.
For the potatoes, you want to avoid anything that feels soft or has sprouted eyes. Soft potatoes have already started converting their starches into sugars, which means they will brown far too quickly in the oil, leaving you with a burnt flavor.
If you can't find peanut oil, sunflower or canola oil are decent backups, but they lack the subtle nutty richness that peanut oil provides.
| Original Ingredient | Substitute | Why It Works |
|---|---|---|
| Russet Potatoes | Yukon Gold | Note: These will be slightly creamier and less "shattery" than Russets. |
| Peanut Oil | Canola Oil | Neutral flavor and high smoke point, though less heat stable than peanut oil. |
| Sea Salt | Celery Salt | Adds a savory, herbal note that complements the potato's natural earthiness. |
Using Yukon Golds is a common pivot, and while I love them for mash, they have a higher sugar content. If you use them, you might need to fry them at 325°F (160°C) for a slightly longer time to prevent over browning.
They result in a "kettle" style chip that is a bit harder on the teeth but very flavorful.
Tools for Uniform Snack Slices
If you are trying to slice these with a chef's knife, I salute your bravery, but your chips will be inconsistent. To get that 1/16th-inch precision, a mandoline is your best friend. It turns a 20 minute chore into a 2 minute task.
Just please, for the love of your fingertips, use the safety guard or a cut resistant glove.
You also need a heavy bottomed pot, like a cast iron Dutch oven. These pots hold onto heat much better than thin stainless steel. When you drop those cold potato slices in, the heavy metal helps the oil recover its temperature much faster, which keeps the chips from becoming greasy.
A wire cooling rack is also better than paper towels; it allows air to circulate around the chip so they don't steam themselves into softness while they cool.
step-by-step Fry Station Workflow
- Scrub the Russet potatoes clean and slice them into 1/16th-inch rounds using a mandoline slicer to ensure uniform thickness.
- Immediately submerge the potato slices in a large bowl of ice cold water. Agitate them by hand to release surface starch.
- Drain the cloudy water and repeat the rinsing process until the water remains clear. Note: This prevents the chips from sticking together in the fryer.
- Let the slices soak in the final clear cold water bath for 30 minutes. until the slices feel rigid and slightly translucent.
- Drain the potatoes and lay them out on clean kitchen towels. Pat them completely dry. Note: Water in the oil causes dangerous splattering and prevents the Maillard reaction.
- Heat 2 quarts of peanut oil in a heavy bottomed Dutch oven until it reaches a stable 350°F (177°C).
- Working in small batches to maintain oil temperature, fry the slices. until they are golden brown and the bubbling subsides (approx. 3-5 minutes per batch).
- Use a slotted spoon to transfer chips to a wire cooling rack set over a baking sheet.
- Season immediately with 1.5 tsp fine sea salt while the chips are still hot. until the salt is evenly distributed across the surface.
This process is all about the flow. While one batch is frying, you should be prepping the next set of dried slices. Keep your oil thermometer in view at all times. If you see the temp dropping below 325°F (160°C), wait a minute between batches to let the oil "recharge" its heat.
It's the most efficient way to ensure the last chip is just as good as the first one.
Avoid These Common Frying Mistakes
The biggest pitfall I see people fall into is overcrowding the pot. It is tempting to dump half the potatoes in at once to finish faster. Don't do it. The oil temperature will crater, the chips will stick together in a massive clump, and you will end up with something that is simultaneously burnt on the edges and raw in the middle.
Another hidden trap is the drying phase. If your potatoes are even slightly damp, that water has to evaporate before the frying can begin. This extra time in the oil leads to more fat absorption. I like to use a salad spinner to get the bulk of the water off, then finish them on a towel.
It's an extra step that saves you from a greasy final product.
Why Your Chips Are Greasy
If your chips feel heavy or leave a thick film of oil on your tongue, your oil temperature was likely too low. When the oil is at a true 350°F (177°C), the steam escaping the potato creates a pressure barrier that keeps the oil from soaking in.
As soon as that steam stops (indicated by the bubbling slowing down), the oil can start to enter. You have to pull them out right at that sweet spot.
Why Your Chips Are Bitter
Dark brown chips usually mean the sugars in the potato have scorched. This happens if you skip the 30 minute soak or if your potatoes are too old and have converted their starch to sugar. If you see them browning too fast, drop the temperature by 10 degrees for the next batch.
| Problem | Root Cause | Solution |
|---|---|---|
| Soft/Soggy Chips | Residual moisture or overcrowding | Dry slices thoroughly and fry in smaller batches. |
| Dark Spots/Bitter Taste | High sugar content or dirty oil | Soak in cold water longer and filter oil between uses. |
| Clumping | Surface starch not rinsed | Rinse until water is crystal clear and agitate during the first 30 seconds of frying. |
Common Mistakes Checklist
- ✓ Never skip the cold water soak (it's the only way to get a clean snap)
- ✓ Use a thermometer (guessing the oil temp is a recipe for disaster)
- ✓ Pat potatoes bone dry (even a drop of water ruins the texture)
- ✓ Season while steaming hot (salt won't stick once the oil cools)
- ✓ Store in a truly airtight container (humidity is the crunch killer)
Efficient Scaling for Larger Batches
If you are cooking for a crowd, you can easily double this recipe, but you need to adjust your setup. For 4 lbs of potatoes, do not try to use the same 2 quarts of oil. The oil will accumulate too much debris and starch. Use a second pot if you have one, or plan to filter the oil halfway through.
- Scaling Down (1 lb): You can use a smaller 3 quart saucepan and only 1 quart of oil. The cook time per batch remains the same, but you'll finish the whole process in about 40 minutes.
- Scaling Up (4 lbs): Increase the salt to 2.5 tsp (not 3 tsp) to avoid over salting. Work in two separate frying stations if possible to keep the total time manageable.
- Time Management: For large batches, you can slice and soak the potatoes hours in advance. Just keep them submerged and in the fridge.
Chef's Tip: If you're doing a massive batch, keep the finished chips in a 200°F (95°C) oven on a wire rack. This keeps them warm and drives off any last bit of moisture, making them even crispier.
Bold Seasoning and Flavor Variations
Once you have the base chip down, you can start playing with flavors. The secret is to have your seasonings mixed and ready before the chips come out of the oil. You have about a 15 second window where the surface oil is still liquid enough to act as a glue for the spices.
- Vinegar Dust: Instead of liquid vinegar (which makes them soggy), use malic acid powder or a salt and vinegar seasoning blend.
- Spicy BBQ: Mix smoked paprika, garlic powder, and a pinch of cayenne with your salt.
- Herbaceous: Finely minced rosemary and lemon zest tossed with the chips while they are hot provides an "elevated" snack feel.
- Pizza Style: If you love savory snacks, these pair incredibly well with pizza egg rolls for a full "junk food" spread that actually tastes like real food.
If you want "Kettle" style:
- Use Yukon Gold potatoes.
- Slice slightly thicker (1/8th inch).
- Start the oil at 325°F (160°C) and let it drop naturally.
Debunking Common Snacking Myths
A common misconception is that you need to boil the potatoes before frying to get them crispy. While this works for French fries, it is a disaster for chips. Boiling makes the thin slices too fragile to handle and introduces too much internal moisture.
A simple cold water soak is much more effective for this specific thickness.
Another myth is that you can't reuse frying oil. As long as you didn't overheat the oil to the point of smoking, you can filter it through a coffee filter and use it again. In fact, many professional fryers believe that "seasoned" oil that has been used once or twice actually produces a better crust than brand new oil.
Preserving the Crunch and Reheating
Storage is where most home cooks fail. Even the crispest chip will turn into a sad, rubbery disc if left out in a humid kitchen. Once the chips are completely cool and I mean completely store them in a gallon sized freezer bag or an airtight glass jar.
If you put them in while they are even slightly warm, they will create steam in the bag and ruin the whole batch.
- Fridge: Never store potato chips in the fridge. The humidity is too high and the starch will undergo "retrogradation," making them tough and stale.
- Freezer: Surprisingly, you can freeze chips in a vacuum sealed bag for up to 2 months. Just let them come to room temperature before opening the bag.
- Zero Waste: Save your potato peels! Toss them in a little oil and salt and air fry them at 400°F (200°C) for 10 minutes. They make a fiber rich, crunchy snack that tastes like a rustic version of the chips themselves.
If your chips do lose their snap, you can "revive" them. Spread them on a baking sheet and pop them into a 300°F (150°C) oven for about 3-4 minutes. This will drive off the absorbed atmospheric moisture and bring back that original shatter.
Best Sides for Salty Snacks
These chips are the ultimate versatile side dish. They are hearty enough to stand up to heavy dips like caramelized onion or spinach artichoke, but clean enough to eat by the handful. I personally love serving these alongside a hot bowl of best homemade loaded potato soup for a "potato on potato" experience that feels incredibly indulgent.
If you are looking for a lighter pairing, try them with a cold tuna salad or a classic club sandwich. The crunch of the chip provides the perfect textural contrast to soft bread and creamy fillings.
For a party, I usually set out a few different salts truffle salt, smoked salt, and spicy chili salt so people can customize their own bowl. It turns a simple snack into an interactive experience. Just remember to keep the portions in check; these disappear much faster than you think they will.

Recipe FAQs
Is it true I can slice the potatoes with a kitchen knife instead of a mandoline?
No, this is a common misconception. A mandoline is essential for achieving the precise 1/16th-inch thickness required for even cooking; manual knife work often leads to uneven thickness and burnt edges.
How to ensure the chips do not stick together in the fryer?
Rinse the slices in cold water until the liquid runs clear. This removes the surface starch that acts as a glue, ensuring each slice fries individually.
Why is a 30-minute soak in cold water required?
This step removes excess starch and hydrates the potato cells. If you enjoyed mastering this technique for potato texture, apply the same precision to our buttery potatoes for consistent results.
Can I use olive oil or vegetable oil instead of peanut oil?
No, stick to peanut oil. It has a high smoke point that remains stable at 350°F, preventing the off-flavors that lower quality oils develop during prolonged frying.
How to tell when the chips are finished frying?
Wait for the bubbling to subside completely and look for a uniform golden brown color. This typically happens within 3-5 minutes, indicating that the moisture has been fully evaporated from the potato.
Is it necessary to use a wire cooling rack after frying?
Yes, it is vital for texture. Placing hot chips on a rack allows air to circulate underneath, preventing the trapped steam that would otherwise make them soggy.
How to prevent the oil from splattering during frying?
Pat the potato slices completely dry with clean kitchen towels before frying. Any residual surface moisture will react violently with the hot oil, causing dangerous splattering.
Homemade Crispy Potato Chips

Ingredients:
Instructions:
Nutrition Facts:
| Calories | 268 kcal |
|---|---|
| Protein | 3.4 g |
| Fat | 17.5 g |
| Carbs | 26.8 g |
| Fiber | 2.3 g |
| Sugar | 0.6 g |
| Sodium | 702 mg |
