Pioneer Woman Beef Tips and Gravy
- Time: Active 20 minutes, Passive 90 minutes, Total 110 minutes
- Flavor/Texture Hook: Savory, velvety gravy with deeply seared beef
- Perfect for: A dependable Sunday family dinner or cozy weeknight meal
- Making Pioneer Woman Beef Tips and Gravy
- Essential Recipe Numbers and Results
- Components of a Silky Gravy
- Picking Your Produce and Proteins
- Simple Tools for Great Flavor
- The Step By Step Method
- Fixing Texture and Flavor Issues
- Simple Ways to Swap Ingredients
- Keeping and Reheating the Leftovers
- What to Serve on Sunday
- Debunking Kitchen Myths
- Adjusting for Different Groups
- High in Sodium
- Recipe FAQs
- 📝 Recipe Card
Making Pioneer Woman Beef Tips and Gravy
Picture this: It is a Sunday afternoon, the kind where the light is turning golden and there is a slight chill in the air. You walk into the kitchen and the first thing you notice is that deep, savory aroma of beef and onions hanging in the air. This isn't just any dinner.
This is the kind of meal that makes everyone wander into the kitchen to ask, "When is it ready?" I remember the first time I made this for a group of friends. I was worried the beef might stay tough, but by the time I pulled the lid off that heavy pot, the meat practically fell apart when I touched it with a spoon.
It was pure magic.
We are going for that classic, dependable comfort that reminds you of home. You don't need fancy techniques or a culinary degree to make this work. It's all about the layers of flavor we build in one single pot.
We start with a hard sear, move to some beautifully caramelized onions, and then let time do all the heavy lifting. Honestly, don't even bother with the "stew meat" pre cut packs at the store. You want a big chuck roast that you cut yourself so you get those perfect, uniform 1.5 inch cubes.
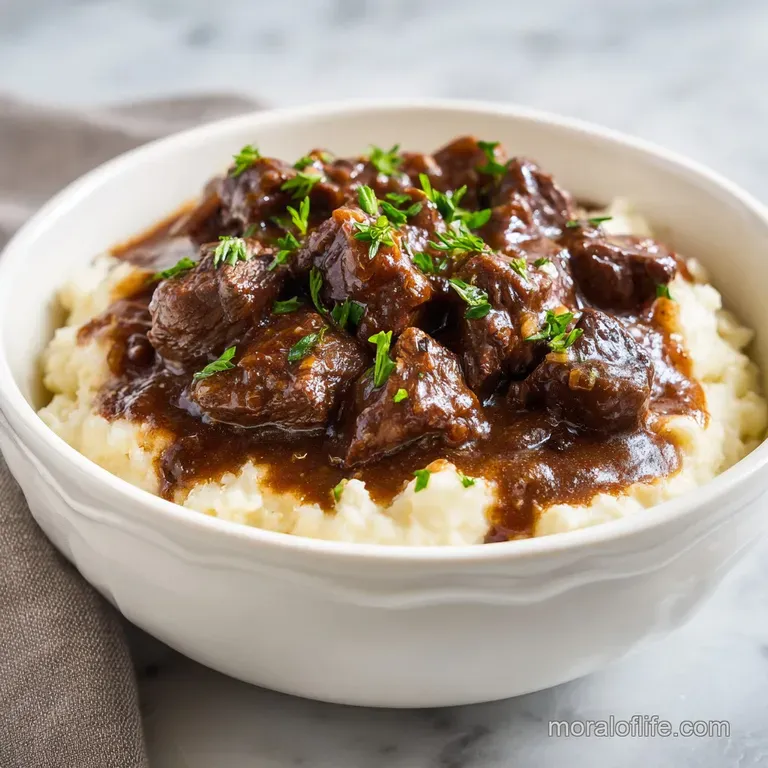
What you'll get at the end of 110 minutes is a bowl of pure nostalgia. The gravy is thick enough to coat a spoon but silky enough to pool around a pile of mashed potatoes or egg noodles. We are focusing on getting that rich, brown color without needing any "gravy browner" shortcuts.
It's all about the fond, those little brown bits on the bottom of the pan that hold all the secrets to a great sauce. Trust me, once you see how easy this is, it will become your go to for a normal Tuesday when you just need a win.
Essential Recipe Numbers and Results
When you are deciding how to tackle this dish, it's helpful to know what you are getting into compared to a faster version. Sometimes we have all afternoon, and sometimes we are rushing home from work.
The classic method we are using today is built for texture and depth, but I've compared it to the "quick" version so you can see the trade offs.
| Method | Cook Time | Beef Texture | Gravy Depth |
|---|---|---|---|
| Classic Pot | 90 minutes | Melts on the tongue | Deep, rich, and complex |
| Pressure Cooker | 35 minutes | Soft but slightly stringy | Lighter color, less reduction |
| Slow Cooker | 8 hours | Very tender | Can become watery if not reduced |
The magic of the 90 minutes simmer is that it gives the connective tissue in the chuck roast enough time to turn into gelatin. That is what gives the sauce that velvety mouthfeel that you just can't get in 20 minutes. If you are looking for a different kind of comfort food that also hits that savory note, my Swedish Meatballs are a family favorite that use a similar creamy gravy base.
Components of a Silky Gravy
Flour Coating: The flour on the beef serves a dual purpose by aiding in browning and acting as a built in thickener for the sauce as it simmers.
Onion Caramelization: Sautéing onions for 8–10 minutes creates a sweet, savory base that balances the saltiness of the beef broth.
Cold Butter Finish: Stirring in cold butter at the very end emulsifies the sauce, giving it a professional shine and a richer flavor.
Acid Balance: Worcestershire and soy sauce provide a hit of acidity and salt that cuts through the heavy fat of the beef roast.
| Component | Science Role | Pro Secret |
|---|---|---|
| Beef Chuck | Collagen source | Pat it dry before searing or it will steam instead of brown. |
| Low sodium Broth | Liquid base | Use low sodium so you can control the final saltiness yourself. |
| All purpose Flour | Starch thickener | Don't over coat; a light dusting is all you need for a clean gravy. |
Each of these elements works together to create a sauce that isn't just "thick," but has actual character. The soy sauce might seem like an odd addition to an old fashioned beef tips and gravy recipe, but it adds an incredible depth of color and umami that salt alone can't provide.
Picking Your Produce and Proteins
Before you head to the store, let's talk about the shopping list. I've listed exactly what you need for this recipe for 6 servings. If you see something you don't have, I've included a dependable swap that won't ruin the vibe of the dish.
- 3 lbs Beef Chuck Roast: Trim the big chunks of hard fat and cut into 1.5 inch cubes. Why this? Chuck has the best fat to meat ratio for long braising.
- Substitute: Top Round or Tri tip (note: these are leaner and may be slightly drier).
- 2 tbsp Olive oil: For the initial over high heat sear. Why this? It has a high enough smoke point to get a good crust.
- Substitute: Avocado oil or Grapeseed oil.
- 1 tsp Kosher salt & 1 tsp Black pepper: For seasoning the beef.
- 0.5 cup All purpose flour: For dredging the beef cubes.
- Substitute: Cornstarch (use only 1/4 cup) for a gluten-free option.
- 2 large Yellow onions: Thinly sliced for maximum surface area. Why this? Yellow onions hold their structure better than white onions.
- Substitute: Sweet onions or shallots.
- 3 cloves Garlic: Freshly minced.
- 3 cups Low sodium beef broth: The main liquid for the gravy.
- Substitute: Beef consommé (skip the extra salt if using this).
- 2 tbsp Worcestershire sauce: For that classic tangy punch.
- 1 tbsp Soy sauce: For color and depth.
- 2 sprigs Fresh thyme & 1 Bay leaf: Aromatics.
- 2 tbsp Unsalted butter: To finish the sauce.
- 1 tbsp Cornstarch & 1 tbsp Water: Only if you want an extra thick gravy.
| Original Ingredient | Substitute | Why It Works |
|---|---|---|
| Beef Broth | Red Wine (1 cup) + Water (2 cups) | Adds acidity and a fancy French style depth to the gravy. |
| Fresh Thyme | Dried Thyme (1 tsp) | Concentrated flavor. Note: Add earlier in the cook than fresh. |
| Yellow Onions | Leeks (white parts only) | Provides a milder, more delicate onion flavor. |
Simple Tools for Great Flavor
You don't need a kitchen full of gadgets for this. In fact, a "minimal tools" approach usually leads to better results because you aren't distracted. The most important thing is a heavy bottomed pot. I use a 6 quart Dutch oven (like a Lodge or Le Creuset), which is perfect because it holds heat so well.
If you don't have one, a deep stainless steel sauté pan will work, but you'll need to keep a closer eye on the liquid levels so it doesn't dry out.
A good wooden spoon is also non negotiable. You need something sturdy to scrape those brown bits off the bottom of the pan during the deglazing step. Don't use a silicone spatula for that; you won't get the leverage you need.
Aside from that, a large mixing bowl for the flour dredge and a sharp chef's knife are all you really need to get this on the table. Keeping it simple means less cleanup later, which is always a win in my book.
The step-by-step Method
- Dredge the beef. Pat the beef cubes completely dry with paper towels. In a large bowl, toss the beef with flour, salt, and pepper until every piece is lightly and evenly coated.
- Sear in batches. Heat oil in a heavy bottomed Dutch oven over medium high heat. Add the meat in batches to avoid crowding. Cook until a dark, mahogany crust develops on at least two sides of each cube. Remove and set aside.
- Soften the onions. Lower the heat to medium. Add sliced onions to the remaining fat in the pan. Sauté for 8–10 minutes until they are soft and look lightly caramelized.
- Add the aromatics. Stir in the minced garlic and cook for about 1 minute until you can smell it clearly.
- Deglaze the pan. Pour in the beef broth. Use your wooden spoon to scrape up all those dark bits from the bottom. This is where the flavor lives.
- Simmer it down. Stir in Worcestershire sauce, soy sauce, thyme, and the bay leaf. Return the beef and any juices to the pot.
- Cover and cook. Bring to a gentle simmer, then cover and reduce heat to low. Cook for 90 minutes until the beef is fork tender and yields to pressure.
- Finish the sauce. Remove the bay leaf and thyme sprigs. Stir in the cold butter. If the gravy isn't thick enough for you, whisk the cornstarch and water slurry into the pot for 2 minutes until it bubbles and thickens.
Fixing Texture and Flavor Issues
Even with a dependable recipe, things can go a little sideways. Maybe your stove runs hotter than mine, or maybe the beef was a bit leaner than expected. Most of these issues are easy to fix if you know what to look for. If you find yourself frequently dealing with beef that isn't quite right, you might want to check out my Stroganoff in 30 Min recipe which covers similar issues with dairy based sauces.
Why is my meat still tough?
If you've hit the 90 minutes mark and the meat is still chewy, it just hasn't had enough time. Not all cows are the same, and some chuck roasts have more connective tissue than others. Don't panic. Just put the lid back on and give it another 15 to 20 minutes.
The meat will eventually surrender and become tender.
| Problem | Root Cause | Solution |
|---|---|---|
| Salty Gravy | Broth reduced too much | Add a splash of water or a pinch of sugar to balance it. |
| Thin Sauce | Lid was too tight | Simmer uncovered for 10 minutes or use the cornstarch slurry. |
| Grey Beef | Pan was overcrowded | Sear in smaller batches next time to ensure over high heat browning. |
Common Mistakes Checklist
- ✓ Never skip drying the beef; moisture is the enemy of a good sear.
- ✓ Don't turn the heat too low during the sear or the meat will boil in its own juices.
- ✓ Avoid using "stew meat" from the store as the pieces are often from different cuts and cook unevenly.
- ✓ Keep the simmer "gentle" if it's boiling hard, the meat will actually toughen up and dry out.
- ✓ Always let the beef rest in the gravy for 5 minutes after turning off the heat to let the juices settle.
Simple Ways to Swap Ingredients
If you are looking to change things up, this easy beef tips and gravy recipe is very forgiving. If you want a deeper, more "Pioneer Woman" style flavor, you can add a splash of heavy cream at the very end with the butter. It makes the sauce incredibly luxurious and gives it a lighter, cafe au-lait color.
For those following a low carb lifestyle, you can skip the flour dredge entirely. Just sear the seasoned beef directly in the oil. The gravy won't be as thick naturally, but you can use a bit of xanthan gum or just reduce the broth by half to concentrate the flavor.
You can also serve it over cauliflower mash instead of noodles to keep it keto friendly.
If you like a bit of heat, adding a teaspoon of horseradish or a dollop of Dijon mustard to the gravy during the final 10 minutes of simmering adds a wonderful "zing" that cuts through the richness of the beef. It’s a trick I learned when making my Chile Colorado recipe, which is another long simmered beef dish that benefits from a hit of acidity.
Keeping and Reheating the Leftovers
This dish is almost better the next day. As it sits in the fridge, the beef continues to absorb the flavors of the thyme and bay leaf, and the gravy thickens into a rich jelly.
Storage: Keep it in an airtight container in the fridge for up to 4 days. If you want to freeze it, it will stay good for up to 3 months. Just make sure it’s completely cool before you put it in the freezer to prevent ice crystals.
Zero Waste: If you have leftover gravy but no beef, don't throw it out! It is incredible over fried eggs and toast the next morning. You can also use the leftover beef and gravy as a shortcut base for a beef pot pie.
Just toss in some frozen peas and carrots, put it in a pie crust, and bake until golden.
Reheating: The best way to reheat this is on the stove over low heat. Add a splash of water or beef broth to loosen the gravy back up, as it will be very thick when cold. Avoid the microwave if you can, as it tends to make the beef a bit rubbery.
What to Serve on Sunday
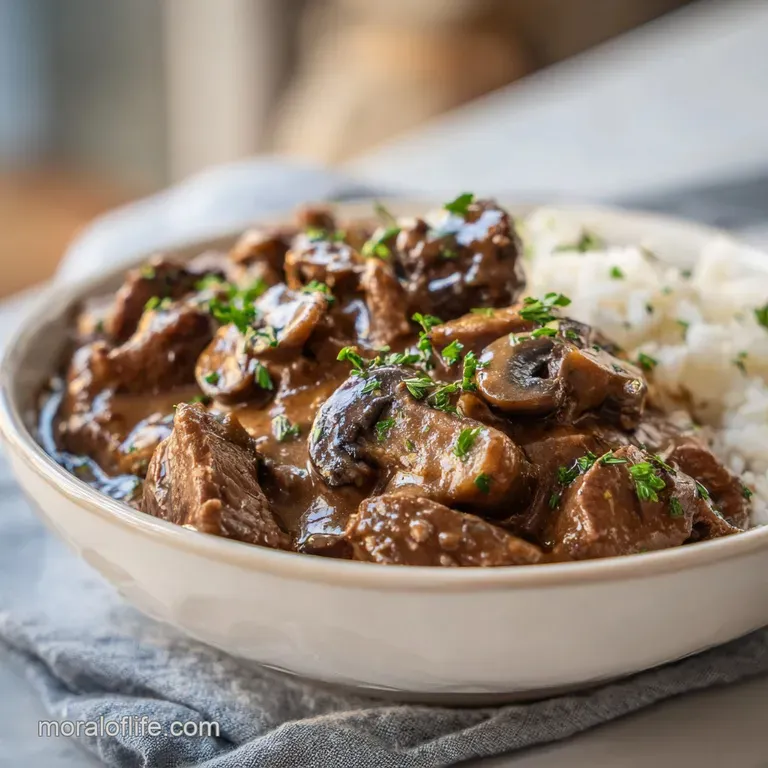
The classic way to serve this is as beef tips and noodles recipe. I love using those extra wide, curly egg noodles because they have so many nooks and crannies for the gravy to hide in. If you aren't a noodle person, a big scoop of buttery mashed potatoes is the ultimate vessel for this sauce.
For a bit of color on the plate, I usually roast some carrots or serve a side of steamed green beans. You want something with a bit of a "snap" to contrast the softness of the beef and gravy. If you are feeling extra, a crusty piece of sourdough bread is mandatory for wiping the plate clean.
There is nothing worse than leaving good gravy behind!
Debunking Kitchen Myths
One big myth is that you need to sear the meat to "lock in the juices." That isn't actually true. Searing is all about the flavor and color of the crust. The meat will lose moisture as it cooks regardless, but that mahogany crust adds a savory depth to the gravy that you just can't get any other way.
Another common misconception is that you need a lot of liquid to keep the meat tender. In reality, you only need enough broth to partially submerge the beef. This is a braise, not a soup. If you drown the meat in liquid, the sauce will be thin and the beef will taste "boiled" rather than rich and savory.
Adjusting for Different Groups
If you are cooking for a crowd, this recipe scales up beautifully. Just remember that when you double the meat, you don't necessarily need to double all the spices. I usually go for 1.5 times the salt and pepper and then taste at the end.
For a smaller group, you can easily halve the recipe. Use a smaller pot so the liquid still covers the meat properly. If you use a giant pot for a small amount of beef, the liquid will evaporate too quickly and you'll end up with burnt onions instead of gravy. If you are doing a half batch and have half a chuck roast left, it's a great excuse to make a small batch of Hobo Casserole later in the week.
| Serving Size | Beef Amount | Pan Size | Cook Time |
|---|---|---|---|
| 2-3 People | 1.5 lbs | 3 quart pot | 80 minutes |
| 6 People | 3 lbs | 6 quart Dutch oven | 90 minutes |
| 10-12 People | 6 lbs | Large stockpot | 105 minutes |
By following these simple steps and keeping an eye on the sensory cues the sizzle of the sear, the smell of the onions, and the "give" of the beef you'll have a meal that feels like a big hug in a bowl.
It’s dependable, it’s comforting, and it’s a recipe you’ll find yourself coming back to every single time the weather turns cold. Enjoy!

High in Sodium
845 mg of sodium per serving (37% of daily value)
The American Heart Association recommends limiting sodium intake to no more than 2,300mg per day, with an ideal limit of less than 1,500mg for most adults.
Tips to Reduce Sodium
-
Swap Beef Broth-30%
Replace the 3 cups of regular beef broth with low-sodium beef broth. This is a significant source of sodium in the recipe.
-
Reduce Added Salt-25%
Decrease the 1 tsp of Kosher salt to 0.5 tsp. You can always add more to taste at the end if needed, but start low.
-
Choose Low-Sodium Soy Sauce-20%
Opt for low-sodium soy sauce. The standard soy sauce contributes a substantial amount of sodium.
-
Flavor with Herbs and Spices
Maximize the use of fresh herbs like thyme and bay leaf, and consider adding other sodium free aromatics like garlic powder or onion powder to boost flavor without salt.
-
Select No-Salt Added Ingredients-10%
When purchasing ingredients like canned tomatoes (if used in a variation) or even some pre-minced garlic, look for no-salt added versions.
-
Consider Worcestershire Sauce-15%
Worcestershire sauce can be high in sodium. Look for a lower sodium version or a brand that uses less salt.
Recipe FAQs
Is it necessary to use pre-cut stew meat for this recipe?
No, avoid store-bought stew meat. These pre-cut pieces often come from various muscle groups, causing them to cook unevenly; it is far better to trim and cube your own 3 lb beef chuck roast for consistent texture.
Why is my beef searing instead of browning properly?
Moisture is the culprit. You must pat the beef cubes completely dry with paper towels before dredging in flour, otherwise, the meat will steam in the pan instead of developing that mahogany crust.
How to ensure the gravy reaches the desired thickness?
Whisk a slurry of one tablespoon cornstarch and one tablespoon water together. Once the beef is fork tender after the 90-minute cook time, stir this mixture into the simmering liquid for 2 minutes to achieve a glossy, thickened consistency.
Is it true that a hard boil creates a more flavorful gravy?
No, this is a common misconception. You must maintain a gentle simmer; if the liquid boils hard, the meat fibers will tighten up and become tough rather than tender.
How to incorporate the brown bits from the bottom of the pan?
Pour the beef broth into the pot and scrape the pan with a wooden spoon. If you enjoyed mastering this deglazing technique here, see how the same principle of building flavor works in our classic meat sauce.
Should I serve the beef immediately after the 90-minute timer?
No, let the beef rest in the gravy for 5 minutes after turning off the heat. This short rest allows the juices to settle back into the meat, ensuring every bite is succulent.
How to avoid overcrowding the pan during the searing phase?
Sear the meat in smaller batches. Giving each piece enough space ensures the temperature in the Dutch oven stays high enough to crust the meat rather than boiling it in its own juices.
Pioneer Woman Beef Tips

Ingredients:
Instructions:
Nutrition Facts:
| Calories | 538 kcal |
|---|---|
| Protein | 45.6 g |
| Fat | 31.4 g |
| Carbs | 15.2 g |
| Fiber | 1.4 g |
| Sugar | 3.2 g |
| Sodium | 845 mg |
