Skillet Pan Cookie Recipe

- Time: Active 10 minutes, Passive 20 minutes, Total 30 minutes
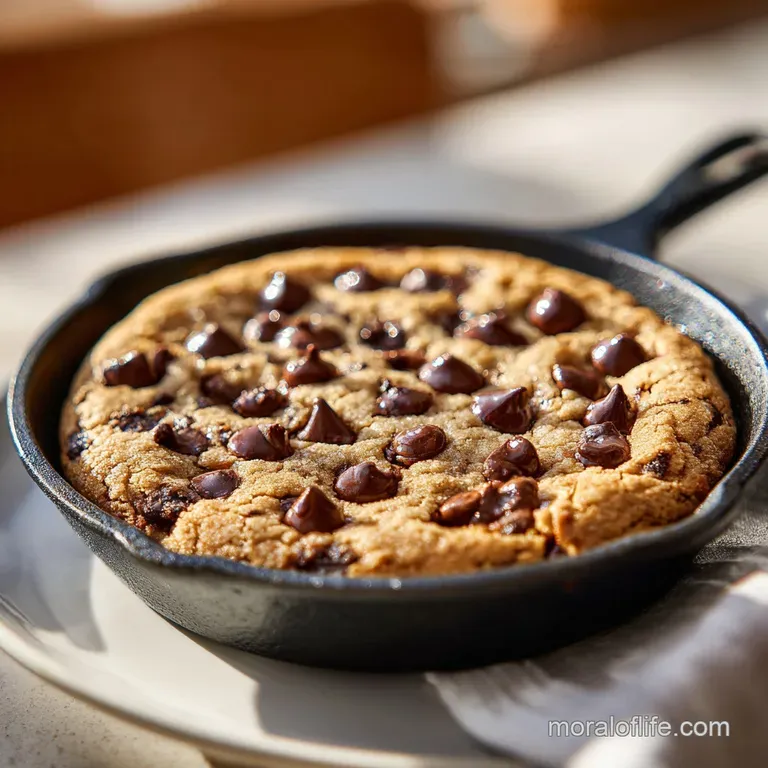
- Flavor/Texture Hook: Fudgy, melt in-your mouth center with a shatter crisp perimeter
- Perfect for: Movie nights, casual dinner parties, or a quick sweet craving
- Mastering the Perfect Skillet Pan Cookie
- The Physics of Pan Heat
- Component Analysis for Better Baking
- Finding the Best Cookie Components
- Best Tools for Perfect Baking
- Visual Guide to the Process
- Troubleshooting Your Skillet Cookie Issues
- Adjusting for Different Dietary Needs
- Storing and Reheating Your Cookie
- Creative Ways to Serve Dessert
- Debunking Common Baking Beliefs
- Recipe FAQs
- 📝 Recipe Card
Mastering the Perfect Skillet Pan Cookie
There is a specific sound that happens when you set a heavy cast iron pan on a wooden table. It’s a solid, satisfying thud that usually means something incredible is about to happen. The first time I tried making a skillet pan cookie, it wasn’t actually a choice.
I had a batch of dough ready, but I’d realized my baking sheets were all occupied by roasted veggies for dinner. Out of sheer laziness, I pressed the whole mass of dough into my 10 inch skillet.
The aroma that filled my kitchen was unlike any standard cookie bake. Because the cast iron holds onto heat so intensely, the butter in the dough began to brown further against the metal, smelling like toasted hazelnuts and caramel.
When I finally pulled it out, the edges were almost like toffee, while the middle stayed so soft you could eat it with a spoon. It was a revelation. We didn't even wait for plates; we just grabbed a few spoons and dug in right there.
Since that night, I’ve refined this method to make sure it’s a success every single time. It’s not just about throwing dough in a pan, it’s about understanding how that metal interacts with the sugar and fat.
You're going to love how the chocolate chunks turn into velvety pools that stay melted much longer than they would in a standard cookie. Let's get into what makes this work so well.
The Physics of Pan Heat
Residual Thermal Mass: Cast iron retains heat longer than aluminum, which continues to bake the bottom of the cookie even after it's out of the oven. This creates a deeply caramelized, sturdy crust that holds up to heavy toppings.
Conduction Efficiency: The direct contact between the dough and the heavy pan creates a "shatter" texture on the edges that you simply cannot replicate on a flat baking sheet.
| Method | Time | Texture | Best For |
|---|---|---|---|
| Traditional Oven | 20 minutes | Fudgy center, crispy rim | Classic "Pizookie" style |
| Stovetop Only | 25 minutes | Soft throughout, pale top | No oven situations |
| Toaster Oven | 18 minutes | Extra crispy top | Small batches / Quick fix |
This comparison shows that while you have options, the oven method is the gold standard for that dual texture we're chasing. The stovetop method works in a pinch, but you'll miss that golden brown top. If you're looking for other easy bakes, you might also enjoy my Greek Yogurt Cookie recipe for a different kind of texture.
Component Analysis for Better Baking
| Ingredient | Science Role | Pro Secret |
|---|---|---|
| Dark Brown Sugar | Humectant (retains moisture) | Pack it tight to ensure the molasses content keeps the center fudgy. |
| Baking Soda | Leavening & Browning | It reacts with the acidic brown sugar to create lift and a rich, golden color. |
| Unsalted Butter | Fat & Flavor | Melting it first creates a denser, more brownie like interior compared to creaming. |
Finding the Best Cookie Components
To get that specific "bakery" taste, we use a mix of sugars and plenty of vanilla. I always reach for semi sweet chocolate chunks rather than chips because they melt into wider, more luxurious pools.
- 1/2 cup (113g) unsalted butter: Why this? Provides the fat base for a tender, melt in-your mouth crumb. (Substitute: Salted butter, but omit the extra sea salt.)
- 1/2 cup (100g) dark brown sugar, packed: Why this? High molasses content creates a chewy, fudgy texture. (Substitute: Light brown sugar for a milder flavor.)
- 1/3 cup (65g) granulated sugar: Why this? Helps create those crispy, shattered edges we love. (Substitute: Raw cane sugar for a slight crunch.)
- 1 large egg: Why this? Binds the dough and provides structure to the rise. (Substitute: Flax egg, though the rise will be much flatter.)
- 1 tbsp vanilla extract: Why this? Essential for that nostalgic, aromatic cookie scent. (Substitute: Vanilla bean paste for those tiny black specks.)
- 1 cup plus 2 tbsp (150g) all purpose flour: Why this? Provides enough protein for structure without being tough. (Substitute: 1:1 gluten-free baking flour.)
- 1/2 tsp baking soda: Why this? Reacts with heat and acid to make the cookie light. (Substitute: 1.5 tsp baking powder, but it will be cakier.)
- 1/2 tsp fine sea salt: Why this? Balances the intense sweetness of the sugars. (Substitute: Table salt, but use slightly less.)
- 1 cup (170g) semi sweet chocolate chunks: Why this? Chunks create larger, more satisfying chocolate "veins." (Substitute: Milk chocolate for a sweeter profile.)
- 1 pinch flaky sea salt (Maldon): Why this? Adds a sophisticated crunch and pops against the chocolate. (Substitute: Regular sea salt flakes.)
Best Tools for Perfect Baking
The most important piece of gear here is a 10 inch cast iron skillet. If you use a larger pan, the cookie will be very thin and likely overcook. If you use a smaller one, the center might stay raw while the edges burn.
If you don't have cast iron, a heavy oven safe stainless steel frying pan will work, but you'll lose some of that deep crust development.
I also recommend a sturdy whisk and a silicone spatula. Since we are melting the butter directly in the pan (or in a bowl), you don't even need a stand mixer. This is what I call "one bowl ish" baking, which is my favorite kind on a busy weeknight. If you’re feeling like a peanut butter vibe instead, check out my Chewy Peanut Butter recipe which follows a similar easy mix philosophy.
Visual Guide to the Process
- Preheat your oven to 350°F (180°C). Note: A fully preheated oven is crucial for the immediate expansion of the baking soda.
- Melt the butter in your 10 inch skillet over low heat until completely liquid and just starting to bubble.
- Whisk in the sugars. Remove the pan from the heat and stir in the dark brown sugar and granulated sugar until the mixture looks like wet sand.
- Cool the base. Let the butter and sugar mixture sit for 5 minutes until it's warm but not hot to the touch. Note: This prevents the egg from scrambling when you add it.
- Add the wet ingredients. Beat in the egg and vanilla extract vigorously until the batter looks glossy and smooth.
- Fold in the dry ingredients. Add the flour, baking soda, and fine sea salt, stirring until just a few streaks of flour remain.
- Incorporate the chocolate. Fold in the chocolate chunks until evenly distributed throughout the dough.
- Smooth the surface. Use your spatula to press the dough into an even layer until it reaches the edges of the skillet.
- Bake the cookie. Place the skillet in the oven for 18-20 minutes until the edges are deep golden brown and the center is slightly jiggly.
- Final touch. Remove from the oven and sprinkle with flaky sea salt until the salt crystals stick to the melting chocolate.
Troubleshooting Your Skillet Cookie Issues
The Center Stays Completely Raw
If your cookie is browned on top but pure liquid in the middle, your oven temperature might be too high, or you used a pan that was too small. Cast iron holds a lot of heat, so even after you take it out, it will keep cooking. However, it needs that initial structural set.
The Edges Are Burnt and Bitter
This usually happens if you over greased the pan or used a very thin metal skillet. Cast iron distributes heat evenly, but if the pan was already screaming hot when you added the dough, the edges will get a head start that they don't need.
| Problem | Root Cause | Solution |
|---|---|---|
| Greasy Surface | Butter was too hot when sugars were added | Let melted butter cool for 5 minutes before mixing. |
| Dry / Crumbly | Overbaked or too much flour | Pull from oven while center still jiggles slightly. |
| No Rise | Expired baking soda | Check soda by dropping a pinch in vinegar; it should fizz. |
One mistake I once made was trying to use cold butter and creaming it in a cold skillet. Honestly, don't even bother with that. The whole magic of the skillet pan cookie is the melted butter method. It creates that dense, fudgy bite that sets it apart from a standard cookie.
Common Mistakes Checklist
- ✓ Ensure the egg is at room temperature so it doesn't seize the melted butter.
- ✓ Don't overmix after adding flour stop as soon as the white streaks disappear.
- ✓ Use a kitchen scale for the flour (150g) to avoid a dry, bready cookie.
- ✓ Let the cookie rest in the pan for at least 10 minutes before slicing to allow the structure to set.
Adjusting for Different Dietary Needs
If you want to scale this down for a small skillet cookie recipe, you can use a 6 inch skillet. You'll need to cut the ingredients in half, but since you can't easily use half an egg, whisk one egg in a cup and use about 2 tablespoons of it.
Reduce the baking time to about 12-15 minutes.
For those looking for gluten-free enthusiasts, a high-quality 1:1 gluten-free flour blend works remarkably well here. Because the skillet supports the dough, you don't have to worry about the cookie spreading too much, which is a common issue with gluten-free baking. If you are interested in doughs that handle differently, my Empanada Dough Recipe is a great study in gluten development versus this tender cookie.
Up scaling this for a massive party is possible if you have a 12 inch or 14 inch skillet. For a 12 inch pan, increase the ingredients by 1.5x. For a 14 inch pan, you can double the recipe.
Keep in mind that the thicker the cookie, the lower you should set your oven temperature (try 325°F) to ensure the middle cooks without burning the bottom.
Storing and Reheating Your Cookie
- Fridge: Keep leftovers in an airtight container for up to 4 days. The texture will become firmer, almost like a fudge bar.
- Freezer: You can freeze slices for up to 3 months. Wrap them tightly in plastic wrap and then foil to prevent freezer burn.
- Reheating: To get that fresh out-of the-oven sizzle, put a slice in the microwave for 15 seconds or in a toaster oven at 300°F for 5 minutes.
- Zero Waste Tip: If you have crumbs or broken pieces, don't toss them! Grind them up and use them as a "crust" for a cheesecake or sprinkle them over vanilla bean ice cream.
Creative Ways to Serve Dessert
Serving this "Pizookie" style is the classic move. Bring the skillet directly to the table (on a very thick trivet!) and top it with three large scoops of cold vanilla bean ice cream. The contrast of the freezing ice cream melting into the warm, velvety chocolate is incredible.
For a more sophisticated finish, you can drizzle a bit of salted caramel over the top or even a tablespoon of bourbon infused maple syrup. If you want to go all out for an occasion, serve it alongside a tray of toppings like crushed pretzels, toasted pecans, and extra chocolate shavings so people can customize their own slice.
It's a crowd pleasing way to end a meal without you having to spend all night in the kitchen.
Debunking Common Baking Beliefs
The pan doesn't need to be greased. Because this recipe uses a full half cup of butter, the dough is essentially self greasing. As long as your cast iron is well seasoned, the cookie will lift right out.
Melted butter makes "bad" cookies. Many people think you must cream room temperature butter for a good cookie. While that adds air for a light, fluffy cookie, melting the butter is what gives us the dense, chewy, and fudgy texture that makes a skillet cookie feel like a premium treat.
You must chill the dough. For individual cookies, chilling prevents spreading. In a skillet, the sides of the pan prevent spreading for us! You can go from craving to eating in 30 minutes flat without any fridge time.

Recipe FAQs
Can you cook cookies in a skillet?
Yes, absolutely. Skillet cookies utilize the high, retained heat of cast iron to achieve deeply caramelized edges and a supremely gooey center.
What is the difference between a skillet cookie and a regular cookie?
The texture contrast is the main distinction. A skillet cookie bakes slower on the bottom due to residual heat, resulting in a thick, almost brownie like interior contrasted against a very crisp, toffee like edge, which is harder to achieve on a flat sheet.
How to know when a skillet cookie is done?
Pull it when the edges are deeply golden brown and the center is still visibly soft and slightly jiggly. The residual heat in the pan will continue cooking the middle for about 10 minutes after removing it from the oven.
What makes a skillet cookie unique?
The melted butter method and the thermal mass of the pan. Melting the butter first creates a denser, fudgier crumb, and the cast iron ensures the bottom caramelizes beautifully, unlike standard cookies made with creamed butter.
Can I use a non-cast iron pan for this recipe?
Yes, but results will vary. A heavy oven safe stainless steel pan will work, but you will lose some of the deep caramelization and shatter crisp edges inherent to cast iron cooking.
Is it true that the dough must be chilled before baking a skillet cookie?
No, chilling is usually unnecessary for this specific format. Since the pan sides prevent lateral spreading, you can press the dough directly into the pan and bake it immediately, speeding up the process significantly.
How do I ensure the chocolate chunks melt into luxurious pools?
Use chunks instead of chips and incorporate them right before baking. Chunks melt slower than chips, allowing the dough structure to set around them, creating those beautiful, deep pockets of melted chocolate.
Skillet Pan Cookie Recipe

Ingredients:
Instructions:
Nutrition Facts:
| Calories | 363 kcal |
|---|---|
| Protein | 3.8 g |
| Fat | 18.4 g |
| Carbs | 47.4 g |
| Fiber | 2.0 g |
| Sugar | 31.9 g |
| Sodium | 238 mg |
