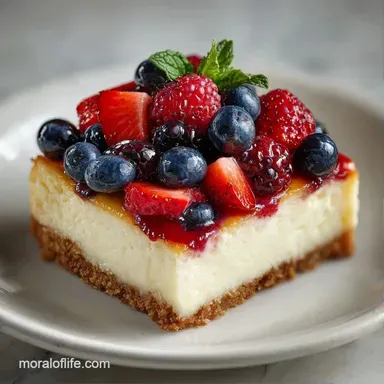
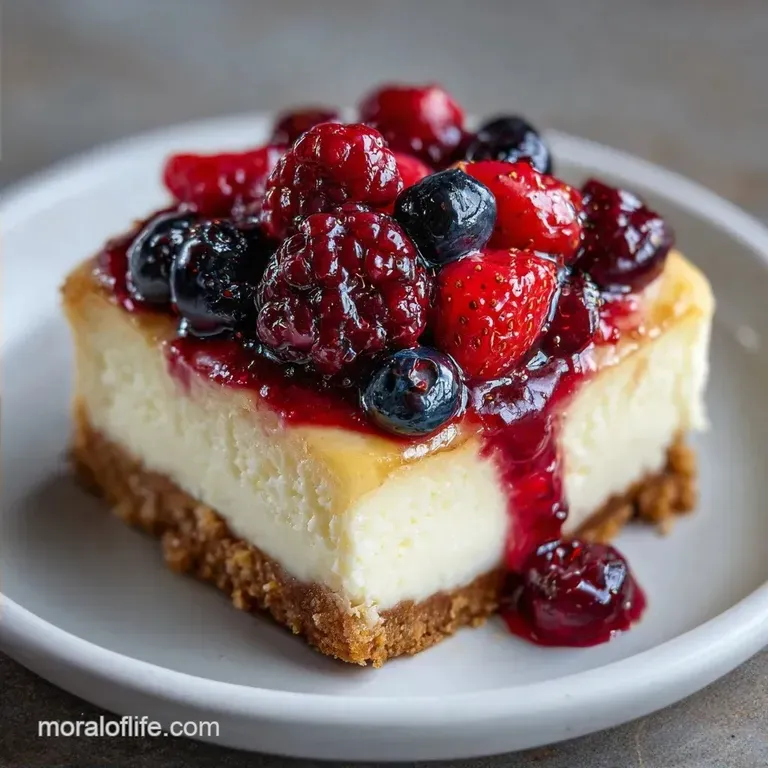
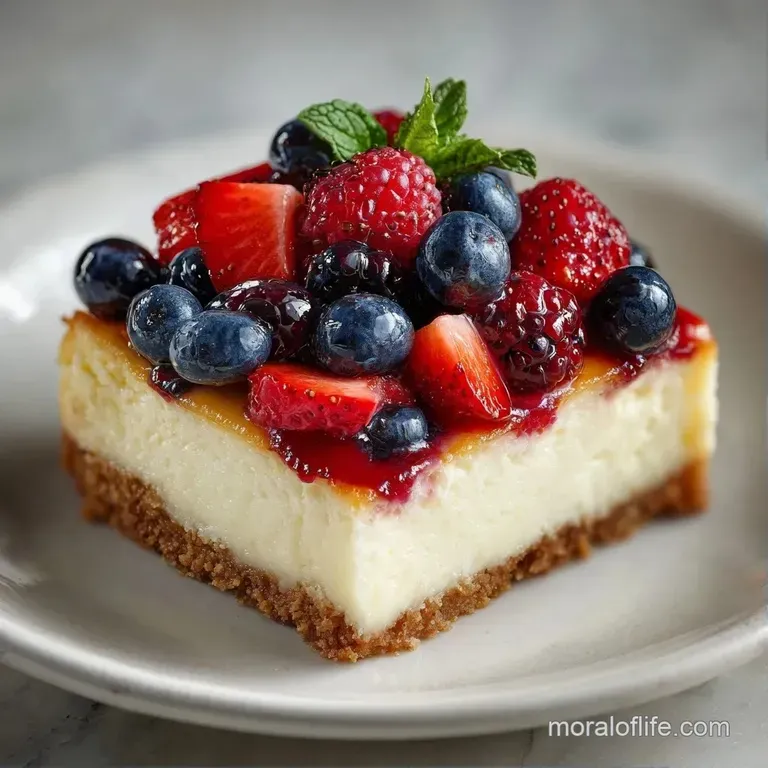
Quick No Bake Dessert: Lemon Berry Cheesecake Bars
- Time:20 minutes active + 4 hours 25 mins chilling
- Flavor/Texture Hook: Tangy lemon cream with a shatter crisp crust and jammy berries
- Perfect for: Summer potlucks, baby showers, or an easy weekend treat
- Making a Quick No Bake Dessert
- How the Filling Sets
- Component Analysis
- Gathering Your Essentials
- Tools for Easy Mixing
- Step by Step Assembly
- Fixing Common Texture Issues
- Fun Flavor Twist Ideas
- Adjusting the Batch Size
- Debunking Dessert Myths
- Storing Your Sweet Treats
- Plating for the Wow
- Recipe FAQs
- 📝 Recipe Card
Making a Quick No Bake Dessert
That sharp, bright scent of fresh lemon zest hitting a bowl of cold cream is enough to wake up any kitchen. I remember one July afternoon where the humidity was so heavy it felt like walking through soup.
The last thing I wanted was to turn on the oven and turn my house into a sauna, but I had a craving for something creamy and tart. I grabbed a block of cream cheese and realized that if I just balanced the fats and the air, I could skip the bake entirely.
The secret is all in the cream cheese. I used to try using low-fat versions to "feel healthier," but trust me on this, don't even bother. low-fat cheese has too much water and not enough stability, which leaves you with a filling that feels more like a thick sauce than a cheesecake.
Full fat is the hero here, providing that rich, dense mouthfeel that holds up against the acidity of the lemon.
This Quick No Bake Dessert is designed for people who want a crowd pleasing result without the stress of a water bath or a cracked top. It's a simple mixing process that yields a velvety finish.
Once it sets in the fridge, you get these clean, sharp slices that look like they came from a professional bakery, but they actually just spent a few hours chilling while you relaxed.
How the Filling Sets
Since we aren't using heat to set the proteins in the cheese, we rely on fat and air to do the heavy lifting.
- Fat Stabilization: Full fat cream cheese creates a structural network when chilled, which keeps the bars from collapsing.
- Air Integration: Whipping the heavy cream introduces tiny air bubbles that make the filling velvety instead of dense.
- Cold Binding: The refrigeration process firms up the butter in the crust and the fats in the filling, locking everything into place.
- Acid Balance: The lemon juice interacts with the dairy proteins to create a slight thickening effect, which helps the stability. To get the right peak for your cream, you can check out Serious Eats' guide on whipping cream.
The difference between this and a traditional baked cheesecake is mainly about the "set." A baked version uses eggs and heat, while this Quick No Bake Dessert uses chilled fats.
| Feature | Fast No Bake | Classic Baked |
|---|---|---|
| Texture | Velvety & Airy | Dense & Custard like |
| Set Time | 4+ hours chilling | 1-2 hours cooling |
| Risk Factor | Very Low | High (Cracking/Sinking) |
Component Analysis
Before we get into the mix, it's helpful to understand why these specific ingredients are in the bowl.
| Ingredient | Science Role | Pro Secret |
|---|---|---|
| Full Fat Cream Cheese | Primary structural base | Must be truly softened to avoid lumps |
| Heavy Whipping Cream | Adds aeration and volume | Keep it ice cold for maximum lift |
| Graham Cracker Crumbs | Provides a crisp contrast | Press firmly to prevent a crumbly mess |
| Lemon Juice | Cuts through the fat richness | Use fresh juice for a brighter "pop" |
Right then, let's look at what you need to get this on the table.
Gathering Your Essentials
For the crust, you'll need: 1.5 cups (180g) graham cracker crumbs Why this? Provides the classic honey wheat flavor and structure 1/3 cup (75g) unsalted butter, melted Why this? Binds the crumbs into a solid base 2 tbsp (25g) granulated sugar
Why this? Adds a slight crunch and sweetness to the crust
For the velvety filling: 16 oz (450g) full fat cream cheese, softened Why this? The essential fat source for a stable set 1 cup (240ml) heavy whipping cream, chilled Why this? Creates the airy, mousse like texture 1/2 cup (100g) powdered sugar
Why this? Dissolves instantly for a smooth finish 1 tbsp (15ml) fresh lemon juice Why this? Provides the signature tang 1 tsp (5ml) lemon zest Why this? Concentrates the citrus aroma
For the berry topping: 1 cup (150g) fresh raspberries or blueberries Why this? Natural tartness to balance the sugar 1 tbsp (15ml) maple syrup Why this? Gives the glaze a glossy, rich look 1 tsp (5ml) lemon juice Why this? Keeps the
Berry color vibrant
If you're missing something, don't panic.
| Original Ingredient | Substitute | Why It Works |
|---|---|---|
| Graham Crumbs | Digestive Biscuits | Similar texture. Note: Slightly saltier, more "biscuity" flavor |
| Maple Syrup | Honey | Similar viscosity. Note: Adds a distinct floral honey note |
| Raspberries | Strawberries (diced) | Same acidity. Note: Requires a bit longer to simmer |
Tools for Easy Mixing
You don't need a professional kitchen for this, but a few specific tools make it way easier. A 9x9 inch baking pan is the standard here, and I highly recommend lining it with parchment paper. If you don't, you'll be fighting with the crust for ten minutes just to get a single slice out.
A hand mixer or a stand mixer such as KitchenAid is great for the cream cheese and the heavy cream. If you're doing it by hand, you'll need some serious arm strength to get those stiff peaks. Also, keep a chilled metal bowl handy for the cream - it helps the fat globules stay stable while you whip.
Step by step Assembly
Let's crack on with the actual making.
Constructing the Foundation
- Combine graham cracker crumbs, melted butter, and sugar in a bowl.
- Press the mixture firmly into the bottom of a parchment lined 9x9 inch pan using the bottom of a measuring cup until flat and compacted. Note: If it's too loose, the bars will fall apart when sliced.
- Place the pan in the freezer for 10 minutes to flash set.
Whipping the Filling
- Beat the softened cream cheese and powdered sugar in a large bowl until smooth and free of lumps.
- In a separate chilled bowl, whip the heavy cream until stiff peaks form. Note: Stop as soon as they hold their shape or you'll end up with butter.
- Gently fold the whipped cream, lemon juice, and lemon zest into the cream cheese mixture using a spatula until uniform and airy.
Layering and Setting
- Spread the cheesecake filling evenly over the chilled crust, smoothing the top with a spatula.
- Simmer berries, maple syrup, and lemon juice in a small saucepan for 5 minutes until the berries burst and the liquid thickens into a syrupy glaze.
- Allow the berry glaze to cool completely, then spoon it over the cheesecake layer.
- Refrigerate for at least 4 hours before slicing.
Chef's Tip: To get those "picture perfect" slices, dip your knife in hot water and wipe it dry between every single cut. This prevents the cream from smudging across the layers.
Fixing Common Texture Issues
Most mistakes with this Quick No Bake Dessert happen during the mixing or the setting phase.
Lumpy Filling Fix
If you see tiny white beads of cream cheese in your filling, it's usually because the cheese wasn't soft enough. You can't just "whip" them out once the cream is added. The best fix is to gently warm the cream cheese mixture for 10 seconds in the microwave before adding the whipped cream.
Runny Filling Fix
A runny filling usually means the heavy cream was over beaten (turning into butter) or the cream cheese was low-fat. If it's already in the pan, give it another 2 hours in the fridge. If it's still soft, you can pop it in the freezer for 30 minutes to firm it up before serving.
Soggy Crust Fix
Sogginess happens when the butter to crumb ratio is off or you didn't press the crust hard enough. To prevent this, always use the "measuring cup press" method and never skip the 10 minute freezer flash set.
| Problem | Root Cause | Solution |
|---|---|---|
| Filling won't set | Not enough chilling time | Refrigerate for a full 6 hours |
| Crust is crumbly | Not enough melted butter | Add 1 tbsp more butter next time |
| Glaze is too watery | Simmered for too short a time | Boil for 2 more mins until syrupy |
Common Mistakes Checklist:
- ✓ Using cold cream cheese (leads to lumps)
- ✓ Over mixing the whipped cream (leads to graininess)
- ✓ Pouring hot berry glaze over the filling (melts the cream)
- ✓ Slicing before the 4 hour mark (causes collapse)
Fun Flavor Twist Ideas
Once you've got the base down, you can play around. If you're into fruit forward treats, you'll love these Strawberry Cheesecake Cookies, which use a similar flavor profile.
- The Tropical
- Swap lemon for lime and use mango puree for the glaze.
- The Choco Berry
- Add 2 tbsp of cocoa powder to the crust and use dark chocolate shavings on top.
- The Peanut Butter
- Swirl in a bit of melted peanut butter into the cream cheese layer.
Decision Shortcut: If you want it tangier → add extra lemon zest. If you want a crunchier base → toast the crumbs in a pan for 3 mins first. If you want a richer topping → use a touch of honey instead of maple syrup.
Adjusting the Batch Size
If you're making this for a massive party, don't just quadruple the recipe in one bowl.
Scaling Up (2x-4x): Work in batches for the whipping process. If you overfill a mixer bowl, you won't get the same aeration, and your Quick No Bake Dessert will be dense. For the berry glaze, increase the simmer time by a few minutes, as more liquid takes longer to reduce.
Scaling Down (½): Use a loaf pan instead of a 9x9 pan to maintain the height. Since there's less mass, the chilling time can often be reduced to 3 hours, though 4 is still the safest bet for a clean slice.
Debunking Dessert Myths
You might hear that you need gelatin to make a no bake cheesecake "stable." That's a myth. While gelatin creates a jiggle free, firm texture, full fat cream cheese and properly whipped cream provide plenty of structure on their own for bars.
Gelatin can sometimes leave a slightly rubbery aftertaste if not bloomed correctly.
Another myth is that you can use any "cream" for the filling. You cannot use half and half or light cream. They don't have the fat content required to hold air bubbles, meaning your dessert will never set and will remain a soup.
Storing Your Sweet Treats
Store these bars in the fridge in an airtight container. They'll stay fresh and velvety for up to 5 days. For another buttery treat that lasts, check out my Scottish Shortbread recipe, which is great for gifting.
Freezing: You can freeze these for up to 2 months. Wrap them individually in plastic wrap and then place them in a freezer bag. Thaw them in the fridge overnight rather than on the counter to prevent condensation from making the crust soggy.
Zero Waste Tip: Don't throw away the lemon peels after zesting. Toss them into a jar of sugar for a few weeks to make lemon infused sugar, or freeze the peels to add to your morning tea.
Plating for the Wow
Since the colors are so vibrant - white cream and deep red berries - keep the plating simple. Use a square white plate to let the colors pop.
Top each slice with one fresh, whole raspberry and a tiny sprig of mint. The green against the red looks professional and fresh. If you're serving this at a party, leave the bars in the pan but slice them into 12 equal squares before bringing them to the table.
This keeps the edges sharp and prevents the bars from sliding around on a platter.
Recipe FAQs
What is a sweet and easy no-bake dessert for a crowd?
These Lemon Berry Cheesecake Bars. They are easy to assemble and serve 12 people without requiring any oven time.
What part of this dessert can be made in 5 minutes?
The berry glaze. Simmering the berries, maple syrup, and lemon juice takes exactly 5 minutes to burst the fruit and thicken the syrup.
Is this dessert a good choice for people with high triglycerides?
No, it is not recommended. The use of full fat cream cheese and butter makes this dessert high in saturated fats.
Can this be put together in 30 minutes?
Yes, the active prep and cooking take 25 minutes. However, the bars must refrigerate for at least 4 hours to set before slicing.
Why is this a recommended no-bake dessert for summer?
The fresh berries and lemon zest provide a bright, refreshing flavor profile. If you enjoyed layering these fresh flavors, see how the same principle works in our Mexican milk cake.
Is this similar to a summer berry icebox cake?
Yes, it is very similar. It utilizes the same chilled, layered technique to create a creamy, cake like texture without any baking.
How to keep the cheesecake filling from becoming lumpy?
Beat the softened cream cheese and powdered sugar until smooth. Ensuring this base is lump free before folding in the whipped cream is the key to a velvety texture.
Quick No Bake Dessert Bars